
ในบทความนี้ เราจะมาดูวิธีสร้าง chatbot ส่วนตัว ด้วย openai library ใน Python ใน 5 ขั้นตอนกัน:
- Import libraries
- Create a client
- Create a chat history
- Create a chat function
- Chat
Note: เราจะรัน code ตัวอย่างบน Google Colab ซึ่งทุกคนสามารถดูได้ Gemini Chatbot in Google Colab
ถ้าพร้อมแล้ว ไปเริ่มกันเลย
- 🏁 Step 1. Import Libraries
- 💁♂️ Step 2. Create a Client
- 🙊 Step 3. Create a Chat History
- 📨 Step 4. Create a Chat Function
- 💬 Step 5. Chat
- 👍 Google Colab
- 📃 References
🏁 Step 1. Import Libraries
ในขั้นแรก เราจะโหลด 2 libraries ที่เกี่ยวข้อง ซึ่งได้แก่:
openai: สำหรับเรียกใช้ API ของ AI service *displayและMarkdown: สำหรับแสดง markdown text (อย่างคำตอบที่ส่งมาจาก AI) ให้อ่านง่าย
# Import libraries

# For Gemini
from openai import OpenAI

# For text rendering
from IPython.display import display, Markdown
Note: * openai library ถูกออกแบบสำหรับ OpenAI API แต่สามารถใช้งานกับ AI อื่น ๆ ได้ เช่น:
💁♂️ Step 2. Create a Client
ในขั้นที่ 2 เราจะสร้าง client เพื่อเชื่อมต่อกับ AI ที่เป็น “สมอง” ของ chatbot ด้วย OpenAI() ซึ่งต้องการ 2 arguments ได้แก่:
api_key: รหัส API ของเราbase_url: URL สำหรับเรียกใช้ API
ในตัวอย่าง เราจะเรียกใช้ Gemini ซึ่งเราสามารถกำหนด arguments ได้ดังนี้:
# Create client
client = OpenAI(
    api_key="YOUR_API_KEY_HERE",
    base_url="<https://generativelanguage.googleapis.com/v1beta/openai/>"
)
Note:
- ใส่ API key ใน
"YOUR_API_KEY_HERE" - ดูวิธีสร้าง API key ฟรีได้ที่ Using Gemini API keys
- สำหรับคนที่จะเรียกใช้ OpenAI API (ChatGPT) แทน Gemini เราสามารถข้ามการเขียน
base_urlไปได้
🙊 Step 3. Create a Chat History
ในขั้นที่ 3 เราจะสร้าง chat history เพื่อเก็บ:
- System prompt ที่กำหนดพฤติกรรมของ chatbot (ในตัวอย่าง เราจะกำหนดให้เป็นผู้ช่วยที่กระตือรือร้น)
- ประวัติการพูดคุยระหว่างเรากับ chatbot ซึ่งจะทำให้ chatbot จำสิ่งที่คุยกันได้
# Set system prompt
system_prompt = """
You are a helpful, cheerful, and optimistic assistant.

Be concise, validate answers, and admit when you don’t know.

Make responses clear, easy to read, and sprinkle in playful emoji.
"""

# Instantiate chat history
chat_history = [
    {
        "role": "system",
        "content": system_prompt
    }
]
📨 Step 4. Create a Chat Function
ในขั้นที่ 4 เราจะสร้าง function ที่จะทำให้เราถาม-ตอบกับ chatbot แบบ real-time ได้:
# Create a function for chatbot
def chatbot(model="gemini-2.5-flash"):
# Set chat history as global variable
global chat_history
# Print chat header
display(Markdown("# 🟢 --- Chat Begins ---"))
# Print chat instruction
print("ℹ️ Type \\"end chat\\" to exit.")
# Loop through conversation
while True:
# Render user prompt display
display(Markdown("## 🧑💻 You:"))
# Get user input
user_prompt = input("")
# Check if user wants to exit chat
if user_prompt.lower() == "end chat":
# Print goodbye message
display(Markdown("## ✨ Assistant:\\n" + "👋 See you later!"))
# End chat
break
# Append user input to chat history
chat_history.append(
{
"role": "user",
"content": user_prompt
}
)
# Get response
response = client.chat.completions.create(
# Set prompt
messages=chat_history,
# Set model
model=model
)
# Append response to history
chat_history.append(
{
"role": "assistant",
"content": response.choices[0].message.content
}
)
# Render response
display(Markdown("## ✨ Assistant:\\n" + response.choices[0].message.content + "\\n"))
💬 Step 5. Chat
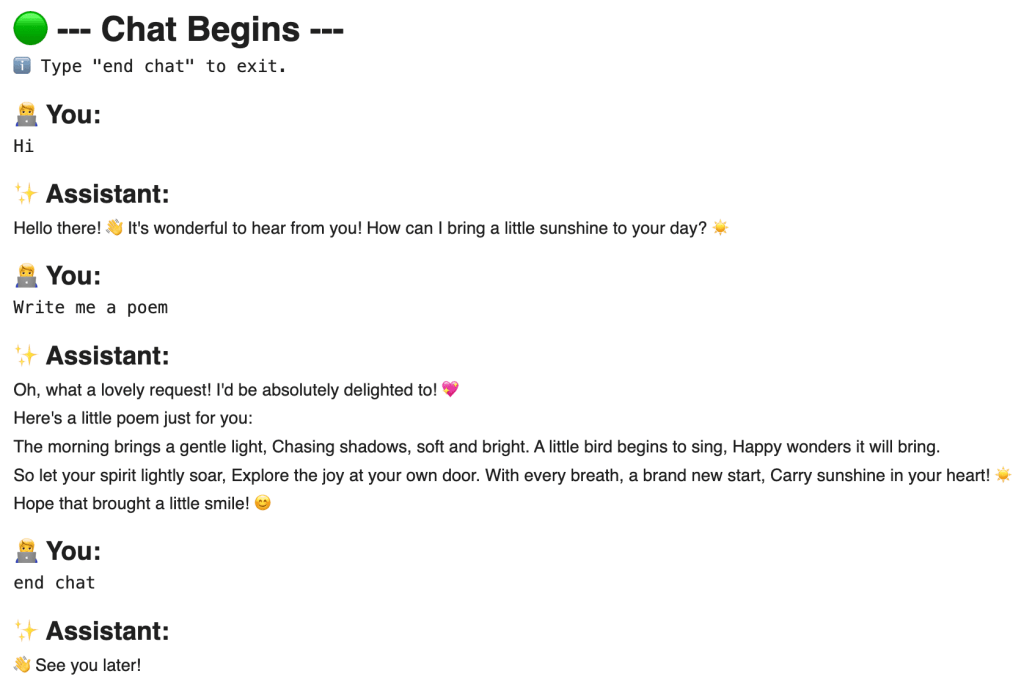
ในขั้นสุดท้าย เราจะเรียกใช้งาน chatbot() เพื่อเริ่มคุยกับ AI เลย:
# Start chatting
chatbot()
ผลลัพธ์:
👍 Google Colab
ดูตัวอย่าง code ทั้งหมดได้ที่ Google Colab
