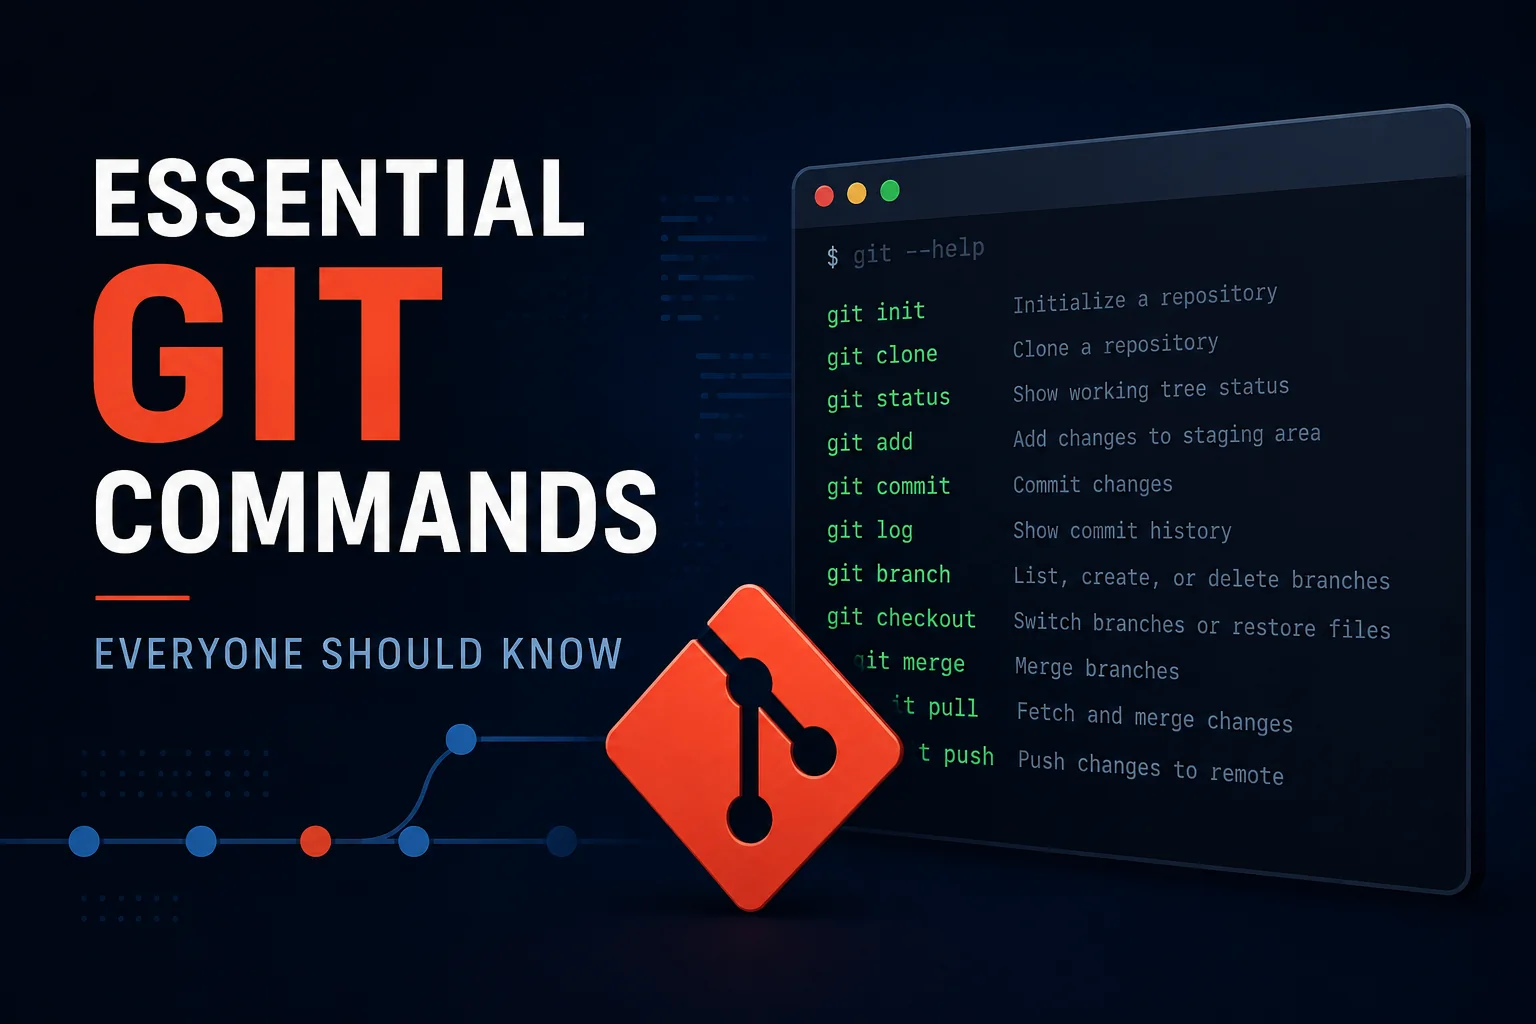
🤨 Git คืออะไร?
Git เป็นเครื่องมือจัดการเวอร์ชั่น (version control) ซึ่งใช้งานฟรี (open source)
Git ช่วยเก็บประวัติการเปลี่ยนแปลงของ code เอาไว้ โดย “ถ่ายภาพ” (snapshot) code ในช่วงเวลาต่าง ๆ
ประโยชน์ของ Git:
- ติดตามการเปลี่ยนแปลงของ code: เราสามารถดูประวัติการเปลี่ยนแปลงของ code ในโปรเจกต์ได้
- ย้อนเวอร์ชั่น (undo): เช่น ย้อน code กลับไปเป็นเวอร์ชั่นก่อนที่จะเกิดบัก (bug) ได้
- สื่อสารกับคนอื่น: ใช้ Git ในการสื่อสารกับคนที่เขียน code ร่วมกับเราว่า code มีการเปลี่ยนแปลงอะไรไปบ้าง
🧑💻 การทำงานของ Git
Git แบ่งพื้นที่ทำงานเป็น 3 ส่วน:
- Working directory: พื้นที่แก้ไขไฟล์
- Staging area: เตรียมไฟล์สำหรับบันทึก
- Repository (repo): บันทึกการเปลี่ยนแปลง
ถ้าเทียบกับการซื้อของ:
- Working directory = เลือกซื้อของ
- Staging area = หยิบของใส่ตะกร้า
- Repo = จ่ายเงินและใส่ถุงกลับบ้าน

🔤 คำศัพท์ที่ควรรู้เกี่ยวกับ Git
- Version control: การติดตามและการจัดการการเปลี่ยนแปลงของไฟล์
- Repo: ที่จัดเก็บและติดตามการเปลี่ยนแปลงไฟล์
- Commit: เวอร์ชั่นไฟล์ที่จัดเก็บอยู่ใน repo
- Branch: เส้นทางการทำงานกับไฟล์ ซึ่งช่วยให้เราทดสอบเปลี่ยนแปลงไฟล์ได้โดยไม่กระทบไฟล์หลัก

💻 คำสั่ง Git
คำสั่ง Git (Git command) เป็นคำสั่ง command line สำหรับทำงานกับ Git และแบ่งได้เป็น 5 กลุ่ม:
- เริ่มต้นใช้งาน (3 คำสั่ง)
- ติดตามการเปลี่ยนแปลง (5 คำสั่ง)
- ยกเลิกการเปลี่ยนแปลง (3 คำสั่ง)
- จัดการ branch (6 คำสั่ง)
- Remote repo (5 คำสั่ง)
สรุป 20+ คำสั่ง Git จาก 5 กลุ่ม:
ดาวน์โหลด cheat sheet คำสั่ง Git:
| คำสั่ง | คำอธิบาย |
|---|---|
git init | สร้าง Git repository ในโฟลเดอร์ทำงาน |
git config | ตั้งค่าการใช้งาน Git |
git status | เช็กสถานะของไฟล์และการเปลี่ยนแปลงใน Git |
git add | เพิ่มไฟล์หรือการเปลี่ยนแปลงไปยัง staging area |
git commit | บันทึกการเปลี่ยนแปลงใน staging area ไปยัง repo |
git diff | ดูความแตกต่างระหว่างไฟล์แต่ละเวอร์ชัน |
git stash | ซ่อนการเปลี่ยนแปลงที่ยังไม่ได้ commit |
git log | ดูประวัติการ commit |
git restore | ยกเลิกการเปลี่ยนแปลงใน working directory หรือ staging area |
git reset | ย้อนกลับไปยัง commit ก่อนหน้า โดยลบ commit หลังจากนั้นออกจากประวัติ |
git revert | ยกเลิกการเปลี่ยนแปลงของ commit โดยสร้าง commit ใหม่ |
git branch | สร้าง branch ใหม่ หรือดูรายชื่อ branch ที่มี |
git switch | ย้ายไปทำงานบน branch ที่ต้องการ |
git checkout | ย้าย branch หรือย้อนกลับไฟล์เป็นเวอร์ชันก่อนหน้า |
git cherry-pick | เลือก commit จาก branch หนึ่งไปใช้กับอีก branch หนึ่ง |
git merge | รวมการเปลี่ยนแปลงจาก branch หนึ่งเข้ากับอีก branch หนึ่ง |
git rebase | ย้ายเส้น commit ของ branch ไปต่อจากอีก branch หนึ่ง |
git clone | คัดลอก remote repo มาไว้บนเครื่องของเรา |
git fetch | ดาวน์โหลดการเปลี่ยนแปลงจาก remote repo โดยยังไม่รวมเข้ากับ branch ปัจจุบัน |
git pull | ดาวน์โหลดและรวมการเปลี่ยนแปลงจาก remote repo เข้ากับ branch ปัจจุบัน |
git push | อัปโหลด commit จาก local repo ไปยัง remote repo |
git remote | จัดการการเชื่อมต่อกับ remote repo |
ดาวน์โหลด Git Command Cheat Sheet:
1️⃣ กลุ่มที่ 1. เริ่มต้นใช้งาน (3 คำสั่ง)
.
👉 คำสั่งที่ 1. git init
git init สร้าง git repo เพื่อเริ่มติดตามการเปลี่ยนแปลงในโฟลเดอร์ที่ทำงานอยู่
ตัวอย่าง:
เมื่อสร้างโฟลเดอร์ใหม่แล้ว และต้องการใช้งาน Git:
git init
ผลลัพธ์:

.
👉 คำสั่งที่ 2. git config
git config ใช้ตั้งค่า Git เช่น:
- ตั้งชื่อและอีเมลผู้ใช้งาน
- เลือก text editor ที่ Git จะใช้งาน
- กำหนดตัวย่อสำหรับคำสั่ง Git
ตัวอย่าง:
ตั้งชื่อผู้ใช้งานแบบ global:
git config --global user.name "shivarong"
.
👉 คำสั่งที่ 3. git status
git status ใช้เช็กสถานะของ Git เช่น:
- ไฟล์ไหนที่ Git กำลังติดตามอยู่
- ไฟล์ไหนที่รอ commit อยู่
ตัวอย่าง:
git status
ผลลัพธ์:

2️⃣ กลุ่มที่ 2. ติดตามการเปลี่ยนแปลง (5 คำสั่ง)
.
👉 คำสั่งที่ 4. git add
git add ใช้งาน 2 อย่าง:
- บอก Git ให้ติดตามไฟล์ใน working directory
- เพิ่มการเปลี่ยนแปลงไปยัง staging area เพื่อรอ commit
ตัวอย่าง:
เราสร้างไฟล์ main.py ขึ้นมาพร้อม code ดังนี้:
print("Hello, World!")
จากนั้น บอก Git ให้ติดตามการเปลี่ยนแปลงของ main.py:
git add main.py
.
👉 คำสั่งที่ 5. git commit
git commit ใช้บันทึกการเปลี่ยนแปลงทั้งหมดใน staging area ไปยัง repo
ตัวอย่าง:
git commit
เคล็ดลับการใช้งาน:
ข้อ 1. ใช้ -m เพื่อเพิ่มโน้ตช่วยจำว่าเราแก้ไขอะไรไปบ้าง:
git commit -m "Add line: print hello world"
ข้อ 2. ใช้ -a แทน git add + git commit:
git commit -a
Note: คำสั่งนี้ใช้ได้กับไฟล์ที่เคยใช้ git add แล้วเท่านั้น
.
👉 คำสั่งที่ 6. git diff
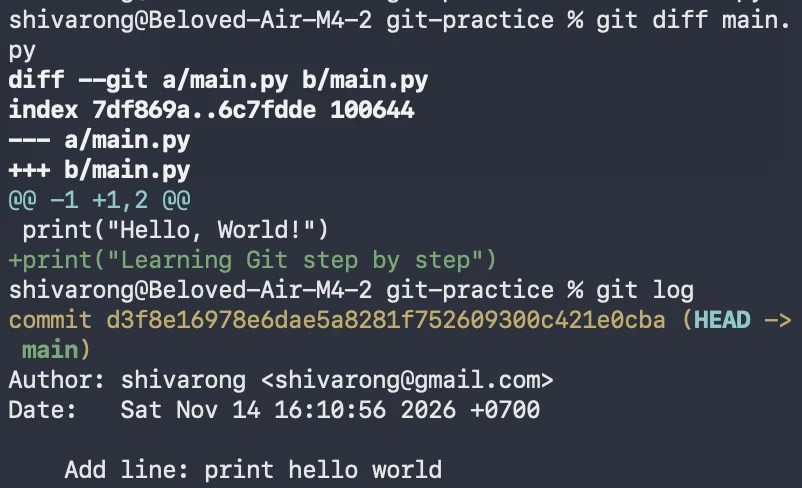
git diff มักใช้ก่อน git add เพื่อดูการเปลี่ยนแปลงที่เกิดขึ้น ก่อนจะบันทึกลงใน staging area
ตัวอย่าง:
เพิ่ม code บรรทัดที่ 2 ใน main.py จาก:
print("Hello, World!")
เป็น:
print("Hello, World!")print("Learning Git step by step")
จากนั้น ดูการเปลี่ยนแปลงของไฟล์:
git diff main.py
ผลลัพธ์:
.
👉 คำสั่งที่ 7. git stash
git stash ใช้ซ่อนการเปลี่ยนแปลงที่ยังไม่ได้ commit
ตัวอย่าง:
ตอนนี้ main.py มี code 2 บรรทัด:
print("Hello, World!")print("Learning Git step by step")
- บรรทัด 1: commit แล้ว
- บรรทัด 2: ยังไม่ได้ commit
ซ่อน code บรรทัด 2 ซึ่งยังไม่ได้ commit:
git stash
ผลลัพธ์:

เมื่อเปิดดู main.py จะเห็นว่าเหลือ code แค่บรรทัดเดียว:
print("Hello, World!")
ดูรายการสิ่งที่ซ่อนไว้ได้ด้วยคำสั่ง:
git stash list
และเอาสิ่งที่ซ่อนไว้กลับมาด้วยคำสั่ง:
git stash pop
ผลลัพธ์:

เมื่อเปิดดู main.py เราจะเห็น code 2 บรรทัดเหมือนเดิม:
print("Hello, World!")print("Learning Git step by step")
.
👉 คำสั่งที่ 8. git log
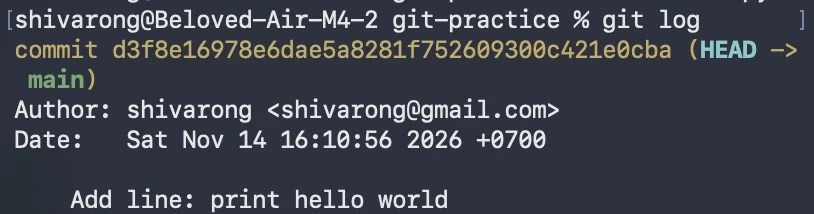
git log ใช้ดูประวัติ commit
ตัวอย่าง:
git log
ผลลัพธ์:
3️⃣ กลุ่มที่ 3. ยกเลิกการเปลี่ยนแปลง (3 คำสั่ง)
.
👉 คำสั่งที่ 9. git restore
git restore ใช้งานได้ 2 อย่าง:
- Undo การเปลี่ยนแปลงใน working directory
- Undo การเปลี่ยนแปลงใน staging area
ตัวอย่าง:
Undo code การเปลี่ยนแปลงบรรทัดที่ 2 ของ main.py:
git restore main.py
เมื่อเปิดดู main.py จะเห็นว่า code เหลือบรรทัดเดียว:
print("Hello, World!")
Note: การเปลี่ยนแปลงใน working directory ที่ถูก undo จะกู้คืนไม่ได้
กรณีที่ต้องการยกเลิกการเปลี่ยนแปลงใน staging area เราจะต้องใช้คำสั่งนี้แทน:
git restore --staged main.py
Note: การเปลี่ยนแปลงใน staging area ที่ถูก undo จะย้ายไปอยู่ใน working directory
.
👉 คำสั่งที่ 10. git reset
git reset ใช้ยกเลิก commit
ตัวอย่าง:
เรามีทั้งหมด 3 commits:
A → B → C ↑ Current
และพบว่า commit C มีปัญหา และอยากจะย้อนไป commit B:
git reset B
Git จะลบ commit C ออกจากประวัติ:
A → B ↑Current
.
👉 คำสั่งที่ 11. git revert
git revert ใช้งานเหมือนกับ git reset
แต่แทนที่จะลบ commit ที่ไม่ต้องการออก git revert จะเก็บ commit นั้นไว้ และสร้าง commit ที่ต้องการเพิ่มขึ้นมา
git revert เหมาะกับโปรเจกต์ที่ทำงานกันหลายคน เพราะการลบ commit ออกจากประวัติ อาจทำให้คนที่กำลังทำงานกับ commit ที่ถูกลบไป สับสนได้
ตัวอย่าง:
เราพบว่า commit C มีปัญหา:
A → B → C ↑ Current
และต้องการย้อนการเปลี่ยนแปลงที่เกิดขึ้นใน commit C:
git revert HEAD
Git จะสร้าง commit ใหม่ (D) ซึ่งไม่มีการเปลี่ยนแปลงของ commit C ขึ้นมา:
A → B → C → D ↑ Current
4️⃣ กลุ่มที่ 4. จัดการ Branch (6 คำสั่ง)
.
👉 คำสั่งที่ 12. git branch
git branch ใช้สร้าง branch ใหม่
ตัวอย่าง:
สร้าง branch เพื่อพัฒนา feature ใหม่:
git branch new-feature
ดูรายชื่อ branch ทั้งหมด:
git branch
ผลลัพธ์:

.
👉 คำสั่งที่ 13. git switch
git switch ใช้เปลี่ยน branch ที่กำลังทำงานอยู่
ตัวอย่าง:
ย้ายจาก branch หลัก (main) ไปที่ new-feature:
git switch new-feature
ผลลัพธ์:

.
👉 คำสั่งที่ 14. git checkout
git checkout เป็นคำสั่งเก่า (legacy) ซึ่งใช้งานได้ 2 แบบ:
- ย้าย branch (เหมือนกับ
git switch) - ย้อนไฟล์กลับเป็นเวอร์ชั่นก่อนหน้า (เหมือนกับ
git restore)
ตัวอย่าง:
ย้ายจาก new-feature กลับมาที่ main:
git checkout main
ผลลัพธ์:

.
👉 คำสั่งที่ 15. git cherry-pick
git cherry-pick เลือก commit จาก branch หนึ่งไปใช้กับอีก branch หนึ่ง
ตัวอย่าง:
เลือก commit D จาก main ไปใช้กับ new-feature:
A → B → C → D (main)X → Y → Z (new-feature)
ขั้นแรก เราต้องย้ายไปที่ new-feature:
git switch new-feature
แล้ววาง commit ที่เลือกลงไป:
git cherry-pick D
ผลลัพธ์:
A → B → C → D (main)X → Y → Z → D' (new-feature) ↑ Current
.
👉 คำสั่งที่ 16. git merge
git merge ใช้รวม branch เข้าด้วยกัน
ตัวอย่าง:
รวม new-feature เข้ากับ main:
A → B → C (main) \ D → E (new-feature)
ขั้นแรก เราจะต้องไปที่ main
git switch main
แล้วรวม branch เข้าด้วยกัน:
git merge new-feature
ผลลัพธ์:
A → B → C ───→ F (main) \ / D → E ──┘ (new-feature)
.
👉 คำสั่งที่ 17. git rebase
git rebase ใช้ย้ายเส้น commit ของ branch หนึ่งไปยังอีก branch หนึ่ง
ตัวอย่าง:
ย้ายเส้น commit ของ new-feature ไปต่อจาก main
A → B → C (main) \ D → E (new-feature)
ขั้นแรก เราต้องไปที่ new-feature:
git switch new-feature
แล้วเปลี่ยนเส้น commit:
git rebase main
ผลลัพธ์:
A → B → C (main) \ D' → E' (new-feature)
5️⃣ กลุ่มที่ 5. Remote Repo (5 คำสั่ง)
.
👉 คำสั่งที่ 18. git clone
git clone ใช้ดาวน์โหลด code จาก remote repo ลงบน local repo
ตัวอย่าง:
ดาวน์โหลด repo ที่ใช้เก็บ code สำหรับบทความ (code-for-articles)
เริ่มจากคัดลอก HTTPS ของ repo ที่ต้องการบน GitHub

ใช้ HTTPS ดังกล่าวกับ git clone:
git clone https://github.com/svarong-port/code-for-articles.git
.
👉 คำสั่งที่ 19. git fetch
git fetch ใช้ดาวน์โหลด code จาก remote repo ลงบน local repo โดย code ที่ดาวน์โหลดมาจะยังไม่ถูกรวมเข้ากับ branch ของ local repo
ตัวอย่าง:
ดาวน์โหลด code จาก origin ของ remote repo:
git fetch origin
.
👉 คำสั่งที่ 20. git pull
git pull ใช้ดาวน์โหลด code จาก remote repo ลงมาบน local repo โดย code ที่ดาวน์โหลดมาจะถูกรวมเข้ากับ code บน local repo
เคล็ดลับการจำ:
git pull=git fetch+git merge
ตัวอย่าง:
ดาวน์โหลด code จาก origin มาที่ main ของ local repo:
git pull origin main
.
👉 คำสั่งที่ 21. git push
git push ใช้อัปโหลด code จาก local repo ไปที่ remote repo
ตัวอย่าง:
อัปโหลด code จาก main ไปที่ origin ของ remote repo:
git push origin main
.
👉 คำสั่งที่ 22. git remote
git remote ใช้ตั้งค่าการเชื่อมต่อกับ remote repo เช่น:
- ดูรายชื่อ remote repo ที่เราเข้าถึง
- เพิ่ม/ลบ remote repo
- เปลี่ยนชื่อ remote repo
ตัวอย่าง:
ดูรายชื่อ remote repo ที่เราเข้าถึง:
git remote
🫵 หลังจบบทความนี้
หลังอ่านบทความนี้แล้ว มาลองใช้ Git กันนะครับ