# Set system prompt
system_prompt = """
You are a helpful, cheerful, and optimistic assistant.

Be concise, validate answers, and admit when you don’t know.

Make responses clear, easy to read, and sprinkle in playful emoji.
"""

# Instantiate chat history
chat_history = [
    {
        "role": "system",
        "content": system_prompt
    }
]
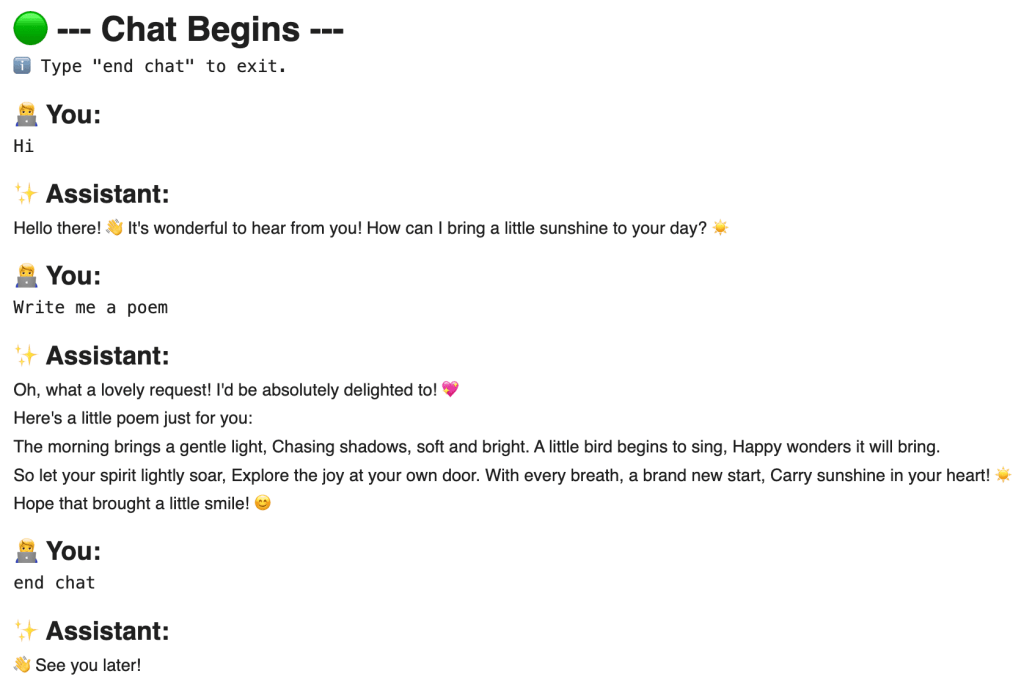
📨 Step 4. Create a Chat Function
ในขั้นที่ 4 เราจะสร้าง function ที่จะทำให้เราถาม-ตอบกับ chatbot แบบ real-time ได้:
# Create a function for chatbot
def chatbot(model="gemini-2.5-flash"):
# Set chat history as global variable
global chat_history
# Print chat header
display(Markdown("# 🟢 --- Chat Begins ---"))
# Print chat instruction
print("ℹ️ Type \\"end chat\\" to exit.")
# Loop through conversation
while True:
# Render user prompt display
display(Markdown("## 🧑💻 You:"))
# Get user input
user_prompt = input("")
# Check if user wants to exit chat
if user_prompt.lower() == "end chat":
# Print goodbye message
display(Markdown("## ✨ Assistant:\\n" + "👋 See you later!"))
# End chat
break
# Append user input to chat history
chat_history.append(
{
"role": "user",
"content": user_prompt
}
)
# Get response
response = client.chat.completions.create(
# Set prompt
messages=chat_history,
# Set model
model=model
)
# Append response to history
chat_history.append(
{
"role": "assistant",
"content": response.choices[0].message.content
}
)
# Render response
display(Markdown("## ✨ Assistant:\\n" + response.choices[0].message.content + "\\n"))
💬 Step 5. Chat
ในขั้นสุดท้าย เราจะเรียกใช้งาน chatbot() เพื่อเริ่มคุยกับ AI เลย:
# Load libraries

# Connect to Gemini
from openai import OpenAI

# Connect to Google Drive
from google.colab import drive

# Extract text from PDF
import PyPDF2

# Dedent text
import textwrap

# Render markdown text
from rich.console import Console
from rich.markdown import Markdown
# Set the job description (JD)
web_dev_jd = """
Senior Web Developer

We're looking for a Senior Web Developer with a strong background in front-end development and a passion for creating dynamic, intuitive web experiences. The ideal candidate will have extensive experience with the entire development lifecycle, from project conception to final deployment and quality assurance. This role requires a blend of technical skill, creative collaboration, and a commitment to solving complex programming challenges.

Responsibilities
* Cooperate with designers to create clean, responsive interfaces and intuitive user experiences.
* Develop and maintain project concepts, ensuring an optimal workflow throughout the development cycle.
* Work with a team to manage large, complex design projects for corporate clients.
* Complete detailed programming tasks for both front-end and back-end server code.
* Conduct quality assurance tests to discover errors and optimize usability for all projects.

Qualifications
* Bachelor's degree in Computer Information Systems or a related field.
* Proven experience in all stages of the development cycle for dynamic web projects.
* Expertise in programming languages including PHP OOP, HTML5, JavaScript, CSS, and MySQL.
* Familiarity with various PHP frameworks such as Zend, Codeigniter, and Symfony.
* A strong background in project management and customer relations.
"""
Note: ในกรณีที่ JD เป็นไฟล์ PDF เราสามารถใช้วิธีดึงข้อมูลแบบเดียวกันกับ resumes ได้
.
📄 (3) Resumes
Input สุดท้าย คือ resumes ที่เราต้องการวิเคราะห์
ในตัวอย่าง เราจะดึงข้อมูล resumes จากไฟล์ PDF ใน Google Drive ใน 3 ขั้นตอน ได้แก่:
ขั้นที่ 1. เชื่อมต่อ Google Drive ด้วย drive.mount():
# Connect to Google Drive
drive.mount("/content/drive")
Note: Google จะถามยืนยันการให้สิทธิ์เข้าถึงไฟล์ใน Drive ให้เรากดยืนยันเพื่อไปต่อ
ขั้นที่ 2. กำหนด file path ของไฟล์ PDF ใน Google Drive:
ขั้นที่ 3. ดึง text ออกจาก resumes ด้วย for loop และ PyPDF2:
# Extract resume texts

# Instantiate a collector
rs_texts = {}

# Loop through resume files to get text
for key in rs_file_paths:

    # Instantiate an empty string to store the extracted text
    rs_text = ""

    # Open the PDF file
    reader = PyPDF2.PdfReader(rs_file_paths[key])

    # Loop through the pages
    for i in range(len(reader.pages)):

        # Extract the text from the page
        text = reader.pages[i].extract_text()

        # Append the text to the string
        rs_text += text

    # Collect the extracted text
    rs_texts[key] = rs_text
Contact
+1 (970) 343  888 999
george.evans@gmail.com
<https://www.coolfreecv.com>
32 ELM STREET MADISON, SD
57042
 George  Evans
PHP / OOP
Zend Framework  Summary
Senior Web Developer specializing in front end development .
Experienced with all stages of the development cycle for dynamic
web projects. Well -versed in numerous programming languages
including HTML5, PHP OOP, JavaScript, CSS, MySQL. Strong
background in project management and customer relations.
Perceived as versatile, unconventional and committed, I am
looking for new and interesting programming challenges.
Experience
Web Developer - 09/201 8 to 05/20 22
Luna Web Design, New York
• Cooperate with designers to create clean interfaces and
simple, intuitive interactions and experiences.
• Develop project concepts and maintain optimal workflow.
• Work with senior developer to manage large, complex
design projects for corporate clients.
• Complete detailed programming and development tasks
for front end public and internal websites as well as
challenging back -end server code.
• Carry out quality assurance tests to discover errors and
optimize usability.
Education
Bachelor of Science: Computer Information Systems  - 2018
Columbia University, NY

Certifications
PHP Framework (certificate): Zend, Codeigniter, Symfony.
Programming Languages: JavaScript, HTML5, PHP OOP, CSS, SQL,
MySQL.
Reference
Adam Smith - Luna Web Design
adam.smith@luna.com  +1(970 )555 555  Skills
JavaScript   Symfony Framework
model: model ของ Gemini ที่เราจะเรียกใช้ (เช่น Gemini 2.5 Flash)
temp: ระดับความคิดสร้างสรรค์ของ model โดยมีค่าระหว่าง 0 และ 2 โดย 0 จะทำให้ model ให้คำตอบเหมือนกันทุกครั้ง และ 2 คำตอบจะแตกต่างกันทุกครั้ง
# Create a function to get a Gemini response
def get_gemini_response(prompts, model, temp):

    # Generate a response
    response = client.chat.completions.create(

        # Set the prompts
        messages=prompts,

        # Set the model
        model=model,

        # Set the temperature
        temperature=temp
    )

    # Return the response
    return response.choices[0].message.content
.
➕ (2) Function ใส่ Input ใน Prompt
ในขั้นที่ 2 เราจะสร้าง function เพื่อประกอบ input เข้ากับ prompt เพื่อพร้อมที่จะนำไปใช้ใน function ในขั้นที่ 1
ในตัวอย่างเราจะสร้าง function แบบนี้:
# Create a function to concatenate prompt + JD + resume
def concat_input(jd_text, rs_text):

    # Set the system prompt
    system_prompt = """
    # 1. Your Role
    You are an expert technical recruiter and resume analyst.
    """

    # Set the user prompt
    user_prompt = f"""
    # 2. Your Task
    Your task is to meticulously evaluate a candidate's resume against a specific job description (JD) and provide a detailed pre-screening report.

    Your analysis must be structured with the following sections and include specific, data-driven insights.

    ## 1. Strengths
    - Identify and elaborate on top three key strengths.
    - For each strength, briefly provide specific evidence from the resume (e.g., "The candidate's experience with Python and Django, as shown in their role at Acme Corp, directly addresses the JD's requirement for...") and explain how it directly fulfills a requirement in the JD.

    ## 2. Weaknesses
    - Identify top three areas where the candidate's experience or skills may not fully align with the JD's requirements.
    - For each point, briefly explain the potential concern and why it might be a risk for the role (e.g., "The JD requires experience with AWS, but the resume only mentions exposure to Azure. This could indicate a gap in cloud infrastructure expertise.").

    ## 3. Candidate Summary
    - Draft a concise summary of the candidate's professional background.
    - Emphasise their JD-relevant core responsibilities, key achievements, and career progression as evidenced in the resume.

    ## 4. Overall Fit Score
    - Provide a numerical score from 1 to 100, representing the overall alignment of the candidate's profile with the JD.
    - A higher score indicates a stronger match: 80-100 = best match; 60-80 = strong match; 0-40 = weak match.

    ## 5. Hiring Recommendation
    - Conclude with a clear, binary hiring recommendation: "🟢 Proceed to interview", "🟡 Add to waitlist", or "🔴 Do not proceed".
    - Justify this recommendation with a brief, objective explanation based on the analysis above.

    ---

    # 3. Your Output
    - Use a professional and objective tone.
    - Base your analysis solely on the provided resume and JD. Do not make assumptions.
    - Be concise and to the point; no more than 30 words per sentence; the hiring manager needs to quickly grasp the key findings.
    - Format your final report using markdown headings and bullet points for readability.

    Output template:
    '''
    # [candidate's name (Title Case)] ([fit score]/100)

    [recommendation]: [justification]

    ## Profile Summary:
    [summary]

    ## Strengths:
    - [strength 1]
    - [strength 2]
    - [strength 3]

    ## Weaknesses:
    - [weakness 1]
    - [weakness 2]
    - [weakness 3]
    '''

    ---

    # 4. Your Input
    **1. JD:**
    {jd_text}

    **2. Resume:**
    {rs_text}

    ---

    Generate the report.
    """

    # Collect prompts
    prompts = [
        {
            "role": "system",
            "content": textwrap.dedent(system_prompt)
        },
        {
            "role": "user",
            "content": textwrap.dedent(user_prompt)
        }
    ]

    # Return the prompts
    return prompts
Note: เราใช้ textwrap.dedent() เพื่อลบย่อหน้าที่เกิดจาก indent ใน function ออกจาก prompt เพื่อป้องกันความผิดพลาดในการประมวลผลของ AI และประหยัด input token
ใช้ for loop เพื่อส่ง resumes ให้กับ Gemini จนครบทุกใบ
# Instantiate a response collector
results = {}

# Loop through the resumes
for rs_name, rs_text in rs_texts.items():

    # Create the prompts
    prompts = concat_input(web_dev_jd, rs_text)

    # Get the Gemini response
    response = get_gemini_response(prompts=prompts, model="gemini-2.5-flash", temp=0.5)

    # Collect the response
    results[rs_name] = response
# Instantiate a console
console = Console()
# Instantiate a counter
i = 1
# Print the results
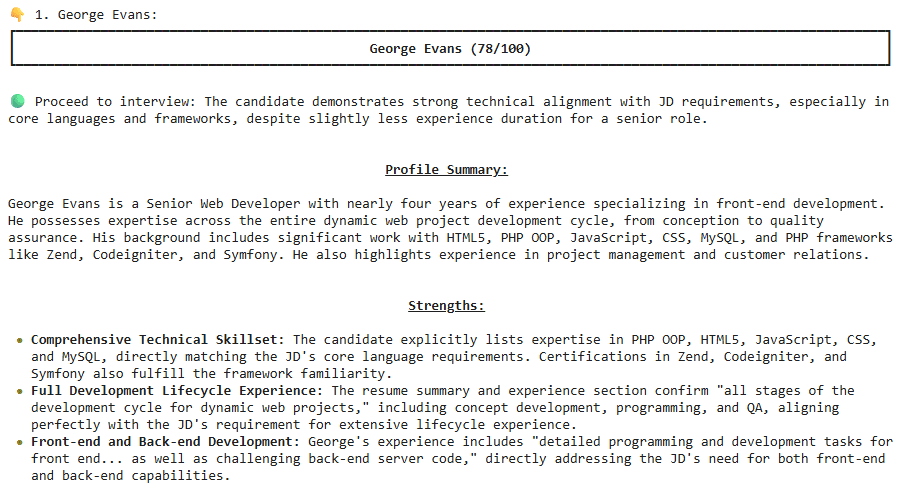
for rs_name, analysis_result in results.items():
# Print the resume name
print(f"👇 {i}. {rs_name}:")
# Print the response
console.print(Markdown(analysis_result))
# Add spacers and divider
print("\\n")
print("-----------------------------------------------------------")
print("\\n")
# Add a counter
i += 1
ตัวอย่างผลลัพธ์:
ในตัวอย่าง จะเห็นได้ว่า George Evans เหมาะที่จะเป็น Senior Web Developer
ในบทความนี้ เราจะมาดู 4 ขั้นตอนในการใช้งาน google-genai ซึ่งเป็น official library สำหรับทำงานกับ Gemini API ผ่านตัวอย่างการสร้างสูตรอาหารใน Google Colab กัน:
# Create a function to get Gemini response
def get_response(model, user_prompt, config):

    # Get response
    response = client.models.generate_content(

        # Set model
        model=model,

        # Set user prompt
        contents=user_prompt,

        # Set config
        config=config
    )

    # Return response
    return response.text
📬 Generate Response
ในขั้นที่ 4 เราจะ get response จาก Gemini โดยใช้ function ที่เราสร้างในขั้นที่ 3
เนื่องจาก function ต้องการ 3 arguments เราจะต้องกำหนด 3 สิ่งนี้ก่อนที่จะสร้าง response ได้:
Model
User prompt
Configuration
.
🤖 Set Model
ในตัวอย่างนี้ เราจะใช้ model เป็น Gemini 2.5 Flash ซึ่งเราสามารถกำหนดได้ดังนี้:
สำหรับ user prompt เราสามารถกำหนดเป็น string ได้แบบนี้:
# Set user prompt
gemini_user_prompt = """
Create a healthy Thai-inspired burger for one person.

Protein: chicken or tofu
Bun: whole-wheat if possible (or lettuce wrap)

Deliver (match field names exactly):
- `menu` (string)
- `ingredient` (list of items with name, description, amount, unit)
- `steps` (30-word strings)
- `calorie_kcal` (float, total for the dish)
"""
.
🛠️ Set Configuration
สำหรับ configuration เราสามารถตั้งค่า model ได้หลายค่า
ในตัวอย่างนี้ เราจะเลือกกำหนด 3 ค่า ได้แก่:
System prompt
Temperature
Output type and structure
ค่าที่ 1. System prompt คือ prompt ที่กำหนดพฤติกรรมของ Gemini ในการตอบสนองต่อ user prompt ของเรา
เราสามารถกำหนด system prompt เป็น string ได้แบบนี้:
# Set system prompt
system_prompt = """
You are a highly experienced home cook specialising in healthy Thai-style food.

Constraints:
- Single-serving
- Favour grilling/pan-searing over deep-frying
- Keep ingredients common in Thai kitchens
- Keep steps <=7
- Include an approximate total calories for the whole dish
- Keep language simple
- Return JSON only that matches the given schema exactly (no extra fields)
"""
หลังกำหนด system prompt, temperature, และ output type กับ structure แล้ว ให้เรารวมค่าทั้งหมดไว้ใน GenerateContentConfig() แบบนี้:
# Set configuration
gemini_config = GenerateContentConfig(

    # Set system prompt
    system_instruction=system_prompt,

    # Set temperature
    temperature=temp,

    # Set response type
    response_mime_type=output_type,

    # Set response structure
    response_schema=OutputStructure
)
หลังจากกำหนด arguments แล้ว เราจะเรียกใช้ function เพื่อ get response แบบนี้:
# Generate a recipe
recipe = get_response(

    # Set model
    model=gemini_model,

    # Set user prompt
    user_prompt=gemini_user_prompt,

    # Set configuration
    config=gemini_config
)
.
🖨️ Print Response
สุดท้าย เราจะดู response ด้วย print():
# Print response
print(recipe)
ผลลัพธ์:
{
  "menu": "Thai Chicken Burger",
  "ingredient": [
    {
      "name": "Ground Chicken",
      "description": "Lean ground chicken",
      "amount": 150.0,
      "unit": "g"
    },
    {
      "name": "Whole-wheat Burger Bun",
      "description": "Standard size",
      "amount": 1.0,
      "unit": "unit"
    },
    {
      "name": "Lime Juice",
      "description": "Freshly squeezed",
      "amount": 1.0,
      "unit": "tablespoon"
    },
    {
      "name": "Fish Sauce",
      "description": "Thai fish sauce",
      "amount": 1.0,
      "unit": "tablespoon"
    },
    {
      "name": "Fresh Ginger",
      "description": "Grated",
      "amount": 1.0,
      "unit": "teaspoon"
    },
    {
      "name": "Garlic",
      "description": "Minced",
      "amount": 1.0,
      "unit": "clove"
    },
    {
      "name": "Cilantro",
      "description": "Fresh, chopped",
      "amount": 2.0,
      "unit": "tablespoons"
    },
    {
      "name": "Green Onion",
      "description": "Chopped",
      "amount": 1.0,
      "unit": "tablespoon"
    },
    {
      "name": "Red Chilli",
      "description": "Finely minced (optional)",
      "amount": 0.5,
      "unit": "teaspoon"
    },
    {
      "name": "Lettuce Leaf",
      "description": "Fresh, crisp",
      "amount": 1.0,
      "unit": "large"
    },
    {
      "name": "Cucumber",
      "description": "Sliced thinly",
      "amount": 3.0,
      "unit": "slices"
    },
    {
      "name": "Cooking Oil",
      "description": "Any neutral oil",
      "amount": 1.0,
      "unit": "teaspoon"
    }
  ],
  "steps": [
    "Combine ground chicken with fish sauce, lime juice, grated ginger, minced garlic, chopped cilantro, and green onion in a bowl. Mix thoroughly.",
    "Form the seasoned chicken mixture into a single, uniform burger patty. If using chilli, incorporate it now.",
    "Heat cooking oil in a non-stick pan over medium heat. Cook the chicken patty for 5-7 minutes per side, or until it is thoroughly cooked through.",
    "While the patty cooks, lightly toast the whole-wheat burger bun in a dry pan or toaster until golden brown.",
    "Assemble your burger: Place the cooked chicken patty on the bottom half of the toasted bun. Top with fresh lettuce and cucumber slices.",
    "Complete the burger with the top bun. Serve immediately and enjoy your healthy Thai-inspired meal."
  ],
  "calorie_kcal": 450.0
}
เท่านี้ก็จบ flow การทำงานกับ Gemini API ด้วย google-genai library แล้ว