Category: AI

  • 30+ คำสั่งสำหรับทำงานกับ Claude Code—ไม่ว่ามือใหม่หรือมืออาชีพก็ใช้ได้

    30+ คำสั่งสำหรับทำงานกับ Claude Code—ไม่ว่ามือใหม่หรือมืออาชีพก็ใช้ได้

    Claude Code เป็น AI ช่วยเขียน code ที่สามารถอ่านและเขียน code ลงบนเครื่องได้โดยตรง ช่วยทุ่นแรงและประหยัดเวลาให้กับทั้ง developer และคนที่เขียน code ไม่เป็น

    Claude Code สามารถใช้งานได้ผ่าน Terminal และสั่งงานได้ผ่านทั้งภาษาธรรมชาติ (natural language) และคำสั่งแบบ command line

    ในบทความนี้ ผมจะพาทุกคนไปดู 30+ คำสั่งในการทำงานกับ Claude Code โดยบทความแบ่งออกเป็น 3 กลุ่มใหญ่:

    1. Basic: 12 คำสั่งเบื้องต้นสำหรับเริ่มใช้งาน Claude Code
    2. Intermediate: 12 คำสั่งสำหรับทำงานกับ Claude Code ได้เข้ามือมากขึ้น
    3. Advanced: 8 คำสั่งสำหรับให้ Claude Code ทำงานอัตโนมัติ

    ถ้าพร้อมแล้ว ไปเริ่มกันเลย


    1. 1️⃣ Part 1. Basic
      1. 🏁 Group 1. Getting Started
      2. 💻 Group 2. Execution
      3. 🧐 Group 3. Review
      4. 😣 Group 4. Getting Help
    2. 2️⃣ Part 2. Intermediate
      1. 🗣️ Group 1. Session Management
      2. 💭 Group 2. Context Management
      3. 🦾 Group 3. Customising Claude Code
      4. 🪙 Group 4. Usage Tracking
    3. 3️⃣ Part 3. Advanced
      1. Group 1. Multi-Tasking
      2. Group 2. Troubleshooting
    4. 💪 Summary
    5. 📃 References

    1️⃣ Part 1. Basic

    ใน part แรก ไปดู 12 คำสั่งสำหรับเริ่มใช้งาน Claude Code ซึ่งจัดได้เป็น 4 กลุ่มกัน:

    1. Getting started: เริ่มใช้งาน Claude Code
    2. Execution: เขียน code
    3. Review: ตรวจสอบงาน
    4. Getting help: ดูคู่มือการใช้งาน Claude Code
    Getting started
    Execution
    Review
    Getting help

    .

    🏁 Group 1. Getting Started

    กลุ่มแรกมี 5 คำสั่งสำหรับเริ่มทำงานกับ Claude Code:

    1. claude: เริ่ม session หรือห้องเพื่อคุยกับ Claude Code
    2. ! <command>: รัน shell command ระหว่างใช้ Claude Code (เช่น ! cd /new_folder)
    3. @<file>: ชี้ไฟล์ให้กับ Claude Code (เช่น @app.py เพื่อบอกให้ไปที่ไฟล์ app.py)
    4. /model: เลือก model สำหรับใช้งาน
    5. /exit: ออกจาก session

    .

    💻 Group 2. Execution

    กลุ่มที่ 2 มี 4 คำสั่งสำหรับเขียน code กับ Claude Code:

    1. /plan: เข้าโหมดวางแผน เพื่อให้ Claude Code ออกแบบก่อนเขียน
    2. /init: สั่งให้ Claude Code สร้าง CLAUDE.md ที่ใช้กำหนดบริบทและการเขียน code
    3. /memory: แก้ไข CLAUDE.md
    4. /btw: คุยกับ Claude Code ในระหว่างที่ Claude Code ยังเขียน code อยู่

    .

    🧐 Group 3. Review

    กลุ่มที่ 3 มี 2 คำสั่งสำหรับตรวจงาน:

    1. /diff: ดูการเปลี่ยนแปลง code แบบบรรทัดต่อบรรทัด
    2. /review: สั่งให้ Claude Code ตรวจ code ให้

    .

    😣 Group 4. Getting Help

    กลุ่มสุดท้ายมี 1 คำสั่งสำหรับดูคู่มือการใช้งาน:

    1. /help: ดูคำสั่งทั้งหมดที่ใช้ได้ใน Claude Code

    2️⃣ Part 2. Intermediate

    ใน part 2 ไปดู 12 คำสั่งที่ให้เราใช้ Claude Code ได้เข้ามือมากขึ้นกัน:

    1. Session management: จัดการ session
    2. Context management: จัดการ context
    3. Customising Claude Code: ตั้งค่า Claude Code ให้ตอบโจทย์
    4. Usage tracking: ติดตามการใช้งาน

    .

    🗣️ Group 1. Session Management

    Session เป็นเหมือนห้องคุยกับ Claude Code

    แต่ละ session มี context หรือความจำในการทำงานแยกจากกัน ทำให้การคุยแต่ละ session ไม่ผสมกัน

    เรามี 3 คำสั่งสำหรับจัดการ session ใน Claude Code:

    1. claude -c: กลับไปใช้งาน session ล่าสุด
    2. /resume: เลือก session ที่จะกลับไปใช้งานต่อ
    3. /rename: เปลี่ยนชื่อ session เพื่อให้หา session ได้ง่ายขึ้น

    .

    💭 Group 2. Context Management

    Context คือ ความจำในการทำงานของ Claude Code ซึ่งมีอยู่อย่างจำกัดในแต่ละ session

    Context จะถูกใช้ไปเรื่อย ๆ ตามคำสั่งของเราและการทำงานของ Claude Code และเมื่อ context เต็ม Claude Code จะลืมข้อมูลเก่า ๆ และทำงานผิดพลาดได้

    เช่น ตอนแรก เราสั่ง Claude Code สร้างเว็บไซต์สีขาวแดง พอ context เต็ม เว็บไซต์อาจจะมีสีอื่นแทรก เพราะ Claude Code ลืมคำสั่งเรื่องสีที่เราบอกไว้ตั้งแต่ต้น

    เรามี 3 คำสั่งสำหรับจัดการ context:

    1. /context: เปิดดู context ที่ถูกใช้ไปใน session ที่ใช้อยู่
    2. /compact: ย่อข้อมูลใน context ด้วยการสรุป เพื่อเพิ่มพื้นที่ใน context ในขณะที่ยังเก็บข้อมูลการทำงานให้กับ Claude Code อยู่
    3. /clear: ลบข้อมูลใน context ของ session นั้นออกทั้งหมด

    .

    🦾 Group 3. Customising Claude Code

    ในกลุ่มที่ 3 เรามี 4 คำสั่งสำหรับตั้งค่า Claude Code ให้ทำงานได้มีประสิทธิภาพมากขึ้น:

    1. /skills: ตั้งค่า skill ที่ Claude Code ใช้งานได้
    2. /mcp: ตั้งค่า MCP ที่ Claude Code ใช้งานได้
    3. /agents: ตั้งค่า subagent ที่ Claude Code ใช้งานได้
    4. /plugin: ตั้งค่า plugin ที่ Claude Code ใช้งานได้

    .

    🪙 Group 4. Usage Tracking

    ในกลุ่มสุดท้าย เรามี 2 คำสั่งสำหรับดูการใช้งาน Claude Code:

    1. /usage: ดูจำนวนข้อความคงเหลือที่ยังใช้ได้
    2. /cost: ดูจำนวนเงินที่ใช้ไป

    3️⃣ Part 3. Advanced

    ใน part สุดท้าย เราไปดู 8 คำสั่งสำหรับ:

    1. Multi-tasking: สั่งให้ Claude Code ทำงานเอง
    2. Troubleshooting: แก้ปัญหาการทำงานของ Claude Code

    .

    Group 1. Multi-Tasking

    ในกลุ่มนี้ เรามี 6 คำสั่งสำหรับให้ Claude Code ทำงานเอง:

    1. /goal: กำหนดเป้าหมายที่ต้องการ โดย Claude Code จะทำงานไปเรื่อย ๆ จนกว่าเป้าหมายนี้จะสำเร็จ
    2. /batch: สั่งให้ Claude Code แตกงานขนาดใหญ่ให้เป็นก้อนเล็ก ๆ และรันงานขนานกันไป เหมาะสำหรับการแก้ code หลายจุดพร้อมกัน
    3. /schedule: ตั้งเวลาที่จะให้ Claude Code ทำงานบางอย่าง (เช่น ทดสอบ code ทุก 10 โมงเช้า)
    4. /loop: สั่งให้ Claude Code ทำงานตามช่วงเวลาที่กำหนด (เช่น ทดสอบ code ทุก ๆ 1 ชั่วโมง)
    5. /background: ย้าย session ไปอยู่ใน background ซึ่งจะทำให้เราใช้ Terminal ได้ในขณะที่ Claude Code ยังทำงานอยู่
    6. /tasks: เปิดดูรายการ session ที่รันอยู่ใน background

    .

    Group 2. Troubleshooting

    ในกลุ่มสุดท้าย เรามี 2 คำสั่งสำหรับแก้ปัญหาเวลาทำงานกับ Claude Code:

    1. /doctor: ตรวจสอบการตั้งค่า Claude Code เวลามีปัญหา
    2. /debug: สั่งให้ Claude Code ค้นหาและอธิบายเหตุของปัญหา

    💪 Summary

    สรุป 30+ คำสั่งในการทำงานกับ Claude Code:

    1️⃣ Part 1. Basic

    • Group 1. Getting started
      • claude
      • ! <command>
      • @<file>
      • /model
      • /exit
    • Group 2. Execution
      • /plan
      • /init
      • /memory
      • /btw
    • Group 3. Review
      • /diff
      • /review
    • Group 4. Getting help
      • /help

    2️⃣ Part 2. Intermediate

    • Group 1. Session management
      • claude -c
      • /resume
      • /rename
    • Group 2. Context Management
      • /context
      • /compact
      • /clear
    • Group 3. Customising Claude
      • /skills
      • /mcp
      • /agents
      • /plugin
    • Group 4. Usage Tracking
      • /usage
      • /cost

    3️⃣ Part 3. Advanced

    • Group 1. Multi-tasking
      • /goal
      • /batch
      • /schedule
      • /loop
      • /background
      • /tasks
    • Group 2. Troubleshooting
      • /doctor
      • /debug

    📃 References

  • สรุป 25 บทเรียนจาก 5 เวทีที่น่าสนใจ ในงาน “How Do I Live? อยู่อย่างไร เมื่อ AI ล้อมไว้หมดแล้ว”: What to Build, Writing, Creativity, AI Can Free Up Time, & Philosophy

    สรุป 25 บทเรียนจาก 5 เวทีที่น่าสนใจ ในงาน “How Do I Live? อยู่อย่างไร เมื่อ AI ล้อมไว้หมดแล้ว”: What to Build, Writing, Creativity, AI Can Free Up Time, & Philosophy

    “How Do I Live? อยู่อย่างไร เมื่อ AI ล้อมไว้หมดแล้ว” เป็นงานที่รวม speaker มาตอบคำถามที่หลาย ๆ คนอาจจะสงสัย ว่าในยุคที่ AI ทำได้เกือบเหมือนมนุษย์ทุกอย่าง เราจะอยู่ยังไง

    ในบทความนี้ ผมจะมาสรุป 25 บทเรียนจาก 5 เวทีที่น่าสนใจในงาน ที่จะตอบคำถามนี้กัน

    โดยบทความแบ่งออกเป็น 5 ส่วน:

    1. What to build
    2. Writing
    3. Creativity
    4. AI can free up time
    5. Philosophy

    ถ้าพร้อมแล้ว ไปเริ่มกันเลย


    1. 🤨 Session 1. What to Build
      1. 🔶 Lesson 1. AI Can Build Anything. Doesn’t Mean Everything Should be Built
      2. 🔶 Lesson 2. TADA: Challenges to Building With AI
      3. 🔶 Lesson 3. KEY: What You Should Build With AI
      4. 🔶 Lesson 4. Focus on Wealth
      5. 🔶 Lesson 5. Takeaway on What to Build
    2. ✏️ Session 2. Writing
      1. 🔶 Lesson 6. Human Writing Can Still Win
      2. 🔶 Lesson 7. The Secret Formula
      3. 🔶 Lesson 8. P for Process
      4. 🔶 Lesson 9. V for Value
      5. 🔶 Lesson 10. E1 for Experiences
      6. 🔶 Lesson 11. E2 for Empathy
    3. 🎨 Session 3. Creativity
      1. 🔶 Lesson 12. Will AI Replace Human Creativity?
      2. 🔶 Lesson 13. Slow/Stop, Not Fast
      3. 🔶 Lesson 14. Question, Not Answer
      4. 🔶 Lesson 15. Quality, Not Quantity
      5. 🔶 Lesson 16. AI = Adaptability Intelligence
      6. 🔶 Lesson 17. Think Outside the Bot
    4. 🕦 Session 4. AI Can Free Up Time
      1. 🔶 Lesson 18. AI Can Free Up Time
      2. 🔶 Lesson 19. Paypers as Example
      3. 🔶 Lesson 20. Next Question After AI
    5. 🧘 Session 5. Philosophy
      1. 🔶 Lesson 21. Agency
      2. 🔶 Lesson 22. What to Choose
      3. 🔶 Lesson 23. What Feels Like Play
      4. 🔶 Lesson 24. Do What’s Right
      5. 🔶 Lesson 25. Become the Best Version of Yourself

    🤨 Session 1. What to Build

    จาก “ถ้าคุณสร้างอะไรก็ได้ คุณจะสร้างอะไร” โดย สิทธินันท์ พลวิสุทธิ์ศักดิ์ (แบงค์)

    .

    🔶 Lesson 1. AI Can Build Anything. Doesn’t Mean Everything Should be Built

    AI สร้างอะไรให้เราก็ได้

    แค่เรารู้ว่าต้อง prompt ยังไง เราก็จะได้สิ่งที่ต้องการภายในไม่กี่คลิก

    แต่เพียงเพราะเราสร้างได้ ไม่ได้หมายความว่า เราจะต้องสร้าง

    และไม่ได้หมายความว่า ทุกอย่างจะสร้างง่ายเหมือนเสกได้

    .

    🔶 Lesson 2. TADA: Challenges to Building With AI

    การสร้างด้วย AI มีความท้าทาย 4 ข้อ:

    ข้อ 1. T = Technical difficulties:

    • เราต้องมีความรู้ทางเทคนิค
    • ต้องรู้ว่าสิ่งที่ AI สร้างขึ้นเกิดขึ้นได้ยังไง
    • เช่น ให้ AI สร้างเว็บไซต์ เราต้องมีความรู้เกี่ยวกับ domain, server, hosting, etc.

    ข้อ 2. A = Acquisition channel:

    • สร้างได้ ≠ จะมีคนใช้
    • ถ้าเราไม่มีช่องทางเข้าถึง หรือของไม่ตอบโจทย์ สิ่งที่สร้างมาก็ไร้ความหมาย

    ข้อ 3. D = Domain expertise:

    • เราต้องมีความรู้ในสิ่งที่สร้าง
    • เช่น ถ้าเราจะสร้าง medical chatbot เราต้องมีความรู้ทางการแพทย์มากพอที่จะตรวจสอบ bot ของเราได้

    ข้อ 4. A = Authority:

    • เราต้องมีความน่าเชื่อถือมากพอ เพื่อให้สิ่งที่เราสร้างดูน่าเข้าหา

    .

    🔶 Lesson 3. KEY: What You Should Build With AI

    สิ่งที่เราควรสร้างกับ AI มีอยู่ 3 อย่าง:

    ข้อ 1. K = Knowledge:

    • ความรู้ที่จะช่วยให้เราก้าวไปข้างหน้าอยู่เสมอ

    ข้อ 2. E = Engine:

    • ใช้ AI ต่อยอดสิ่งที่เรามี

    ข้อ 3. Y = Why:

    • ใช้ AI ค้นหาคุณค่าของสิ่งที่ต้องสร้าง

    .

    🔶 Lesson 4. Focus on Wealth

    AI ควรช่วยสร้าง wealth ให้กับเรา ไม่ว่าจะเป็น:

    ข้อ 1. Time:

    • อิสระในการเลือกใช้เวลาด้วยตัวเอง

    ข้อ 2. Social:

    • ความสัมพันธ์ทางสังคมที่ดี

    ข้อ 3. Mental:

    • ความสงบในจิตใจและศักยภาพในการเติบโต

    ข้อ 4. Physical:

    • สุขภาพทางกายที่ดี

    ข้อ 5. Financial:

    • ความร่ำรวยทางการเงิน

    .

    🔶 Lesson 5. Takeaway on What to Build

    ข้อ 1. Process over result:

    • Focus ที่ขั้นตอนและกระบวนการมากกว่าผลลัพธ์ที่ได้

    ข้อ 2. Bite size:

    • หาโจทย์ที่ทำได้พอตัว ไม่ต้องเป็นโจทย์ที่เปลี่ยนโลก

    ✏️ Session 2. Writing

    จาก “เขียนให้ชนะ AI” โดย วีรยา ถาวรวัฒนยงค์ (ลุงพล)

    .

    🔶 Lesson 6. Human Writing Can Still Win

    ในยุคที่ AI สร้าง content ได้ง่ายและเร็ว และคนมี short attention span การเขียน long-form ยังสร้าง engagement และรายได้หลักล้านได้

    .

    🔶 Lesson 7. The Secret Formula

    สูตรสำเร็จในการเขียน คือ

    PVE^2

    .

    🔶 Lesson 8. P for Process

    เน้นที่ขั้นตอน/กระบวนการ ไม่ใช่ผลลัพธ์

    แม้ AI สร้างรูปได้สวยและหลากหลาย แต่ก็สู้เอกลักษณ์ของจิตรกรที่นั่งลงพู่กันในงานแต่งสด ๆ ไม่ได้

    .

    🔶 Lesson 9. V for Value

    คุณค่าที่ต้องการส่งต่อ

    อย่างในกรณีลุงพล คือ การส่งต่อสรุปเนื้อหาดี ๆ ถึงคนที่ไม่ได้เข้าร่วมงาน ให้เหมือนได้ไปอยู่ในงานด้วยตัวเอง

    .

    🔶 Lesson 10. E1 for Experiences

    งานเขียนขึ้นอยู่กับประสบการณ์ที่นักเขียนถ่ายทอดลงในงานเขียน

    ประสบการณ์ของมนุษย์เป็นสิ่งที่ AI ยัง copy ไม่ได้ และเป็นสิ่งที่สร้าง individuality ให้กับงานเขียนของเรา

    .

    🔶 Lesson 11. E2 for Empathy

    ตัวแปรสุดท้ายในสมการลับ คือ empathy

    ความสามารถที่จะทำให้คนอ่านเข้าใจสิ่งที่เราต้องการสื่อสาร ทั้งเนื้อหาและบรรยากาศงาน เหมือนกับเขาได้ไปนั่งอยู่ในงานกับเรา


    🎨 Session 3. Creativity

    จาก “AI Is the End of Human Creativity” โดย สิทธิพงศ์ ศิริมาศเกษม

    .

    🔶 Lesson 12. Will AI Replace Human Creativity?

    Creativity ของมนุษย์ยังคงมีที่ยืนในยุคที่ AI สร้างงานที่มนุษย์ใช้เวลาครึ่งวันทำได้ภายใน 3 นาที ด้วยเหตุผล 3 ข้อ:

    1. Slow/stop, not fast
    2. Question, not answer
    3. Quality, not quantity

    .

    🔶 Lesson 13. Slow/Stop, Not Fast

    Creativity ไม่ได้เกิดจากความเร็ว

    แต่เกิดจากการคิดให้ช้าหรือหยุดคิด

    ความคิดดี ๆ มักจะเกิดขึ้นตอนที่เราไม่ได้จดจ่อกับงาน แต่ออกไปเดินเล่นหรือทำกิจกรรมอื่น

    .

    🔶 Lesson 14. Question, Not Answer

    Creativity ไม่ได้เกิดจากคำตอบ

    แต่มาจากการตั้งคำถามที่ดี

    .

    🔶 Lesson 15. Quality, Not Quantity

    AI สามารถคิด option จำนวนมากให้เราได้ภายในเวลาอันสั้น

    แต่ creativity ไม่ได้เกิดจากจำนวนของ option

    แต่จากการคัดกรองไอเดียที่ใช่และเชื่อมโยงกัน

    .

    🔶 Lesson 16. AI = Adaptability Intelligence

    แม้ AI จะมาแทน human creativity ไม่ได้ แต่ AI ช่วยให้เราพัฒนาและปรับตัวเข้ากับยุคต่าง ๆ ได้

    ในมุมนี้ AI จะไม่ใช่ artificial intelligence แต่เป็น adaptability intelligence

    .

    🔶 Lesson 17. Think Outside the Bot

    ในยุคที่ AI คิดแทนเราได้ สิ่งที่จะทำให้เราแตกต่างออกไป คือ การคิดนอกบอท

    นั่นคือ การคิดด้วยตัวเอง และไม่พึ่งพา AI จนมากเกินไป


    🕦 Session 4. AI Can Free Up Time

    จาก “How AI Helps Startups: สร้างธุรกิจให้เร็วขึ้นด้วย AI” โดย อภิญญา สหัสสะรังษี (พลอย Paypers)

    .

    🔶 Lesson 18. AI Can Free Up Time

    เป็นครั้งแรกในประวัติศาสตร์มนุษย์ที่เทคโนโลยีเอางานไปจากเรา

    AI ช่วยลดงานและคืนเวลาในชีวิตให้กับเราได้

    .

    🔶 Lesson 19. Paypers as Example

    ตัวอย่างเช่น Paypers ที่ช่วยจัดเก็บและทำเอกสารบัญชี ช่วยลดงาน routine และปล่อยเวลา 30–60% ให้กับเจ้าของธุรกิจได้ทำงานที่มีคุณค่ามากกว่า เช่น:

    • หาไอเดียใหม่ ๆ
    • วางแผน วางระบบให้ธุรกิจเติบโต

    .

    🔶 Lesson 20. Next Question After AI

    คำถามที่ตามมาจากการที่ AI ปลดงานออกจากเรา คือ เราจะใช้เวลาที่ได้มาไปกับอะไร?


    🧘 Session 5. Philosophy

    จาก “One Person Business: ธุรกิจคนเดียวที่ไม่ทำคนเดียว” โดย อานันท์ ตรีฐิติพัฒน์, กษิดิศ สตางค์มงคล, และทีปกร วุฒิพิทยามงคล

    .

    🔶 Lesson 21. Agency

    Agency คือ ความสามารถในการเลือกทางเดินของตัวเอง

    คนเราเกิดมาพร้อมกับ agency ไม่ว่าจะกินจะนอนเวลาไหนก็ไม่มีใครสั่งเราได้

    แต่สังคมหล่อหลอมให้เรากลายเป็น version ที่มี agency น้อยลง

    .

    🔶 Lesson 22. What to Choose

    ถ้าจะต้องเลือกทางเดิน เราจะเลือกไปทางไหน?

    คำตอบมีอยู่ 3 อย่าง:

    1. What feels like play
    2. What’s right
    3. Better version of yourself

    .

    🔶 Lesson 23. What Feels Like Play

    เลือกทำในสิ่งที่เป็นเหมือนการเล่นสำหรับเรา แต่เป็นงานสำหรับคนอื่น

    เช่น งานออกแบบ UX ที่เรารู้สึกสนุก แต่คนอื่นมองว่าเป็นงาน UX design เป็นสิ่งที่เราควรเลือก เพราะเป็นสิ่งที่เราจะสร้างคุณค่าให้กับโลกได้อย่างยั่งยืน

    Find what feels like play to you, but looks like work to others. — Naval Ravikant

    .

    🔶 Lesson 24. Do What’s Right

    ทำในสิ่งที่ถูกต้อง เพราะสิ่งที่ไม่ดีกับส่วนรวมก็ไม่ดีกับปัจเจกบุคคล และสิ่งที่เราทำจะกลับมาหาเราเอง

    What brings no benefit to the hive brings none to the bee. — Marcus Aurelius

    .

    🔶 Lesson 25. Become the Best Version of Yourself

    ทำสิ่งที่จะทำให้เราเป็น version ที่ดีขึ้นของตัวเองในทุก ๆ วัน

    There is nothing noble in being superior to your fellow man; true nobility is being superior to your former self. — Ernest Hemingway

  • Basic Haystack: วิธีใช้ Haystack 2.0 เพื่อทำงานกับ LLM อย่างง่าย ใน 5 ขั้นตอน—ตัวอย่างการสร้าง AI ตอบคำถามเรื่อง Mental Model

    Basic Haystack: วิธีใช้ Haystack 2.0 เพื่อทำงานกับ LLM อย่างง่าย ใน 5 ขั้นตอน—ตัวอย่างการสร้าง AI ตอบคำถามเรื่อง Mental Model

    ในบทความก่อน ผมพาทุกคนไปรู้จักกับการใช้ LangChain ซึ่งเป็น package ยอดนิยมสำหรับสร้าง LLM (large language model) application อย่าง chatbot

    ในบทความนี้ ผมจะพาทุกคนไปรู้จักกับ Haystack 2.0 ซึ่งเป็นอีกหนึ่ง package ที่ทำงานได้เหมือนกับ LangChain

    แม้ว่า LangChain เป็นที่นิยมและใช้งานง่าย แต่ก็แลกมาด้วยข้อจำกัดใน “การมองเห็น” เพราะ LangChain ซ่อนการทำงานหลาย ๆ อย่างไว้หลัง code ไม่กี่บรรัดเพื่อให้เราใช้งานง่าย เมื่อเกิด bug ขึ้นมา เราจะไม่รู้เลยว่า error อยู่ที่จุดไหน จนกว่าเราจะแกะการทำงานเบื้องหลัง code ที่เราเขียนออกมา

    Haystack เป็น package ที่มี “การมองเห็น” ที่สูงกว่า เพราะมีการทำงานแบบแยกส่วนประกอบ หรือ component เหมือนกับรถยนต์ที่ประกอบขึ้นมาจากหลายชิ้นส่วน อย่างเครื่องยนต์ ถังน้ำมัน ล้อ และพวงมาลัย เราสามารถกำหนดได้ว่า เราอยากได้ชิ้นส่วนไหนแบบไหน และแต่ละชิ้นส่วนจะประกอบกันยังไง เมื่อเป็นเช่นนี้ เราจะรู้ได้ว่าข้อผิดพลาดอยู่ที่ไหน เพราะเราเป็นคนที่ประกอบทุกอย่างขึ้นมาเอง

    ในบทความนี้ ผมจะพาทุกคนไปดูการใช้ Haystack เพื่อเชื่อมต่อกับ LLM ผ่านตัวอย่างการสร้าง AI ตอบคำถามเกี่ยวกับ mental model กัน

    ถ้าพร้อมแล้ว ไปเริ่มกันเลย


    1. ⭐️ High-Level View
    2. 📜 Step 1. Create a Prompt Builder
    3. 🤖 Step 2. Create an LLM Instance
    4. 🪈 Step 3. Create a Pipeline
    5. 🏃 Step 4. Run
    6. 💪 Summary
    7. 😺 GitHub
    8. 📃 References

    ⭐️ High-Level View

    ในการใช้ Haystack เชื่อมต่อกับ LLM เราจะใช้ component 3 อย่าง:

    1. Prompt builder สำหรับเก็บ prompt
    2. LLM instance สำหรับเรียก LLM
    3. Pipeline สำหรับเชื่อมทุก component เข้าด้วยกัน

    โดยเราจะเรียกใช้งาน 3 components นี้ใน 4 ขั้นตอน:

    1. Create a prompt builder
    2. Create an LLM instance
    3. Create a pipeline
    4. Run

    ไปดูตัวอย่างทั้ง 4 ขั้นตอนกัน


    📜 Step 1. Create a Prompt Builder

    ในขั้นแรก เราจะสร้าง prompt builder สำหรับเก็บ prompt กัน

    เราจะเริ่มจากสร้าง system prompt และ user prompt:

    Python
    # System prompt
    system_prompt = """
    You are an expert curator of mental models across science, philosophy, and applied reasoning.
    Your task is to explain mental models clearly and accurately using a fixed schema.
    If the origin of a model is unclear or debated, state that explicitly.
    Do not invent historical sources. Be concise and concrete.
    """
    # User prompt
    user_prompt = "Explain the following mental model: {{model_query}}"

    Note: เราใช้ {{}} ใน user prompt เพื่อที่เราจะสร้างแทนที่ค่าใน user prompt ได้ในภายหลัง เช่น ถ้าเราต้องการถามเกี่ยวกับ “First-Principles Thinking” user prompt ของเราก็จะกลายเป็น:

    "Explain the following mental model: First-Principles Thinking"

    จากนั้น เราจะใส่ prompts ลงใน ChatPromptBuilder():

    Python
    # Import required packages
    from Haystack.components.builders import ChatPromptBuilder
    from Haystack.dataclasses import ChatMessage
    # Create a prompt builder instance
    prompt_builder = ChatPromptBuilder(
    template=[
    ChatMessage.from_system(system_prompt.strip()),
    ChatMessage.from_user(user_prompt)
    ],
    required_variables=["model_query"]
    )

    Note: เรากำหนด required_variables เพื่อกันไม่ให้ {{model_query}} เป็นค่าว่าง


    🤖 Step 2. Create an LLM Instance

    ในขั้นที่ 2 เราจะสร้าง LLM instance สำหรับเชื่อมต่อกับ LLM โดยในตัวอย่าง เราจะใช้ Gemini

    เราจะเริ่มจากดึง API key ที่เก็บไว้ใน .env:

    Python
    # Import required packages
    import os
    # Retrieve the API key
    GEMINI_API_KEY = os.getenv("GEMINI_API_KEY")

    จากนั้น กำหนด structured output หรือหน้าตา output ที่เราต้องการ ด้วย Pydantic:

    Python
    # Import required packages
    from pydantic import BaseModel, Field
    from typing import List, Literal
    # Define the output schema
    class MentalModel(BaseModel):
    # Mental model name
    model_name: str = Field(
    description="The commonly accepted name of the mental model"
    )
    # Origin or source
    origin: str = Field(
    description="Where the model comes from (a person, book, field, or cultural origin)"
    )
    # Brief description
    description: str = Field(
    description="A brief explanation of what the mental model is and why it matters"
    )
    # Example
    example: str = Field(
    description="A concrete real-world example illustrating the mental model"
    )
    # Tags
    tags: List[str] = Field(
    description="Short tags such as decision-making, systems thinking, learning, and philosophy"
    )

    หน้าตา structured output ที่เราจะได้:

    {
    "model_name": "",
    "origin": "",
    "description": "",
    "example": "",
    "tags": []
    }

    สุดท้าย เราจะใส่ API key และ structured output ลงใน LLM instance:

    Python
    # Import required packages
    from Haystack.utils import Secret
    from Haystack_integrations.components.generators.google_genai import GoogleGenAIChatGenerator
    # Create an LLM instance
    llm_with_structured_output = GoogleGenAIChatGenerator(
    model="gemini-2.5-flash",
    api_key=Secret.from_token(GEMINI_API_KEY),
    generation_kwargs={
    "temperature": 0.5,
    "response_format": MentalModel
    }
    )

    🪈 Step 3. Create a Pipeline

    ในขั้นที่ 3 เราจะเชื่อมต่อ prompt builder และ LLM instance เข้าด้วยกัน

    เริ่มจากสร้าง pipeline:

    Python
    # Import the required package
    from Haystack import Pipeline
    # Create a pipeline instance
    chain = Pipeline()

    เพิ่ม prompt builder และ LLM instance ลงใน pipeline:

    Python
    # Add the prompt builder and LLM instances
    chain.add_component(
    "prompt_builder", # Name
    prompt_builder # Instance
    )
    chain.add_component(
    "llm", # Name
    llm_with_structured_output # Instance
    )

    แล้วเชื่อมต่อ prompt builder และ LLM instance เข้าด้วยกัน:

    Python
    # Connect the components
    chain.connect(
    "prompt_builder.prompt", # Sender: prompt from prompt builder
    "llm.messages" # Receiver: message from LLM instance
    )

    Note: เรากำหนดให้ prompt builder ส่ง system และ user prompts ให้เป็น input สำหรับ LLM instance:

    Prompt FROM prompt builder
    Messages TO LLM instance

    🏃 Step 4. Run

    ในขั้นสุดท้าย เราจะรัน pipeline และดึงผลลัพธ์ที่ต้องการออกมา

    ตัวอย่างเช่น ถามเกี่ยวกับ “Compound Interest”:

    Python
    # Run the pipeline with a mental-model query
    raw_result = chain.run(
    data={
    "prompt_builder": {"model_query": "Compound Interest"}
    }
    )

    ดึงผลลัพธ์ที่ต้องการ:

    Python
    # Extract the structured-output text from the raw result
    reply_json = raw_result["llm"]["replies"][0].text
    # Validate the structured output
    result = MentalModel.model_validate_json(reply_json)
    # Print the validated structured output
    print(result.model_dump())

    ผลลัพธ์:

    {
    "model_name": "Compound Interest",
    "origin": (
    "Finance, Mathematics. The concept dates back to ancient Mesopotamia, "
    "with formalization in mathematics and finance over centuries."
    ),
    "description": (
    "Compound interest is the interest on a loan or deposit calculated "
    "based on both the initial principal and the accumulated interest from "
    "previous periods. It matters because it illustrates exponential growth, "
    "where small, consistent gains over time lead to significantly larger "
    "returns, making it a powerful force in finance and many other systems."
    ),
    "example": (
    "If you invest $1,000 at a 5% annual interest rate, after one year "
    "you have $1,050. In the second year, you earn 5% not just on the "
    "initial $1,000, but on the full $1,050, resulting in $1,102.50. "
    "This 'interest on interest' accelerates growth significantly over "
    "decades compared to simple interest."
    ),
    "tags": [
    "Finance",
    "Growth",
    "Long-term thinking",
    "Mathematics",
    "Systems thinking",
    ],
    }

    💪 Summary

    ในบทความนี้ เราได้ทำความรู้จักกับ Haystack ซึ่งเป็น package สำหรับสร้าง LLM application กัน

    เราได้เรียนเกี่ยวกับ 3 components สำหรับเชื่อมต่อกับ LLM:

    1. Prompt builder
    2. LLM instance
    3. Pipeline

    และการเชื่อมต่อกับ LLM ใน 4 ขั้นตอน:

    1. Create a prompt builder
    2. Create an LLM instance
    3. Create a pipeline
    4. Run

    😺 GitHub

    ดูตัวอย่าง code ทั้งหมดได้ที่ GitHub


    📃 References

  • สร้าง RAG pipeline ด้วย LangChain ใน 5 ขั้นตอน–ตัวอย่างการสร้างบอทตอบคำถามเกี่ยวกับนโยบาย HR

    สร้าง RAG pipeline ด้วย LangChain ใน 5 ขั้นตอน–ตัวอย่างการสร้างบอทตอบคำถามเกี่ยวกับนโยบาย HR

    RAG (Retrieval-Augmented Generation) เป็นเทคนิคที่ช่วยให้ LLM (large language model) ตอบคำถามได้แม่นยำขึ้น และไม่ถูกจำกัดด้วย knowledge cutoff หรือความรู้ที่จำกัดจากตอน train model

    RAG ทำงานใน 2 ขั้นตอน:

    1. Retrieve: ดึงเอกสารที่เกี่ยวข้อง
    2. Generate: สร้างคำตอบจากเอกสารที่ได้มา

    RAG มีข้อดี 3 ข้อ:

    1. คำตอบมีความแม่นยำมากขึ้น
    2. คำตอบมีความเกี่ยวข้องกับคำถามมากขึ้น
    3. ช่วยอัปเดตความรู้ให้กับ LLM ได้โดยไม่ต้อง train model ใหม่

    ในบทความนี้ เราจะมาดูวิธีการสร้าง RAG pipeline ด้วย LangChain ซึ่งเป็น framework ในการพัฒนาแอปพลิเคชัน LLM กัน

    ถ้าพร้อมแล้ว ไปเริ่มกันเลย


    1. 🔆 High-Level View
    2. 📑 Step 1. Load Documents
    3. 📚 Step 2. Split Text
    4. 💾 Step 3. Embed & Store Chunks
    5. 🔎 Step 4. Create a Retriever
    6. 🤖 Step 5. Generate a Response
    7. 💪 Summary
    8. 😺 GitHub
    9. 📃 References

    🔆 High-Level View

    เราใช้ LangChain สร้าง RAG pipeline ได้ใน 5 ขั้นตอน

    1. Load documents
    2. Split text
    3. Embed and store chunks
    4. Create a retriever
    5. Generate a response

    เราไปดูการสร้าง RAG pipeline กับตัวอย่างบอทตอบคำถามเกี่ยวกับนโยบาย HR เช่น การลาและสวัสดิ กัน


    📑 Step 1. Load Documents

    ในขั้นแรก เราจะโหลดเอกสารที่เป็นข้อมูลของ RAG pipeline ก่อน

    LangChain มีหลาย functions สำหรับโหลดเอกสาร เช่น:

    FunctionDocument
    TextLoader()Text file
    UnstructuredMarkdownLoader()Markdown file
    CSVLoader()CSV file
    JSONLoader()JSON file
    PyPDFLoader()PDF file
    DirectoryLoader()ไฟล์จากในโฟลเดอร์

    ในตัวอย่าง เราจะใช้ DirectoryLoader() เพราะเราเก็บเอกสารไว้ในโฟลเดอร์ชื่อ documents:

    documents/
    ├── benefits_policy.txt
    ├── compensation_policy.txt
    ├── leave_policy.txt
    └── remote_work_policy.txt

    ตัวอย่างข้อมูลในเอกสาร benefits_policy.txt:

    DataWise Co. Benefits Policy
    Full-time employees receive health insurance after completing probation.
    The company provides annual health checkups once per year.
    Employees can claim up to 2,000 THB per month for wellness activities such as fitness memberships, yoga classes, or mental health support.
    Employees are also eligible for learning support. The company reimburses up to 10,000 THB per year for approved online courses, books, or professional certificates.

    วิธีใช้ DirectoryLoader():

    Python
    # Import packages
    from langchain_community.document_loaders import DirectoryLoader
    from langchain_community.document_loaders import TextLoader
    # Initialise loader
    loader = DirectoryLoader(
    path="documents",
    glob="*.txt",
    loader_cls=TextLoader,
    loader_kwargs={"encoding": "utf-8"}
    )
    # Load documents
    docs = loader.load()

    การใช้งาน DirectoryLoader():

    • path = โฟลเดอร์ที่ต้องการโหลด
    • glob = pattern ชื่อไฟล์ที่ต้องการโหลด (เช่น "*.txt" หมายถึง ไฟล์ที่ลงชื่อด้วย .txt ทั้งหมด)
    • loader_cls = function ที่จะใช้โหลด (เช่น TextLoader())
    • loader_kwargs = argument เพิ่มเติมสำหรับ function ที่จะใช้โหลด

    เราสามารถดูตัวอย่างเอกสารที่โหลดแล้วได้แบบนี้:

    Python
    # View loaded documents
    for doc in docs:
    print("=" * 50)
    print(doc.metadata["source"])
    print("=" * 50)
    print(doc.page_content[:200])

    ผลลัพธ์:

    ==================================================
    documents/remote_work_policy.txt
    ==================================================
    DataWise Co. Remote Work Policy
    Employees may work from home up to 2 days per week.
    Remote work must be approved by the employee's direct manager.
    Employees must be reachable on Slack during core w
    ==================================================
    documents/benefits_policy.txt
    ==================================================
    DataWise Co. Benefits Policy
    Full-time employees receive health insurance after completing probation.
    The company provides annual health checkups once per year.
    Employees can claim up to 2,000 THB
    ==================================================
    documents/compensation_policy.txt
    ==================================================
    DataWise Co. Compensation Policy
    Salary is paid on the last working day of each month.
    Performance bonuses are reviewed once per year in December.
    Employees may receive an annual salary adjustment
    ==================================================
    documents/leave_policy.txt
    ==================================================
    DataWise Co. Leave Policy
    Full-time employees receive 10 days of annual leave per year after completing probation.
    Employees receive 15 days of paid sick leave per year.
    Sick leave of 3 consecutive

    📚 Step 2. Split Text

    ในขั้นที่ 2 เราจะแบ่ง text ในเอกสารออกเป็นก้อน ๆ หรือ chunk เพราะการแบ่ง text จะช่วยให้การค้นหาข้อมูลง่ายขึ้น

    LangChain มี 3 functions หลักในการแบ่ง text:

    FunctionMethod
    CharacterTextSplitter()แบ่งตามจำนวน character ที่กำหนด
    TokenTextSplitter()แบ่งตามจำนวน token ที่กำหนด
    RecursiveCharacterTextSplitter()แบ่งตามย่อหน้า บรรทัด และประโยค

    ในตัวอย่าง เราจะใช้ RecursiveCharacterTextSplitter() เพราะเป็นวิธีที่เก็บรักษาความหมายของ text ได้ดีกว่าวิธีอื่น:

    วิธีใช้ RecursiveCharacterTextSplitter():

    Python
    # Import package
    from langchain_text_splitters import RecursiveCharacterTextSplitter
    # Create splitter
    text_splitter = RecursiveCharacterTextSplitter(
    chunk_size=500,
    chunk_overlap=100
    )
    # Split documents
    chunks = text_splitter.split_documents(docs)

    ดูตัวอย่าง text ที่แบ่งแล้วได้ตามนี้:

    Python
    # View results
    for i, chunk in enumerate(chunks[:5]):
    print(f"Chunk {i+1}")
    print("Source:", chunk.metadata["source"])
    print(chunk.page_content)
    print("-" * 50)

    ผลลัพธ์:

    Chunk 1
    Source: documents/remote_work_policy.txt
    DataWise Co. Remote Work Policy
    Employees may work from home up to 2 days per week.
    Remote work must be approved by the employee's direct manager.
    Employees must be reachable on Slack during core working hours from 10:00 AM to 4:00 PM.
    Employees working remotely are responsible for maintaining a stable internet connection and a quiet work environment.
    New employees may request remote work only after completing their first month.
    --------------------------------------------------
    Chunk 2
    Source: documents/benefits_policy.txt
    DataWise Co. Benefits Policy
    Full-time employees receive health insurance after completing probation.
    The company provides annual health checkups once per year.
    Employees can claim up to 2,000 THB per month for wellness activities such as fitness memberships, yoga classes, or mental health support.
    Employees are also eligible for learning support. The company reimburses up to 10,000 THB per year for approved online courses, books, or professional certificates.
    --------------------------------------------------
    Chunk 3
    Source: documents/compensation_policy.txt
    DataWise Co. Compensation Policy
    Salary is paid on the last working day of each month.
    Performance bonuses are reviewed once per year in December.
    Employees may receive an annual salary adjustment based on company performance, individual performance, and market benchmarks.
    Overtime pay is available only for non-managerial employees and must be approved by a manager before the overtime work begins.
    --------------------------------------------------
    Chunk 4
    Source: documents/leave_policy.txt
    DataWise Co. Leave Policy
    Full-time employees receive 10 days of annual leave per year after completing probation.
    Employees receive 15 days of paid sick leave per year.
    Sick leave of 3 consecutive days or more requires a medical certificate.
    Employees should submit annual leave requests at least 7 days in advance through the HR system.
    Unused annual leave can be carried over for up to 5 days into the next calendar year.
    --------------------------------------------------

    สังเกตว่า text ถูกแบ่งย่อหน้า ทำให้ chunk ที่ได้มีความหมายที่ครบถ้วนในตัวเอง


    💾 Step 3. Embed & Store Chunks

    ในขั้นที่ 3 เราจะ embed และเก็บข้อมูลลงใน vector database

    Embedding คือ การแปลง chunk ให้กลายเป็น vector คือ ชุดตัวเลขที่เป็นตัวแทนของ chunk

    ตัวอย่าง chunk:

    "Employees can work from home up to two days per week."

    ตัวอย่าง vector:

    [
    0.021,
    -0.184,
    0.736,
    0.094,
    -0.511,
    0.302,
    0.087,
    -0.624
    ]

    Vector เป็นสิ่งที่ระบบจะใช้ในการค้นหาเอกสารที่เกี่ยวข้อง โดย vector ที่มีความหมายใกล้เคียงกัน จะมีตัวเลขที่ใกล้เคียงกัน เมื่อเราต้องการหาเอกสาร ระบบจะดึงเอกสารที่มี vector ใกล้เคียงกับคำถามของเราขึ้นมาให้

    ใน LangChain เราสามารถเลือก model ที่จะใช้ embedding ได้ ในตัวอย่าง เราจะใช้ Gemini กัน:

    Python
    # Import packages
    import os
    from langchain_google_genai import GoogleGenerativeAIEmbeddings
    # Get API key
    GEMINI_API_KEY = os.getenv("GEMINI_API_KEY")
    # Create embedder
    document_embedder = GoogleGenerativeAIEmbeddings(
    model="gemini-embedding-001",
    task_type="retrieval_document",
    google_api_key=GEMINI_API_KEY
    )

    หลังจากได้ embedding model แล้ว เราจะสร้าง vector database เพื่อเก็บ vector โดยในตัวอย่างเราจะใช้ FAISS database:

    Python
    # Import package
    from langchain_community.vectorstores import FAISS
    # Build vector DB
    vectorstore = FAISS.from_documents(
    documents=chunks,
    embedding=document_embedder
    )

    สังเกตว่า เราใส่ document_embedder ไปใน vector database ด้วย เพื่อแปลง chunk เป็น vector และเก็บลงใน database


    🔎 Step 4. Create a Retriever

    ในขั้นที่ 4 เราจะสร้าง retriever ที่ทำหน้าที่ค้นหา vector โดยใช้ .as_retriever() แบบนี้:

    Python
    # Creater retriever
    retriever = vectorstore.as_retriever(
    search_type="similarity",
    search_kwargs={"k": 2}
    )

    เราสามารถทดสอบ retriever เพื่อดูว่า จะได้เอกสารอะไรกลับมา ได้แบบนี้:

    Python
    # Test retriever
    question = "Do I need a medical certificate for sick leave?"
    relevant_docs = retriever.invoke(question)
    for i, doc in enumerate(relevant_docs, start=1):
    print(f"Retrieved chunk {i}")
    print("Source:", doc.metadata["source"])
    print(doc.page_content)
    print("-" * 60)

    ผลลัพธ์:

    Retrieved chunk 1
    Source: documents/leave_policy.txt
    DataWise Co. Leave Policy
    Full-time employees receive 10 days of annual leave per year after completing probation.
    Employees receive 15 days of paid sick leave per year.
    Sick leave of 3 consecutive days or more requires a medical certificate.
    Employees should submit annual leave requests at least 7 days in advance through the HR system.
    Unused annual leave can be carried over for up to 5 days into the next calendar year.
    ------------------------------------------------------------
    Retrieved chunk 2
    Source: documents/compensation_policy.txt
    DataWise Co. Compensation Policy
    Salary is paid on the last working day of each month.
    Performance bonuses are reviewed once per year in December.
    Employees may receive an annual salary adjustment based on company performance, individual performance, and market benchmarks.
    Overtime pay is available only for non-managerial employees and must be approved by a manager before the overtime work begins.
    ------------------------------------------------------------

    🤖 Step 5. Generate a Response

    ในขั้นสุดท้าย เราจะให้ LLM สร้างคำตอบโดยใช้ข้อมูลใน vector database

    ในตัวอย่างเราจะลองใช้ Gemini ช่วยคิดคำตอบให้กับเรา

    เราจะเริ่มจากเชื่อมต่อกับ Gemini และสร้าง prompt ก่อน:

    Python
    # Import packages
    from langchain_google_genai import ChatGoogleGenerativeAI
    from langchain_core.prompts import ChatPromptTemplate
    # Initialise Gemini
    llm = ChatGoogleGenerativeAI(
    model="gemini-2.5-flash",
    temperature=0,
    google_api_key=GEMINI_API_KEY
    )
    # Create prompt template
    prompt = ChatPromptTemplate.from_template("""
    You are an HR policy assistant.
    Answer the user's question using only the policy context below.
    Rules:
    - Do not use outside knowledge.
    - If the answer is not in the context, say:
    "I could not find this information in the available company policies."
    - Keep the answer concise.
    - Mention the source policy file when possible.
    Policy context:
    {context}
    User question:
    {question}
    """)

    จากนั้น กำหนดคำถามและดึงเอกสารที่เกี่ยวข้องจาก vector database

    Python
    # Ask a question
    question = "Do I need a medical certificate for sick leave?"
    # Retrieve relevant document chunks
    relevant_docs = retriever.invoke(question)
    # Combine retrieved chunks into one context string
    context = "\n\n".join(
    [
    f"Source: {doc.metadata['source']}\n"
    f"{doc.page_content}"
    for doc in relevant_docs
    ]
    )
    # Inspect retrieved context before sending it to Gemini
    print("Retrieved context:")
    print(context)

    ผลลัพธ์:

    Retrieved context:
    Source: documents/leave_policy.txt
    DataWise Co. Leave Policy
    Full-time employees receive 10 days of annual leave per year after completing probation.
    Employees receive 15 days of paid sick leave per year.
    Sick leave of 3 consecutive days or more requires a medical certificate.
    Employees should submit annual leave requests at least 7 days in advance through the HR system.
    Unused annual leave can be carried over for up to 5 days into the next calendar year.
    Source: documents/compensation_policy.txt
    DataWise Co. Compensation Policy
    Salary is paid on the last working day of each month.
    Performance bonuses are reviewed once per year in December.
    Employees may receive an annual salary adjustment based on company performance, individual performance, and market benchmarks.
    Overtime pay is available only for non-managerial employees and must be approved by a manager before the overtime work begins.

    แล้วส่งข้อมูลคำถามและเอกสารให้กับ Gemini:

    Python
    # Add context and question to prompt template
    messages = prompt.invoke(
    {
    "context": context,
    "question": question
    }
    )
    # Send prompt to Gemini
    response = llm.invoke(messages)
    # Print Gemini's answer
    print(response.content)

    ผลลัพธ์:

    Yes, sick leave of 3 consecutive days or more requires a medical certificate. (Source: documents/leave_policy.txt)

    เพื่อให้เราใช้งาน RAG pipeline ได้ง่าย เราสามารถแปลงโค้ดชุดนี้ให้เป็น function ได้:

    Python
    # Convert to function
    def ask_policy_question(question: str) -> str:
    """
    Retrieve relevant policy chunks, send them to Gemini,
    and return Gemini's answer.
    """
    # Retrieve relevant chunks
    relevant_docs = retriever.invoke(question)
    # Combine retrieved chunks into context
    context = "\n\n".join(
    [
    f"Source: {doc.metadata['source']}\n"
    f"{doc.page_content}"
    for doc in relevant_docs
    ]
    )
    # Add context and question to prompt template
    messages = prompt.invoke(
    {
    "context": context,
    "question": question
    }
    )
    # Send completed prompt to Gemini
    response = llm.invoke(messages)
    # Return answer text
    return response.content

    เพื่อที่เราจะเขียนโค้ดสั้นลงในครั้งถัด ๆ ไป:

    Python
    # Test function
    answer = ask_policy_question("Who is eligible for health insurance?")
    print(answer)

    ผลลัพธ์:

    Full-time employees receive health insurance after completing probation. (Source: documents/benefits_policy.txt)

    💪 Summary

    ในบทความนี้ เราได้เรียนรู้การสร้าง RAG pipeline ด้วย LangChain ใน 5 ขั้นตอน:

    1. Load documents: โหลดเอกสารสำหรับ RAG pipeline
    2. Split text: แบ่ง text ในเอกสารเป็น chunk
    3. Embed and store chunks: แปลง chunk เป็น vector และเก็บลงใน database
    4. Create a retriever: สร้างตัวค้นหาเอกสารจาก vector database
    5. Generate a response: สร้างคำตอบจากเอกสาร

    😺 GitHub

    ดูตัวอย่าง code และเอกสารทั้งหมดได้ที่ GitHub


    📃 References

  • Basic LangChain: วิธีใช้ LangChain เพื่อทำงานกับ LLM อย่างง่าย ใน 5 ขั้นตอน—ตัวอย่างการสร้าง AI ตอบคำถามเรื่อง Mental Model

    Basic LangChain: วิธีใช้ LangChain เพื่อทำงานกับ LLM อย่างง่าย ใน 5 ขั้นตอน—ตัวอย่างการสร้าง AI ตอบคำถามเรื่อง Mental Model

    langchain เป็น framework สำหรับสร้างแอปพลิเคชั่นที่ใช้ large language model (LLM) ที่ช่วยลดความยุ่งยากการเรียกใช้งาน API โดยตรง

    langchain มีข้อดี 3 อย่าง:

    1. Modular: ใช้งานง่าย ด้วยการเขียนเป็นส่วน ๆ หรือ module (เหมือนเลโก้)
    2. Use case: รองรับการใช้งานหลายหลาก เพราะสามารถประกอบ module เข้าด้วยกันได้หลายแบบ (ต่อเลโก้ได้หลายแบบ)
    3. Integration: ใช้งานร่วมเครื่องมือได้กับหลากหลาย เช่น OpenAI, Hugging Face, databricks

    ในบทความนี้ เรามาดูวิธีใช้ langchain เพื่อทำงานกับ LLM อย่างง่ายกัน

    ถ้าพร้อมแล้ว ไปเริ่มกันเลย


    1. 🧠 Mental Model
    2. 🤖 Step 1. Set LLM
    3. 💬 Step 2. Set Prompt
    4. 📦 Step 3. Set Output Structure
    5. ⛓️‍💥 Step 4. Chain
    6. 🏃 Step 5. Run
      1. ☝️ Single Run
      2. 🎳 Batch Run
    7. 💪 Summary
    8. 🫵 Your Turn
    9. 📄 References

    🧠 Mental Model

    การใช้งาน langchain มีอยู่ 5 ขั้นตอน ได้แก่:

    1. Set LLM: เลือก LLM ที่ต้องการ
    2. Set prompt: สร้าง prompt สำหรับคุยกับ LLM
    3. Set output structure: กำหนดหน้าตา output ที่ต้องการ
    4. Chain: เชื่อม LLM และ prompt เข้าด้วยกัน เพื่อสร้าง pipeline ในการเรียกใช้ LLM
    5. Run: เรียกใช้งาน LLM

    เราไปดูการใช้งาน ผ่านการสร้าง chatbot ตอบคำถามเกี่ยวกับ mental model กัน


    🤖 Step 1. Set LLM

    langchain รองรับการใช้งาน LLM หลายเจ้า เช่น:

    ในตัวอย่าง เราจะเลือกใช้ Gemini โดยเริ่มจากโหลด module สำหรับเชื่อมกับ Gemini:

    Python
    # Import package
    from langchain_google_genai import ChatGoogleGenerativeAI

    แล้วสร้าง LLM instance ขึ้นมา:

    Python
    # Create model instance
    llm = ChatGoogleGenerativeAI(
    model="gemini-2.5-flash",
    temperature=0.5,
    api_key="YOUR_API_KEY"
    )
    • model: ชื่อ LLM ที่เราต้องการใช้งาน
    • temperature: ระดับความสุ่มของคำตอบจาก LLM (ค่ายิ่งสูง คำตอบยิ่งมีความหลากหลาย ส่วนยิ่งค่าน้อย คำตอบจะยิ่งมีความคล้ายคลึงกัน)
    • api_key: API key สำหรับใช้งาน LLM (ดูวิธีการสร้าง Gemini API key ฟรี)

    💬 Step 2. Set Prompt

    ในขั้นที่ 2 เราจะสร้าง prompt สำหรับคุยกับ LLM กัน:

    1. โหลด module
    2. กำหนด prompt

    ขั้นย่อยที่ 1. โหลด module สำหรับสร้าง prompt:

    Python
    # Import package
    from langchain_core.prompts import ChatPromptTemplate

    ขั้นย่อยที่ 2. กำหนด prompt โดยแยกระหว่าง:

    1. System prompt: บทบาทและสไตล์การตอบคำถามของ LLM (เช่น ผู้เชี่ยวชาญด้าน mental model)
    2. User prompt: คำถามที่จะส่งให้ LLM (เช่น บอกให้อธิบาย mental model ที่ต้องการ)

    ตัวอย่าง system และ user prompts:

    Python
    # Define system prompt
    system_prompt = """
    You are an expert curator of mental models across science, philosophy, and applied reasoning.
    Your task is to explain mental models clearly and accurately using a fixed schema.
    If the origin of a model is unclear or debated, state that explicitly.
    Do not invent historical sources. Be concise and concrete.
    """
    # Define user prompt
    user_prompt = "Explain the following mental model: {model_query}"

    จากนั้น ประกอบ prompts เข้าด้วยกัน:

    Python
    # Create prompt template
    prompts = ChatPromptTemplate.from_messages(
    [
    # System prompt
    ("system", system_prompt.strip()),
    # User prompt
    ("human", user_prompt)
    ]
    )

    เราสามารถดูตัวอย่าง prompt ได้ด้วย .format_messages():

    Python
    # Inspect prompt template
    prompts.format_messages(model_query="Pareto Principle")

    ผลลัพธ์:

    [SystemMessage(content='You are an expert curator of mental models across science, philosophy, and applied reasoning.\\n\\nYour task is to explain mental models clearly and accurately using a fixed schema.\\n\\nIf the origin of a model is unclear or debated, state that explicitly.\\n\\nDo not invent historical sources. Be concise and concrete.', additional_kwargs={}, response_metadata={}),
    HumanMessage(content='Explain the following mental model: Pareto Princinple', additional_kwargs={}, response_metadata={})]

    📦 Step 3. Set Output Structure

    ในขั้นที่ 3 เราจะกำหนดหน้าตา output ที่เราต้องการ

    เช่น ถ้าเราต้องการให้คืนค่า JSON แบบนี้:

    {
    "model_name": "",
    "origin": "",
    "description": "",
    "example": "",
    "tags": []
    }

    เรากำหนดได้โดยใช้ pydantic และ typing packages แบบนี้:

    Python
    # Import packages
    from pydantic import BaseModel, Field
    from typing import List, Literal
    # Define output structure
    class MentalModel(BaseModel):
    # Mental model name
    model_name: str = Field(description="The commonly accepted name of the mental model")
    # Source/origin
    origin: str = Field(
    description="Where the model comes from (person, book, field, or cultural origin)"
    )
    # Brief description
    description: str = Field(
    description="A brief explanation of what the mental model is and why it matters"
    )
    # Example
    example: str = Field(
    description="A concrete real-world example illustrating the mental model"
    )
    # Tags
    tags: List[str] = Field(
    description="Short tags such as decision-making, systems thinking, learning, philosophy"
    )

    Note: ดูวิธีใช้ Pydantic

    หลังกำหนดหน้าตา output แล้ว ให้ใส่เข้าไปใน LLM instance แบบนี้:

    Python
    # Add output structure to LLM
    llm_with_structured_output = llm.with_structured_output(MentalModel)

    ⛓️‍💥 Step 4. Chain

    ในขั้นที่ 4 ให้เราสร้าง chain โดยเชื่อม LLM instance เข้ากับ prompts ด้วย pipe operator (|):

    Python
    # Build chain
    chain = prompts | llm_with_structured_output

    Note: ให้มองว่า | เป็นลูกศรชี้ทางขวา (prompt → llm)


    🏃 Step 5. Run

    ในขั้นสุดท้าย เราจะเรียกใช้งาน chain ซึ่งทำได้ 2 แบบ:

    1. Single run: เรียกใช้ครั้งเดียว
    2. Batch run: เรียกใช้หลายครั้งพร้อมกัน

    .

    ☝️ Single Run

    เราเรียกใช้งานครั้งเดียวด้วย .invoke()

    ในตัวอย่าง เราจะถามเกี่ยวกับ “compound interest” กัน:

    Python
    # Run query
    result = chain.invoke({"model_query": "Compound Interest"})

    แสดงผลลัพธ์ใน console:

    Python
    # Import package
    import json
    # Load result
    result_dict = result.model_dump()
    # Print
    print(json.dumps(result_dict, indent=4))

    ผลลัพธ์:

    {
    "model_name": "Compound Interest",
    "origin": "Finance, Mathematics; concept dates back to ancient times, formalized in the Renaissance.",
    "description": "Compound interest is the interest on a loan or deposit calculated based on both the initial principal and the accumulated interest from previous periods. It is often called 'interest on interest' and leads to exponential growth over time, making it a powerful force in finance for both wealth creation and debt accumulation.",
    "example": "If you invest $1,000 at an annual interest rate of 5% compounded annually, after the first year you'll have $1,050. In the second year, the 5% interest is calculated on $1,050, not just the original $1,000, leading to a balance of $1,102.50. This snowball effect accelerates over decades, significantly increasing the total return compared to simple interest.",
    "tags": [
    "Finance",
    "Economics",
    "Wealth Building",
    "Decision-making",
    "Long-term thinking"
    ]
    }

    .

    🎳 Batch Run

    สำหรับการรันหลายครั้งพร้อมกัน เราจะใช้ .batch() แบบนี้:

    Python
    # Create list of mental models
    mental_model_queries = [
    "First Principles Thinking",
    "Occam's Razor",
    "Confirmation Bias"
    ]
    # Create batch inputs
    batch_inputs = [{"model_query": query} for query in mental_model_queries]
    # Run queries
    results = chain.batch(batch_inputs)
    # Instantiate collector
    query_collector = [result.model_dump() for result in results]

    แสดงผลลัพธ์ใน console:

    Python
    # Instantiate counter
    i = 1
    # Loop through elements in collector
    for result in query_collector:
    # Print result
    print(f"👉 Query {i}:")
    print(json.dumps(result, indent=4))
    print("\\n")
    # Add 1 to counter
    i += 1

    ผลลัพธ์:

    👉 Query 1:
    {
    "model_name": "First Principles Thinking",
    "origin": "Often attributed to Aristotle; popularized in modern business by Elon Musk.",
    "description": "First Principles Thinking involves breaking down complex problems into their most basic, fundamental truths or 'first principles,' rather than reasoning by analogy or conventional wisdom. It matters because it allows for innovative solutions by challenging assumptions and building new knowledge from the ground up.",
    "example": "Instead of accepting the high cost of batteries for electric cars, Elon Musk famously broke down a battery into its constituent raw materials (cobalt, nickel, lithium, etc.) to understand their actual cost, then sought ways to procure and assemble them more efficiently, leading to significant cost reductions and innovation.",
    "tags": [
    "Problem-solving",
    "Innovation",
    "Critical Thinking",
    "Decision-making"
    ]
    }
    👉 Query 2:
    {
    "model_name": "Occam's Razor",
    "origin": "William of Ockham (14th-century philosopher and theologian)",
    "description": "Occam's Razor is a problem-solving principle stating that among competing hypotheses that explain an event or phenomenon equally well, the simplest solution is most likely the correct one. It advocates for parsimony, suggesting that one should not multiply entities beyond necessity, thereby favoring theories with fewer assumptions.",
    "example": "If you hear hoofbeats outside, it is more likely to be horses than zebras, assuming you are in a location where horses are common and zebras are not. The 'horse' explanation is simpler and requires fewer extraordinary assumptions.",
    "tags": [
    "Philosophy",
    "Decision-making",
    "Problem-solving",
    "Critical thinking",
    "Science"
    ]
    }
    👉 Query 3:
    {
    "model_name": "Confirmation Bias",
    "origin": "Psychology; early concepts traced to Francis Bacon's Novum Organum (1620)",
    "description": "Confirmation bias is the tendency to search for, interpret, favor, and recall information in a way that confirms one's pre-existing beliefs or hypotheses. It matters because it can lead to flawed reasoning, poor decision-making, and resistance to new or contradictory evidence, hindering objective analysis.",
    "example": "A person who believes a certain stock will perform well might selectively read news articles and analyst reports that support this positive outlook, while ignoring or downplaying any negative news or warnings about the company.",
    "tags": [
    "cognitive bias",
    "decision-making",
    "psychology",
    "critical thinking"
    ]
    }

    💪 Summary

    เราจะได้เห็นได้ว่า langchain เป็น package ที่ใช้ทำงานกับ LLM ได้อย่างง่าย ๆ ใน 5 ขั้นตอน:

    Set LLM: เลือก model
    Set prompt: กำหนด system และ user prompt
    Set output: กำหนด output structure
    Chain: สร้าง pipeline
    Run: เรียกใช้งาน (single & batch)

    🫵 Your Turn

    สำหรับคนที่สนใจศึกษา langchain เพิ่มเติม:


    📄 References

  • AI Literacy: สรุป 31 ข้อคิดการใช้ AI ให้อยู่รอด จาก session แชร์ความรู้ให้กับนักศึกษา ม.หอการค้าไทย

    AI Literacy: สรุป 31 ข้อคิดการใช้ AI ให้อยู่รอด จาก session แชร์ความรู้ให้กับนักศึกษา ม.หอการค้าไทย

    สัปดาห์ที่แล้ว ผมมีโอกาสแชร์ความรู้การใช้ AI ในหัวข้อ AI literacy ให้กับนักศึกษาคณะการศึกษาปฐมวัย มหาวิทยาลัยหอการค้าไทย

    ในบทความนี้ ผมจะมาสรุป 31 ข้อคิดที่ผมแชร์ใน session โดยแบ่งเป็น 5 กลุ่ม:

    1. Why AI literacy: ความสำคัญของ AI literacy
    2. Working with AI: แนวคิดการทำงานกับ AI
    3. How to prompt: วิธีเขียน prompt
    4. Future trends: แนวโน้มของ AI ในอนาคต
    5. Be human: การเป็นมนุษย์ในยุคของ AI

    ถ้าพร้อมแล้ว ไปเริ่มกันเลย


    1. 🤖 Part I. Why AI Literacy
    2. 💼 Part II. Working With AI
    3. 👷 Part III. How to Prompt
    4. 🚀 Part IV. Future Trends
    5. 😌 Part V. Be Human

    🤖 Part I. Why AI Literacy

    .

    ข้อ 1. Pareto Principle (80/20 rule)

    Pareto principle เป็น mental model หรือแนวคิดช่วยตัดสินใจที่บอกว่า 80% ของความสำเร็จมักมาจาก 20% ของสิ่งที่เราทำ

    ในยุคที่ AI เข้ามามีบทบาทในหลายด้านของชีวิต ทักษะ AI เป็นสิ่งง่าย ๆ ที่เราทำได้เพื่อช่วยให้เราอยู่รอด

    การเรียนรู้เกี่ยวกับ AI คือ 20% ที่เราทำได้ เพื่อให้โอกาสอยู่รอดถึง 80%

    .

    ข้อ 2. What is AI literacy?

    AI literacy คือ ความเข้าใจและความสามารถในการใช้งาน AI ได้อย่างมีประสิทธิภาพ

    .

    ข้อ 3. AI can do many things

    AI สามารถทำได้หลายอย่าง เช่น:

    • Content: สร้าง content เช่น ข้อความ ภาพ เสียง และวิดีโอ
    • Analysis: วิเคราะห์ข้อมูลขนาดใหญ่อย่างรวดเร็ว
    • Automation: ทำงานโดยอัตโนมัติ (เช่น คุยกับลูกค้าในขณะที่เราหลับ)

    .

    ข้อ 4. Jobs at risk

    ความสามารถของ AI ทำให้มีหลายงานเสี่ยงที่จะถูกแทนที่ แม้กระทั่งงานที่ปกติจะต้องใช้มนุษย์ เช่น:

    • ล่าม/นักแปลภาษา
    • นักเขียน
    • โปรแกรมเมอร์
    • Customer service

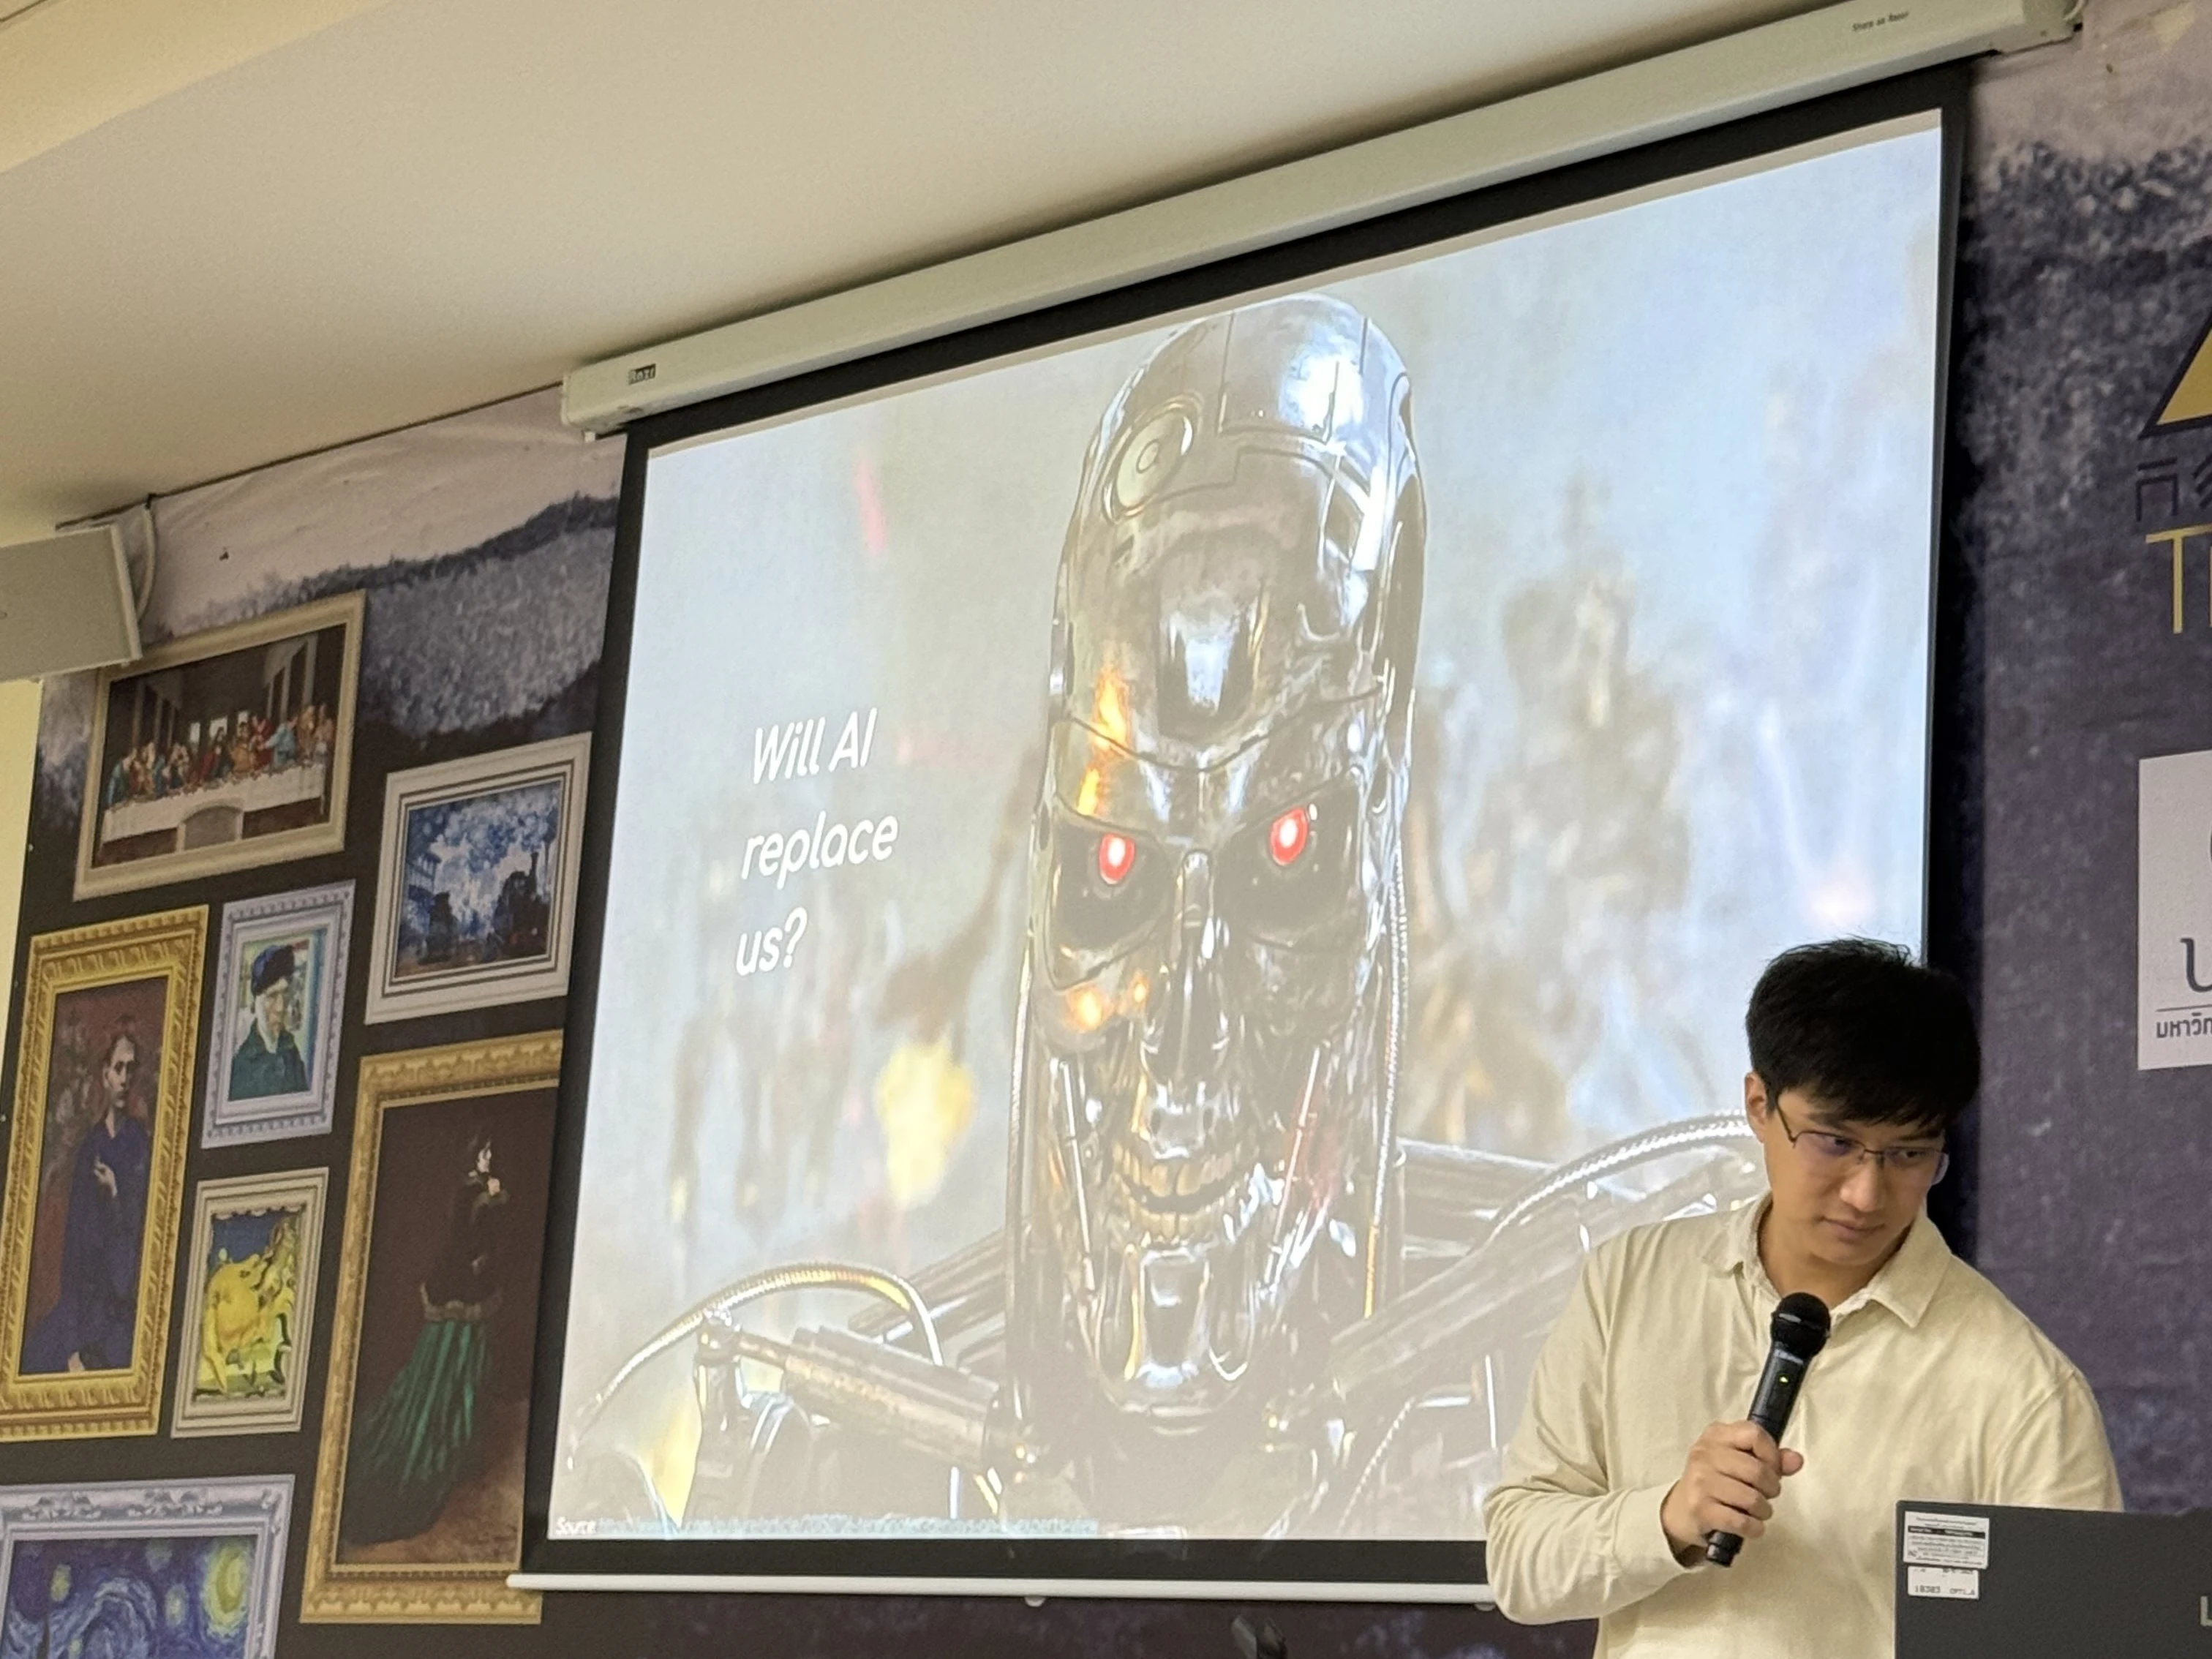
    เมื่อเป็นอย่างนี้ AI จะมาแทนที่มนุษย์ไหม?

    .

    ข้อ 5. AI still has limitations

    แม้ AI จะทำได้หลายอย่าง แต่ก็ยังมีข้อจำกัดอยู่ เช่น:

    .

    ข้อ 6. We must not fear AI, but people who use AI

    ด้วยข้อจำกัดของ AI เรายังไม่ต้องกลัวว่า AI จะมาแทนที่เรา

    แต่เราควรจะกลัวคนที่ใช้ AI เป็นมากกว่า

    AI won’t replace people, but maybe people that use AI will replace people that don’t. — Andrew Ng

    คนที่ใช้ AI เป็นสามารถไปได้ไกลกว่าคนอื่น

    เช่น ถ้าไม่ใช้ AI เราอาจจะใช้เวลา 2 วันเพื่อเขียนรายงานส่งอาจารย์

    แต่เมื่อใช้ AI เราอาจใช้เวลาแค่ 2 ชั่วโมง และมีเวลาสำหรับอ่านหนังสือสอบมากขึ้น ทำให้เรามีโอกาสได้เกรดที่ดีกว่าคนอื่น

    .

    ข้อ 7. The one who survives is the one who levels up

    แต่ละครั้งที่มีเทคโนโลยีใหม่เกิดขึ้น คนที่อยู่รอด คือ คนที่ยกระดับตัวเอง

    สมัยก่อน เราผลิตหนังสือโดยใช้ scribe หรือชาวบ้านที่ฝึกคัดลอกหนังสือมาโดยเฉพาะ scribe ใช้เวลาฝึกฝนนานหลายปีกว่าจะสามารถคัดหนังสือได้

    วันหนึ่ง เครื่องพิมพ์ถูกพัฒนาขึ้น เราสามารถพิมพ์หนังสือได้หลายพันหน้าในวันเดียว โดยไม่ต้องพึ่ง scribe

    ความต้องการ scribe ลดน้อยลงเรื่อย ๆ และ scribe ที่ยึดติดกับวิธีการผลิตหนังสือแบบเดิม ก็ค่อย ๆ หายไปพร้อมกับความต้องการของตลาด

    ส่วน scribe ที่ปรับตัวเข้าหาเทคโนโลยี และฝึกควบคุมเครื่องพิมพ์ ยังคงอยู่รอดต่อไป

    การมาถึงของ AI ก็เหมือนเครื่องพิมพ์ ถ้าเราไม่เรียนรู้ที่จะใช้ AI เราก็จะค่อย ๆ ถูกลืม เหมือนกับ scribe ที่ยังคัดหนังสือด้วยมือ

    .

    ข้อ 8. We are at a crossroad: choose

    AI พัฒนาเร็วขึ้นและก้าวกระโดดมากขึ้นเรื่อย ๆ

    ในช่วงแรกที่ ChatGPT เปิดตัวใหม่ ๆ เราต้องรอนานหลายเดือนกว่าจะได้ใช้ ChatGPT เวอร์ชั่นใหม่ที่มีความสามารถไม่ต่างจากเวอร์ชั่นก่อนหน้ามากนัก

    ในปัจจุบัน เราจะเห็น ChatGPT มีการอัปเดตที่ถี่ขึ้น และในอัปเดตแต่ละครั้ง ChatGPT มีความสามารถมากกว่าเวอร์ชั่นก่อนมาก

    การที่ AI พัฒนาเร็วขึ้นเรื่อย ๆ ทำให้เรามีเวลาปรับตัวน้อยลงเรื่อย ๆ

    และตอนนี้ เราเหมือนอยู่ที่ทางแยกที่เราจะต้องเลือกว่า เราจะเรียนรู้การใช้ AI ให้เป็นและอยู่รอดในยุคของ AI หรือเราจะใช้ AI แบบเดิม ๆ และถูกทิ้งไว้ข้างหลัง

    The people who will come out of this well won’t be the ones who mastered one tool. They’ll be the ones who got comfortable with the pace of change itself. — Matt Shumer


    💼 Part II. Working With AI

    .

    ข้อ 9. Maslow’s hammer

    I suppose it is tempting, if the only tool you have is a hammer, to treat everything as if it were a nail. — Abraham Maslow

    Maslow’s hammer เป็น mental model ที่บอกว่า เครื่องมือสามารถจำกัดมุมมองของเราได้

    เช่น ถ้าเรามีค้อน เราจะมองทุกอย่างเป็นตะปู

    ในยุคของ AI เราอาจมองว่าทุกอย่างแก้ได้ด้วย AI:

    • ทำงานเร็วขึ้น
    • ผิดพลาดน้อยลง
    • มีเวลามากขึ้น

    แต่ไม่ใช่ทุกปัญหาจะแก้ได้ด้วย AI เพราะ AI ไม่ใช่เครื่องมือสำหรับแก้ทุกอย่าง

    ถ้าเราอยากตอกตะปู เราจะต้องใช้ค้อน ไม่ใช่ AI

    การใช้ AI ที่ถูกต้อง คือ เริ่มต้นจากปัญหาและความต้องการของเรา แล้วเลือกเครื่องมือที่ตอบโจทย์ ซึ่งเครื่องมือนั้นอาจจะเป็น AI หรือไม่ก็ได้

    .

    ข้อ 10. AI is built in man’s image

    AI เกิดจากการ train model ด้วยข้อมูลจากอินเทอร์เน็ตซึ่งมาจากมนุษย์

    Human -> Data -> Train -> AI

    เพราะ AI ถูกสร้างจากข้อมูลของมนุษย์ และเรามองได้ว่า AI เป็นเหมือนเป็นมนุษย์คนหนึ่ง

    .

    ข้อ 11. AI as capable but junior assistant

    ถ้าเรามอง AI เป็นคน AI จะเป็นเหมือนผู้ช่วยที่มีความรู้รอบด้านและมีศักยภาพสูง

    แต่สิ่งเดียวที่ผู้ช่วยคนนี้ยังขาดไป คือ ทิศทาง

    .

    ข้อ 12. Even a fried egg is hard to get right

    การทำงานกับ AI ก็เหมือนสั่งไข่ดาว แม้จะดูง่าย แต่ก็ไม่ง่ายอย่างที่คิด

    บางครั้ง เราอยากกินไข่ไม่สุก แต่ได้แบบสุกมาแทน

    บางครั้ง เราอยากให้ AI สร้างรูปในแบบที่เราคิด แต่ไม่เคยได้ภาพนั้นสักที

    .

    ข้อ 13. Principal-agent dilemma

    Principal-agent dilemma เป็น mental model ที่บอกว่า คนทำงาน (agent) มักทำตามความต้องการของคนสั่ง (principal) ไม่ได้ เพราะทั้งสองฝ่ายมีข้อมูลไม่เท่ากัน

    ในตัวอย่าง เราไม่ได้ไข่ดาวที่ต้องการ เพราะคนทอดไข่ไม่รู้ว่าเราชอบไข่สุกหรือไม่สุก

    เช่นเดียวกัน AI สร้างรูปที่เราต้องการไม่ได้ เพราะ AI ไม่รู้ว่ารูปที่เราคิดต้องการเป็นยังไง

    .

    ข้อ 14. Fixing the egg

    ถ้าเราอยากได้ไข่ดาวที่ต้องการ เราจะต้องทำให้ AI รู้เท่ากับเรา เช่น ให้ข้อมูลอย่าง:

    1. Goal: ภาพปลายทางที่เราต้องการ (ภาพแมวน่ารัก)
    2. Steps: ขั้นตอนที่จะไปถึงจุดหมาย (วาดแมวก่อน แล้วค่อยวาดองค์ประกอบอื่น ๆ ในภาพ)
    3. Constraints: ข้อจำกัดหรือสิ่งที่ไม่ควรทำ (เช่น ไม่เอาแมวสีดำ ฉากหลังต้องดูสดใส)

    .

    ข้อ 15. Human in the loop: taste and iterate

    Taste: เมื่อไข่ดาวมาเสิร์ฟ เราจะไม่รู้ว่าไข่ดาวอร่อยไหม จนกว่าจะได้ลองชิมด้วยตัวเอง

    การทำงานกับ AI ก็เช่นกัน เราไม่ควรจะบอกว่า สิ่งที่ AI ส่งกลับมาดีไหม จนกว่าจะได้เช็กด้วยตัวเอง

    Iterate: ถ้าชิมแล้วไข่ดาวไม่อร่อย เราจะบอกกับคนทอดว่า ไม่อร่อยเพราะอะไร และจะทำยังไงให้อร่อยมากขึ้น และรอชิมไข่จานต่อไป

    ถ้าสิ่งที่ AI ส่งกลับมาไม่ตรงใจ เราควรจะบอก AI ว่าอะไรที่ยังไม่ถูกใจ เพื่อให้ AI ปรับผลลัพธ์และส่งกลับมาให้เราเช็กจนกว่าเราจะพอใจกับงานของ AI

    .

    ข้อ 16. Be accountable

    เราควรจะเช็กงานของ AI ทุกครั้ง เพราะถ้าเราไม่รับผิดชอบกับงานของ AI เราอาจจะเป็นเหมือนทนายความจากออสเตรเลียที่ถูกตรวจสอบ หลังจากศาลพบว่าเอกสารที่ทนายนำส่งเป็นข้อมูลที่ไม่มีอยู่จริง

    แม้ทนายจะอ้างว่ารู้เท่าไม่ถึงการณ์ว่า AI ที่บริษัทให้ใช้สามารถสร้างข้อมูลที่ไม่มีอยู่จริงได้ และตัวเองควรตรวจสอบข้อมูลจาก AI ก่อน ศาลยังสั่งให้ทนายงดว่าความด้วยตัวเองเป็นเวลา 2 ปี โดยในระยะเวลานี้จะต้องทำงานเป็นลูกจ้างของคนอื่น และต้องรายงานต่อศาลทุกไตรมาส

    ดังนั้น ไม่ว่างานของ AI จะดูดีขนาดไหน เราควรจะตรวจสอบด้วยตัวเองก่อนที่จะนำงานไปใช้จริง

    👷 Part III. How to Prompt

    .

    ข้อ 17. Prompt and prompt engineering

    Prompt คือ คำสั่งสำหรับทำงานกับ AI ซึ่งจะเป็น:

    • ข้อความ
    • ภาพ
    • เสียง

    หรือสื่ออื่น ๆ ก็ได้

    Prompt engineering คือ การออกแบบ prompt เพื่อทำให้ AI ทำงานได้อย่างมีประสิทธิภาพสูงสุด

    .

    ข้อ 18. Effective prompts

    Prompt ที่ดีมีลักษณะ 3 อย่าง:

    1. Clear: ชัดเจนว่า สิ่งที่ต้องทำคืออะไร
    2. Specific: มีความเจาะจง ไม่คลุมเครือ
    3. Structured: มีโครงสร้างที่ดี รู้ว่าข้อมูลไหนคืออะไรและต้องใช้ยังไง

    นอกจากนี้ ทั้ง 3 อย่างต้องทำงานภายในเป้าหมายและขอบเขตงานที่เราต้องทำ

    .

    ข้อ 19. How and what of prompting

    การเขียน prompt ที่เราจะต้องรู้มี 2 อย่าง:

    1. Prompting technique (how): วิธีเขียน prompt ให้ AI เข้าใจ
    2. Prompting framework (what): สิ่งที่เราจะควรใส่ลงใน prompt

    .

    ข้อ 20. Prompting technique: n-shot

    n-shot technique เป็นการสั่ง AI โดยให้ตัวอย่าง (shot) และแบ่งได้เป็น 3 ประเภท:

    • Zero-shot: สั่งโดยไม่ให้ตัวอย่าง
    • One-shot: สั่งโดยให้ 1 ตัวอย่าง
    • Few-shot: สั่งโดยให้หลายตัวอย่าง

    เราจะใช้ shot น้อยเมื่อต้องการให้คำตอบของ AI มีความหลากหลาย (มีความสร้างสรรค์)

    และใช้ shot เยอะเมื่อต้องการให้คำตอบของ AI ใกล้เคียงกับภาพที่เราต้องการมากที่สุด

    ตัวอย่างการใช้ n-shot:

    จะสังเกตว่า ยิ่งให้ shot เยอะ คำตอบของ AI ก็จะยิ่งใกล้เคียงกับตัวอย่างมากขึ้น (zero-shot ให้สัตว์ป่า แต่ few-shot ให้สัตว์เลี้ยง)

    .

    ข้อ 21. Prompting technique: COT

    COT ย่อมาจาก chain-of-thought ซึ่งเป็นวิธีเขียน prompt โดยกำหนดวิธีคิดให้กับ AI

    เช่น แทนที่ให้ AI แก้โจทย์เลขในทันที:

    A ซื้อส้ม 2 ลูก ลูกละ 10 บาท A ต้องจ่ายเงินเท่าไร

    เราจะสอนให้ AI คิดก่อน:

    A ซื้อส้ม 2 ลูก ลูกละ 10 บาท
    วิธีคิด:
    1. หาว่า ส้มราคาลูกละเท่าไร
    2. คูณจำนวนราคาด้วยจำนวนส้มที่ต้องซื้อ
    A ต้องจ่ายเงินเท่าไร

    COT เหมาะกับงานที่ซับซ้อนหรือมีหลายขั้นตอน เช่น:

    • แก้สมการเลข
    • วิเคราะห์งานวิจัย
    • การวางแผนเชิงกลยุทธ์

    .

    ข้อ 22. Prompting framework: theatre model

    Theatre model เป็นแนวการเขียน prompt ที่มนุษย์เป็นเหมือนผู้กำกับ และ AI เป็นนักแสดงบนเวทีของเรา

    Theatre model ประกอบด้วย 6 ส่วน ได้แก่:

    1. Role: บทบาทของ AI
    2. Context: setting ของละคร (บริบทในการทำงาน)
    3. Task: การเดินเรื่อง (เป้าหมาย ขั้นตอน และข้อจำกัด)
    4. Output format: จุดจบของเรื่องจะเป็นยังไง (ส่งที่ AI ต้องส่งให้เรา)
    5. Input: อุปกรณ์ที่จะให้นักแสดงใช้ (ข้อมูลสำหรับ AI)
    6. Execution: “Action!” (คำสั่งให้ AI)

    ตัวอย่างการใช้ theatre model เพื่อสร้างสูตรอาหารใหม่:

    PartExample
    Roleคุณเป็น cook มืออาชีพ มีประสบการณ์ทำงานอาหารไทยและนานาชาติมากกว่า 30 ปี
    Contextคุณกำลังเข้าร่วมแข่งอยู่ในรายการทำอาหาร เพื่อชิงเงินรางวัล 10 ล้านบาท โจทย์คืออาหารไทยฟิวชั่น
    Taskคิดสูตรอาหารไทยฟิวชัน โดยต้องมีวัตถุดิบที่กำหนดอยู่ในอาหาร

    ตั้งชื่อจาน และบอกวิธีการเตรียมอาหาร

    อาหารจะต้องมีความเป็นไทย และถูกปากคนทุกชาติ

    ห้ามเป็นอาหารที่มีอยู่แล้ว
    Output formatส่งกลับมาในรูปแบบนี้:

    ชื่ออาหาร:
    xxx

    ขั้นตอนการทำ:
    xxx
    Inputวัตถุดิบที่ต้องมี:
    1. ใบโหระพา
    2. เนื้อไก่
    3. ผักชี
    Executionคิดสูตรอาหารเลย

    .

    ข้อ 23. Annotation

    เพื่อช่วยให้ AI เข้าใจ prompt ได้มากขึ้น เราควรจัด format ให้อ่านง่ายโดยใช้ XML tags และ markdown:

    • XML tags เช่น <example>ตัวอย่าง</example>
    • Markdown เช่น # และ *

    อ่านเพิ่มเติมเกี่ยวกับ XML tags และ markdown

    .

    ข้อ 24. Iterate

    Prompt แรกอาจจะไม่ให้ในสิ่งที่เราต้องการเสมอไป

    สิ่งที่เราต้องทำ คือ วิเคราะห์ว่า ผลลัพธ์ยังขาดอะไรไป และมีส่วนไหนของ prompt ที่เราปรับได้ แล้วส่ง prompt ที่แก้แล้วให้ AI อีกครั้ง

    ทำอย่างนี้วนไปจนกว่าจะได้ผลลัพธ์ที่เราต้องการ

    .

    ข้อ 25. Ask AI

    ถ้าไม่รู้ว่าจะเขียน prompt ยังไง หรือ prompt ยังขาดอะไรไป เราสามารถถาม AI ได้ให้ช่วยเราได้

    ตัวอย่าง:


    .

    ข้อ 26. AI, more agentic

    AI จะทำงานแบบอัตโนมัติมากขึ้น และมีมนุษย์เข้ามาเกี่ยวข้องน้อยลง

    .

    ข้อ 27. Human and AI getting closer

    เพราะ AI จะทำงานได้ด้วยตัวเองมากขึ้น AI จะเข้ามามีบทบาทในการทำงานมากขึ้น ทำให้มนุษย์จะทำงานกับ AI อย่างใกล้ชิดมากขึ้น


    😌 Part V. Be Human

    .

    ข้อ 28. Humans required

    แม้ว่า AI จะสามารถทำงานหลาย ๆ อย่างแทนมนุษย์ได้ แต่ในบางงาน เรายังต้องการมนุษย์ด้วยกันเองอยู่ เช่น:

    • นักบิน: แม้ AI จะขับเครื่องบินได้ แต่เราก็อยากให้มีนักบินที่สามารถแก้ปัญหาเฉพาะหน้าอยู่ในห้องนักบิน
    • หมอ: แม้ AI จะวินิจฉัยโรคได้แม่นยำกว่ามนุษย์ แต่เราก็ยังต้องการให้มีคนบอกข่าวดี/ร้ายเป็นคนที่เข้าใจความรู้สึกของเรา
    • Customer service: บางครั้ง เราก็ต้องการคุยกับคนมากกว่า chatbot ที่ตอบเป็น pattern

    .

    ข้อ 29. Skill, like muscle

    ทักษะก็เป็นเหมือนกล้ามเนื้อ เมื่อไม่ได้ใช้งาน ก็จะอ่อนแอลงเรื่อย ๆ

    ถ้าเราใช้ AI ทำทุกอย่างให้เรา ทักษะที่เราเคยมีก็จะค่อย ๆ หายไป

    .

    ข้อ 30. What not to outsource to AI

    4 ทักษะที่เราควรฝึกพัฒนา และไม่ควรให้ AI ทำแทนเรา ได้แก่:

    1. Thinking: การคิด เพราะถ้าเราคิดไม่ได้แล้ว เราจะไม่ประเมินงานของ AI ได้ว่าดี/ไม่ดี
    2. Learning: ถ้าเราไม่เรียนรู้สิ่งใหม่ ๆ เราจะถูกทิ้งไว้ข้างหลัง โดยเฉพาะในยุคที่การเปลี่ยนแปลงเกิดขึ้นอย่างรวดเร็ว
    3. Writing and reading: การเขียนและการอ่านเป็นทักษะที่ช่วยให้เราคิดและเรียนรู้ได้อย่างมีประสิทธิภาพ
    4. Empathy: การเข้าใจคนอื่นเป็นทักษะที่ช่วยให้เราเข้าใจคนอื่นและเชื่อมโยงถึงกันและกันในแบบที่ AI ยังไม่สามารถทำได้

    .

    ข้อ 31. When to use AI

    3 กรณีที่เราจะใช้ AI:

    1. Routine: ใช้ AI ทำงานจำเจหรืองานที่ต้องเป็นประจำ เพื่อที่เราจะได้โฟกัสงานที่ต้องใช้ความคิดมากขึ้น
    2. What and how: ใช้ AI ทำงานในขณะที่เราโฟกัสกับภาพใหญ่ ซึ่งได้แก่ when (ทำเมื่อไร) และ why (ทำไมต้องทำ)
    3. Brainstorm: ใช้ AI ช่วยระดมความคิด เพราะ AI มีข้อมูลเยอะ และช่วยให้เห็นมุมมองที่เราคิดไม่ถึงมาก่อนได้

    🔔 ใครที่ชอบบทความนี้ ฝากกด subscribe และติดตามกันได้ที่:

  • Python for AI: รวบรวม 8 บทความการทำงานกับ AI ใน Python

    Python for AI: รวบรวม 8 บทความการทำงานกับ AI ใน Python

    ในช่วงที่ผ่านมา ผมมีโอกาสแชร์การใช้ Python เพื่อทำงานกับ AI จากการที่ผมได้ทำงานเกี่ยวกับ AI มากขึ้น

    เพื่อช่วยในการแชร์ ผมได้สรุปเนื้อหาไว้ใน 8 บทความ (5 กลุ่ม) ซึ่งทุกคนสามารถอ่านตามได้ดังนี้:

    🐍 Session #1. Intro to Python:

    • Intro to Python: แนะนำการใช้งานและประเภทข้อมูลใน Python

    🔁 Session #2. Control flow:

    • Control flow: สอนใช้ statement เช่น if, for, while เพื่อควบคุมการทำงานของ Python

    💻 Session #3. Functions:

    • Functions: สอนการสร้าง function ใน Python

    📦 Session #4. Packages and files:

    • open(): สอนการทำงานกับไฟล์ด้วย base Python
    • json package: สอนการทำงานกับ JSON ด้วย json package
    • pd.read_csv(): สอนการทำงานกับ CSV ด้วย pandas package

    🤖 Session #5. AI packages:

    • openai package: สอนการทำงานกับ AI API ผ่าน openai package
    • google-genai package: สอนการใช้ google-genai เพื่อทำงานกับ Gemini API
  • สรุป 7 ประเด็น AI Transformation จาก 7 Speakers ในงาน DigiTech ASEAN Thailand 2025

    สรุป 7 ประเด็น AI Transformation จาก 7 Speakers ในงาน DigiTech ASEAN Thailand 2025

    ในบทความนี้ ผมจะมาสรุป 7 ประเด็น AI transformation จาก 7 speakers บนเวที Global Tech Conference ในงาน DigiTech ASEAN Thailand 2025 เมื่อวันที่ 19 พ.ย. ที่ผ่านมา:

    1. Future trends: แนวโน้ม AI ในโลกอนาคต
    2. How to AI transformation: แนวคิดในการทำ AI transformation ในองค์กร
    3. Factors to consider: ปัจจัยที่ควรพิจารณาในการทำ AI transformation
    4. People management: การบริหารพนักงานในองค์กรในยุคของ AI
    5. Risks to consider: ความเสี่ยงในการทำ AI transformation
    6. AI solution showcases: ตัวอย่าง AI solutions จาก SCBX และ KBTG
    7. Surviving in the age of AI: แนวคิดในการเอาตัวรอดในยุค AI

    ถ้าพร้อมแล้ว ไปเริ่มกันเลย


    1. 🚀 Topic 1. Future Trends
      1. 🤖 AI Is Here to Stay.
      2. 😎 AI, More Agentic
      3. 🤝 Human-AI Collaboration
    2. 👷 Topic 2. How to AI Transformation
      1. 🫨 Pain Points
      2. 💪 Prioritise, Relentlessly
      3. ⛰️ Set Goal & Plan
      4. 👄 Communicate
      5. 📋 Track Success
    3. ☝️ Topic 3. Factors to Consider
    4. 🤠 Topic 4. People Management
      1. ♥️ Mindset
      2. 😈 Building Culture
      3. 👶 Generation Gap
    5. 🚨 Topic 5. Risks to Consider
    6. 👾 Topic 6. AI Solution Showcases: SCBX & KBTG
      1. 🟣 SCBX
    7. 🟢 KBTG
    8. 💡 Topic 7. Surviving in the Age of AI
    9. 🎤 List of Sessions
    10. 🔗 Related Links

    ประเด็นในเรื่อง future trends มีอยู่ 3 เรื่อง ได้แก่:

    1. AI is here to stay
    2. AI, more agentic
    3. Human-AI collaboration

    .

    🤖 AI Is Here to Stay.

    AI ก็เหมือนกับคอมพิวเตอร์ในยุคก่อน เราไม่มีทางที่จะย้อนกลับไปในยุคที่ไม่มี AI อีกแล้ว และเราต้องเรียนรู้ที่จะอยู่ร่วมกับ AI

    .

    😎 AI, More Agentic

    การใช้งาน AI เปลี่ยนจากการใช้ GenAI มาเป็น agentic AI มากขึ้นเรื่อย ๆ (สอดคล้องกับเวทีในปีก่อนที่บอกว่า การใช้ AI ในปี 2025 จะกลายมาเป็น agentic AI)

    .

    🤝 Human-AI Collaboration

    มนุษย์จะยังคงเป็นส่วนสำคัญในโลก แต่บทบาทของมนุษย์จะเปลี่ยนแปลงไป แต่เปลี่ยนแปลงไปยังไง ยังไม่มีใครรู้แน่ชัด


    👷 Topic 2. How to AI Transformation

    แนวคิดในการทำ AI transformation ในองค์กรมีอยู่ 5 ขั้นตอน ได้แก่:

    1. Pain points
    2. Prioritise, relentlessly
    3. Set goal and plan
    4. Communicate
    5. Track success

    .

    🫨 Pain Points

    เราไม่ควร transform เพียงเพราะองค์กรอื่นทำได้ เพราะแต่ละองค์กรมีบริบทที่แตกต่างกัน การที่ Amazon ทำได้ ไม่ได้หมายความว่า Google หรือเราจะทำได้ด้วยวิธีการเดียวกัน

    AI transformation ไม่มี one-size-fits-all และสิ่งที่เราต้องการหา pain point ให้เจอ: อะไรคือปัญหาที่เราต้องการแก้ในองค์กรของเรา?

    วิธีหนึ่งที่ช่วยให้เรามองเห็นปัญหาได้ คือ การลงไปดูหน้างานจริง

    ยกตัวอย่าง Makro ที่พบว่า พนักงานมีปัญหาในการยกถุงผงซักฟองลงจากชั้นวาง เพราะพนักงานส่วนใหญ่เป็นผู้หญิงและถุงผงซักฟองมีน้ำหนักมาก Makro จะไม่เห็นปัญหานี้เลยถ้าผู้จัดการนั่งอยู่แต่ในออฟฟิศ เพราะบนรายงานการขาย เราจะเห็นแค่ว่าผงซักฟองเป็นสินค้าขายดี

    .

    💪 Prioritise, Relentlessly

    ในองค์กร เราอาจจะมีปัญหามากมายที่เราต้องการแก้ไข:

    • เพิ่ม productivity
    • พัฒนา product ใหม่
    • เพิ่ม engagement กับลูกค้า

    แต่ด้วยเวลาและงบประมาณ เราจะต้องเลือกว่าจะจัดการปัญหาไหนก่อน

    เราจะต้องคอยจัดลำดับความสำคัญอย่างไม่ลดละเพื่อไม่ให้เราหลงทางในยุคที่การเปลี่ยนแปลงและปัญหาเกิดขึ้นอย่างรวดเร็ว

    เรามี 3 frameworks ที่ช่วยเราได้:

    Framework #1. Impact: ดูว่า AI solution ที่เราจะทำ สามารถใช้ได้ทั้งในระดับกลุ่ม (group level) และบริษัท (company level) ไหม

    Framework #2. Priority: ดูความเป็นไปได้ในการประยุกต์ใช้ (feasibility) และคุณค่าทางธุรกิจ (business value) ที่เราจะได้รับ

    Framework #3. Innovation: ดูว่า AI solution ที่เราต้องการมีคนทำอยู่แล้วไหม (off-the-shelf solution) และระดับความต้องการของเรา (need)

    .

    ⛰️ Set Goal & Plan

    เมื่อเราได้ปัญหาที่เราต้องการแก้ไขแล้ว สิ่งต่อไปที่เราต้องทำ คือ กำหนดเป้าหมายและวางแผน

    เราอาจจะวางแผน 1 ปี, 3 ปี, 5 ปี ซึ่งยิ่งแผนระยะยาวเท่าไร ก็ยิ่งมีโอกาสจะเปลี่ยนได้ง่าย เพราะเทคโนโลยีมีการเปลี่ยนแปลงอย่างรวดเร็ว อย่างแผน 5 ปีในปีนี้อาจแตกต่างกันอย่างสิ้นเชิงกับแผน 5 ปีในปีหน้า

    แต่มีแผนดีกว่าไม่มีแผน เพราะอย่างน้อย เราจะรู้ว่าเราจะต้องทำอะไร และแม้แผนจะเปลี่ยน แต่เป้าหมายเรายังเหมือนเดิม

    .

    👄 Communicate

    การตั้งเป้าหมายไม่พอ เรายังต้องสื่อสารและทำให้แน่ใจว่า ทุกคนเห็นและเข้าใจเป้าหมายเดียวกัน

    ถ้าเราทำให้ทุกคนเห็นเป้าหมายเดียวกันได้ แม้ต่างคนต่างจะมี job to be done ที่แตกต่างกัน แต่ทุกคนก็จะยังเดินไปในทิศทางเดียวกัน

    .

    📋 Track Success

    สุดท้าย เราจะต้องคอยติดตามผลความคืบหน้า เพื่อให้เราปรับเปลี่ยนวิธีการตามหน้างาน และทำให้แน่ใจว่า เรายังมุ่งหน้าไปในทิศที่เราต้องการอยู่


    ☝️ Topic 3. Factors to Consider

    เรามีปัจจัยที่ต้องพิจารณาในการทำ AI transformation มีอยู่ 4 อย่าง ได้แก่:

    1. People: พนักงานและลูกค้าของเรา
    2. Culture: วัฒนธรรมขององค์กร
    3. Systems/tools/tech: ระบบ เครื่องมือ และเทคโนโลยี
    4. Finance: เงิน (เพราะองค์กรอยู่ได้ด้วยเงินทุน)

    People เป็นสิ่งที่เราต้องให้ความสำคัญเป็นอันดับแรก เพราะถ้าเราโฟกัสที่ technology แต่พนักงานหรือลูกค้าไม่พร้อมที่จะใช้เครื่องมือใหม่ เราอาจจะได้ AI solution ที่ไม่มีใครใช้


    🤠 Topic 4. People Management

    การบริหารพนักงานในยุคของ AI มีอยู่ 3 หัวข้อ ได้แก่:

    1. Mindset
    2. Building culture
    3. Generation gap

    .

    ♥️ Mindset

    สิ่งที่เราต้องการในพนักงาน คือ mindset เพราะถ้าขาด mindset ที่เหมาะสม ไม่ว่าเราจะทำ AI transformation ดีขนาดไหน ก็อาจจะไม่สำเร็จ

    Mindset อาจจะเริ่มที่ตัวเราก่อน เช่น ถ้าเราอยากทำ AI transformation แต่เราไม่ชอบ AI เราต้องหันกลับมามองว่า ถ้า AI เป็นสิ่งที่หลีกเลี่ยงไม่ได้ เป็นเราหรือเปล่าที่จะต้องเปลี่ยน

    ถ้าเราไม่เปลี่ยน โลกก็จะเคลื่อนไปข้างหน้าโดยไม่มีเรา

    .

    😈 Building Culture

    สิ่งที่เราต้องการในองค์กร คือ diversity

    เราไม่ต้องการพนักงานที่มีลักษณะนิสัยเหมือนกันหมด เพราะ culture ที่มีคนแบบเดียวกัน คือ culture ที่จะหยุดนิ่ง เปลี่ยนแปลงได้ยาก

    ในการคัดเลือกพนักงาน เราไม่ควรปล่อยให้หัวหน้างานเลือกพนักงานเอง แต่ควรมีกระบวนการที่จะช่วยให้เราคัดเลือกพนักงานอย่างไม่ลำเอียงได้ เช่น มีการสัมภาษณ์หลายครั้งเพื่อให้ได้ความเห็นจากหลายมุมมอง

    นอกจากนี้ เราควรบอกว่า คนที่เป็น “ขบถ” หรือแตกต่าง มากกว่ามองหา “ขนมเปี๊ยะ” หรือคนที่ดูภายนอกหน้าตาเหมือนกันไปหมด

    .

    👶 Generation Gap

    Generation gap เป็นสิ่งที่หลีกเลี่ยงได้ยาก โดยเฉพาะในองค์กรขนาดใหญ่

    แต่ละ generation มีมุมมอง จุดแข็งและจุดอ่อนที่แตกต่างกันไป ซึ่งบางทีก็ทำให้เกิด conflict ระหว่างพนักงานได้

    ถ้าเราอยากทำให้เกิด collaboration แทน เราจะต้องโฟกัสไปที่จุดแข็งของแต่ละ generation เช่น:

    • Generation ที่อายุมากกว่า อาจจะไม่เชี่ยวชาญเทคโนโลยีเท่ากับรุ่นใหม่ แต่มีประสบการณ์และความเชี่ยวชาญมากกว่า
    • Generation ที่อายุน้อยกว่า แม้จะไม่มีประสบการณ์เท่ากับคนรุ่นก่อน แต่ก็มีความเชี่ยวชาญและคุ้นชินกับเทคโนโลยีใหม่ ๆ มากกว่า

    ถ้าเราสามารถดึงจุดแข็งของแต่ละรุ่นขึ้นมา เราก็จะทำให้เกิด collaboration ระหว่างพนักงานในองค์กรได้


    🚨 Topic 5. Risks to Consider

    ความเสี่ยงในการทำ AI transformation มีอยู่ 8 ข้อ ได้แก่:

    1. Cybersecurity threat: ความปลอดภัยของระบบ
    2. Employee resistance: การต่อต้านของพนักงาน
    3. Cost overrun: ใช้งบประมาณเกินกำหนด
    4. Data loss: การสูญเสียข้อมูล โดยเฉพาะข้อมูลที่สำคัญต่อองค์กร
    5. Vendor lock-in: การพึ่งพา vendor แค่เจ้าเดียว
    6. Compliance issues: ปัญหาการปฏิบัติตามกฎ ระเบียบ และข้อบังคับต่าง ๆ
    7. System downtime: ระบบหยุดทำงานและส่งผลต่อการทำงานของพนักงาน
    8. Integration challenges: ความท้าทายในการเชื่อมต่อกับระบบอื่น ๆ

    👾 Topic 6. AI Solution Showcases: SCBX & KBTG

    .

    🟣 SCBX

    SCBX นำเสนอ 2 ตัวอย่างการใช้ AI เพื่อแก้ปัญหาในองค์กร ได้แก่:

    1. ARIS (Advanced Reputation Intelligence System)
    2. PITAG (Predictive Intelligence for Tactical Anti-fraud Guardian)

    Case 1. ARIS เป็นระบบตรวจจับ incident หรือเหตุการณ์ที่อาจสร้างความเสียหายต่อชื่อเสียงขององค์กร ซึ่งช่วยให้ SCBX สามารถรับรู้และรับมือ incident ต่าง ๆ (เช่น ข่าวว่าแอป SCB ถูกแฮ็ก) ได้อย่างทันท่วงที

    ARIS มีการทำงาน 4 ขั้นตอน:

    1. Data pruning: คัดกรอง content บนอินเทอร์เน็ตที่เกี่ยวข้องกับ SCBX (เช่น แอป SCB)
    2. Sentiment analysis: แยกประเภท content เป็นเขียว เหลือง และแดง พร้อมจับกลุ่ม content ที่อยู่ในหัวข้อเดียวกัน (เช่น แอป SCB ขัดข้อง)
    3. Incident detection: ประเมินว่า แต่ละหัวข้อ (แอป SCB ขัดข้อง) เป็น incident ไหม และถ้าใช่ เป็น incident ระดับไหน
    4. Real-time dashboard: แสดงผลบนหน้าจอ เพื่อให้พนักงานรับรู้ถึง incident ได้แบบ real-time

    Case 2. PITAG เป็น agentic AI สำหรับตรวจจับ fraud และแบ่งการทำงานเป็น 4 ขั้นตอน:

    1. Data collector agent: รวบรวมข้อมูลเกี่ยวกับลูกค้า ทั้งข้อมูลบนระบบ และข้อมูลจากแหล่งอื่น ๆ (เช่น หน่วยงานทางการเงินที่เกี่ยวข้อง)
    2. Investigator agent: ตรวจสอบข้อมูลและประเมินแนวโน้มที่จะเป็น fraud
    3. Executor agent: จัดการกับเคสความเสี่ยง (เช่น โทรขอข้อมูลเพิ่มเติมจากลูกค้า หรือจำกัดวงเงินในการใช้งาน)
    4. Governance agent: กำกับการทำงานของ agents ให้เป็นไปตามกฎระเบียบข้อบังคับ

    .

    🟢 KBTG

    KBTG นำเสนอ 6 AI use cases ในองค์กร ได้แก่:

    1. Increase revenue: เพิ่มรายได้ให้กับองค์กร เช่น เพิ่มยอด sales leads, เพิ่มยอด conversion ผ่าน product และ promotion recommendation
    2. Reduce risk: ลดความเสี่ยงในการทำธุรกรรม เช่น การประเมิน credit score
    3. Streamline operation: ลดเวลาในการทำงาน เช่น ใช้ AI ช่วยประเมินความเสียหายของรถยนต์ และปรับแต่งรูปอสังหาริมทรัพย์เพื่อลงประกาศขาย
    4. Protect customers: รักษาความปลอดภัยให้กับลูกค้า เช่น AINU ระบบยืนยันตัวตนด้วย AI
    5. Improve productivity: เพิ่ม productivity เช่น ใช้ AI ช่วยเขียน code ซึ่งลดเวลาจากหลายชั่วโมงเหลือไม่กี่นาที
    6. New products/services: พัฒนา products ใหม่ ๆ เช่น แอปเหมียวจด และ Future You แอปสำหรับพัฒนาตัวเองผ่านการพูดคุยกับตัวเองในอนาคต

    💡 Topic 7. Surviving in the Age of AI

    ผมขอทิ้งท้ายบทความด้วย 10 ข้อคิดดี ๆ ในการเอาตัวรอดในยุค AI:

    1. Focus on one problem at a time. If you focus on many problems, a year from now you’ll still be where you are now.
    2. Break your goal into smaller ones. Get the small wins first.
    3. Don’t be afraid to fail; if you are, you’ve already failed.
    4. ผิดพลาดได้ แต่สิ่งที่สำคัญ คือ จะทำยังไงให้ไม่ผิดซ้ำ
    5. Be resilient, be persistent.
    6. เราไม่ต้องกลัว AI แทนที่เรา ถ้าเรายังพัฒนาตัวเองอยู่เสมอ
    7. คนที่จะมาแทนที่เราไม่ใช่ AI แค่คือคนที่ใช้ AI เก่งกว่าเรา
    8. สร้าง blue ocean ของตัวเอง ด้วยการทำสิ่งที่ไม่เหมือนใคร
    9. ทำงานเร็วจะต้องตั้งอยู่บนความเป็นจริงและตรงเป้าหมาย ไม่อย่างนั้น ก็จะเป็นความเร็วไร้ทิศทางที่ทำให้เราพังเร็วขึ้น
    10. ความเร็วไม่ใช่ทุกอย่าง แต่ละคนเก่งไม่เหมือนกัน เราจะต้องหาให้เจอว่า ใครทำอะไรได้ดีและหางานนั้นให้เขาทำ

    🎤 List of Sessions

    7 หัวข้อบนเวที Global Tech Conference:

    1. ดิจิทัลไม่ใช่แค่ฝ่าย IT แต่คือภารกิจของ CEO ในการขับเคลื่อนองค์กร โดย คุณสุธีรพันธุ์ สักรวัตร, ประธานเจ้าหน้าที่ฝ่ายการตลาด, SCBX
    2. จากวิสัยทัศน์สู่ความเร็ว: คู่มือทรานส์ฟอร์มองค์กรสู่ยุคเรียลไทม์ โดย ดร.ธีรเดช ดำรงค์พลาสิทธิ์, หัวหน้าคณะผู้บริหารด้านกลุ่มธุรกิจองค์กร, True Corporation
    3. Technology & Talent Transformation โดย คุณ Shaun Wong, Chief Corporate Planning Officer, CP Axtra
    4. พลิกมุมคิด ผู้นำ ธุรกิจยุคใหม่: ทรานส์ฟอร์มองค์กรอย่างไรให้รอดในปี 2030 โดย คุณกานติมา เลอเลิศยุติธรรม, รองประธานเจ้าหน้าที่บริหาร ด้านธุรธิจองค์กร, AIS
    5. Smart CEO in AI Era: ผู้นำองค์กรต้องปรับตัวอย่างไรในโลกที่ AI วิ่งเร็วกว่าเรา โดย ดร.ธรรม์ธีร์ สุกโชติรัตน์, CEO, JIB AI
    6. จากดิจิทัลสู่ความอัจฉริยะ: ก้าวต่อไปของเทคโนโลยีธุรกิจยุคใหม่ โดย ดร.ทัดพงศ์ พงศ์ถาวรกมล, กรรมการผู้จัดการ, KBTG
    7. The New Corporate DNA: สร้างองค์กรไว ปรับง่ายโตได้ทุกจังหวะ โดย คุณเปา พีรดนย์ เหมยากร, ประธานเจ้าหน้าที่บริหารและผู้ก่อตั้ง, iHAVECPU

  • วิเคราะห์ resumes ใน 3 ขั้นตอน ด้วย Gemini ผ่าน OpenAI library ใน Python — ตัวอย่างการทำงานใน Google Colab

    วิเคราะห์ resumes ใน 3 ขั้นตอน ด้วย Gemini ผ่าน OpenAI library ใน Python — ตัวอย่างการทำงานใน Google Colab

    บทความนี้เหมาะสำหรับบริษัทหรือ HR ที่ต้องการใช้ AI ช่วยลดเวลาในการคัดกรองผู้สมัคร เพราะเราจะมาดูวิธีวิเคราะห์ resumes ด้วย Gemini ผ่าน OpenAI library ใน Python กัน

    บทความนี้แบ่งเป็น 3 ส่วนตามขั้นตอนการวิเคราะห์ ได้แก่:

    1. Install and load libraries
    2. Set input
    3. Analyse resumes

    โดยเราจะไปดูตัวอย่างโดยใช้ Google Colab กัน (ดู code ทั้งหมดได้ที่นี่)

    ถ้าพร้อมแล้ว ไปเริ่มกันเลย


    1. ⬇️ 1. Install & Load Libraries
    2. 🔧 2. Set the Input
      1. 🧑‍💻 (1) Client
      2. 💼 (2) JD
      3. 📄 (3) Resumes
    3. ⚡ 3. Analyse the Resumes
      1. 🤖 (1) Function เรียกใช้งาน Gemini
      2. ➕ (2) Function ใส่ Input ใน Prompt
      3. 🤔 (3) วิเคราะห์ Resumes
      4. 👀 (4) Print ผลลัพธ์
    4. 😺 Code & Input Examples
    5. 📃 References

    ⬇️ 1. Install & Load Libraries

    ในขั้นแรก เราจะเรียกติดตั้งและโหลด libraries ที่จำเป็นดังนี้:

    • openai: สำหรับเรียกใช้ AI ผ่าน API
    • drive จาก google.colab: สำหรับเชื่อมต่อกับไฟล์ใน Google Drive
    • PyPDF2: สำหรับดึง text ออกจากไฟล์ PDF
    • textwrap: สำหรับลบย่อหน้าออกจาก string
    • Console จาก rich.console และ Markdown จาก rich.markdown: สำหรับ render การแสดงผล string ให้อ่านง่ายขึ้น

    ติดตั้ง:

    # Install libraries
    !pip install PyPDF2
    

    Note: Google Colab มี libraries อื่น ๆ อยู่แล้ว ทำให้เราแค่ต้องติดตั้ง PyPDF2 อย่างเดียว

    โหลด:

    # Load libraries
    
    # Connect to Gemini
    from openai import OpenAI
    
    # Connect to Google Drive
    from google.colab import drive
    
    # Extract text from PDF
    import PyPDF2
    
    # Dedent text
    import textwrap
    
    # Render markdown text
    from rich.console import Console
    from rich.markdown import Markdown
    

    🔧 2. Set the Input

    สำหรับการวิเคราะห์ resumes เราต้องการ input 3 อย่าง ได้แก่:

    1. Client: สำหรับเรียกใช้ Gemini API
    2. Job description (JD): รายละเอียดตำแหน่งงานที่กำลังต้องการพนักงาน
    3. Resumes: ข้อมูล resume ที่เราต้องการวิเคราะห์

    เราไปดูวิธีกำหนด input แต่ละตัวกัน

    .

    🧑‍💻 (1) Client

    เราสามารถกำหนด client ได้ด้วย OpenAI() ซึ่งต้องการ 2 arguments:

    1. api_key: API key สำหรับเชื่อมต่อ API
    2. base_url: base URL สำหรับเรียกใช้ AI service ซึ่งสำหรับ Gemini เราต้องกำหนดเป็น "<https://generativelanguage.googleapis.com/v1beta/openai/>"

    ในตัวอย่าง เราจะเรียกใช้ OpenAI() แบบนี้:

    # Create a client
    client = OpenAI(api_key="YOUR_API_KEY", base_url="<https://generativelanguage.googleapis.com/v1beta/openai/>")
    

    Note: ในกรณีใช้งานจริง ให้แทนที่ "YOUR_API_KEY" ด้วย API key จริง (ดูวิธีสร้าง API key ฟรีได้ที่ Using Gemini API keys)

    .

    💼 (2) JD

    Input ที่ 2 สำหรับการวิเคราะห์ คือ JD ซึ่งเราสามารถกำหนดเป็น string ได้แบบนี้:

    # Set the job description (JD)
    web_dev_jd = """
    Senior Web Developer
    
    We're looking for a Senior Web Developer with a strong background in front-end development and a passion for creating dynamic, intuitive web experiences. The ideal candidate will have extensive experience with the entire development lifecycle, from project conception to final deployment and quality assurance. This role requires a blend of technical skill, creative collaboration, and a commitment to solving complex programming challenges.
    
    Responsibilities
    * Cooperate with designers to create clean, responsive interfaces and intuitive user experiences.
    * Develop and maintain project concepts, ensuring an optimal workflow throughout the development cycle.
    * Work with a team to manage large, complex design projects for corporate clients.
    * Complete detailed programming tasks for both front-end and back-end server code.
    * Conduct quality assurance tests to discover errors and optimize usability for all projects.
    
    Qualifications
    * Bachelor's degree in Computer Information Systems or a related field.
    * Proven experience in all stages of the development cycle for dynamic web projects.
    * Expertise in programming languages including PHP OOP, HTML5, JavaScript, CSS, and MySQL.
    * Familiarity with various PHP frameworks such as Zend, Codeigniter, and Symfony.
    * A strong background in project management and customer relations.
    """
    

    Note: ในกรณีที่ JD เป็นไฟล์ PDF เราสามารถใช้วิธีดึงข้อมูลแบบเดียวกันกับ resumes ได้

    .

    📄 (3) Resumes

    Input สุดท้าย คือ resumes ที่เราต้องการวิเคราะห์

    ในตัวอย่าง เราจะดึงข้อมูล resumes จากไฟล์ PDF ใน Google Drive ใน 3 ขั้นตอน ได้แก่:

    ขั้นที่ 1. เชื่อมต่อ Google Drive ด้วย drive.mount():

    # Connect to Google Drive
    drive.mount("/content/drive")
    

    Note: Google จะถามยืนยันการให้สิทธิ์เข้าถึงไฟล์ใน Drive ให้เรากดยืนยันเพื่อไปต่อ

    ขั้นที่ 2. กำหนด file path ของไฟล์ PDF ใน Google Drive:

    # Set resume file paths
    rs_file_paths = {
        "George Evans": "/content/drive/My Drive/Resumes/cv_george_evans.pdf",
        "Robert Richardson": "/content/drive/My Drive/Resumes/cv_robert_richardson.pdf",
        "Christine Smith": "/content/drive/My Drive/Resumes/cv_christine_smith.pdf"
    }
    

    Note: ในตัวอย่าง จะเห็นว่า เรามี resumes 3 ใบ (ดาวน์โหลด resumes ฟรีได้ที่ www.coolfreecv.com)

    ขั้นที่ 3. ดึง text ออกจาก resumes ด้วย for loop และ PyPDF2:

    # Extract resume texts
    
    # Instantiate a collector
    rs_texts = {}
    
    # Loop through resume files to get text
    for key in rs_file_paths:
    
        # Instantiate an empty string to store the extracted text
        rs_text = ""
    
        # Open the PDF file
        reader = PyPDF2.PdfReader(rs_file_paths[key])
    
        # Loop through the pages
        for i in range(len(reader.pages)):
    
            # Extract the text from the page
            text = reader.pages[i].extract_text()
    
            # Append the text to the string
            rs_text += text
    
        # Collect the extracted text
        rs_texts[key] = rs_text
    

    ตัวอย่าง PDF และข้อมูลที่ดึงจาก PDF:

    Source: www.coolfreecv.com
    Contact  
    +1 (970) 343  888 999 
    george.evans@gmail.com  
    <https://www.coolfreecv.com>  
    32 ELM STREET MADISON, SD 
    57042  
     George  Evans  
    PHP / OOP   
    Zend Framework  Summary  
    Senior Web Developer specializing in front end development . 
    Experienced with all stages of the development cycle for dynamic 
    web projects. Well -versed in numerous programming languages 
    including HTML5, PHP OOP, JavaScript, CSS, MySQL. Strong 
    background in project management and customer relations. 
    Perceived as versatile, unconventional and committed, I am 
    looking for new and interesting programming challenges.  
    Experience  
    Web Developer - 09/201 8 to 05/20 22 
    Luna Web Design, New York  
    • Cooperate with designers to create clean interfaces and 
    simple, intuitive interactions and experiences.  
    • Develop project concepts and maintain optimal workflow.  
    • Work with senior developer to manage large, complex 
    design projects for corporate clients.  
    • Complete detailed programming and development tasks 
    for front end public and internal websites as well as 
    challenging back -end server code.  
    • Carry out quality assurance tests to discover errors and 
    optimize usability.  
    Education  
    Bachelor of Science: Computer Information Systems  - 2018  
    Columbia University, NY  
     
    Certifications  
    PHP Framework (certificate): Zend, Codeigniter, Symfony. 
    Programming Languages: JavaScript, HTML5, PHP OOP, CSS, SQL, 
    MySQL.  
    Reference  
    Adam Smith - Luna Web Design  
    adam.smith@luna.com  +1(970 )555 555  Skills   
    JavaScript   Symfony Framework
    

    ⚡ 3. Analyse the Resumes

    ในขั้นสุดท้าย เราจะเปรียบเทียบความเหมาะสมของ resumes กับตำแหน่งงาน (JD) ใน 4 ขั้นตอน ดังนี้:

    1. สร้าง function เพื่อเรียกใช้ Gemini
    2. สร้าง function เพื่อใส่ input ใน prompt
    3. วิเคราะห์ resumes โดยใช้ for loop และ functions จากข้อ 1, 2
    4. Print ผลการวิเคราะห์

    .

    🤖 (1) Function เรียกใช้งาน Gemini

    ในขั้นแรก เราจะสร้าง function สำหรับเรียกใช้ Gemini เพื่อให้ง่ายในการใช้งาน AI

    ในตัวอย่าง เราจะกำหนด 3 arguments สำหรับ function:

    1. prompts: list เก็บ system prompt และ user prompt
    2. model: model ของ Gemini ที่เราจะเรียกใช้ (เช่น Gemini 2.5 Flash)
    3. temp: ระดับความคิดสร้างสรรค์ของ model โดยมีค่าระหว่าง 0 และ 2 โดย 0 จะทำให้ model ให้คำตอบเหมือนกันทุกครั้ง และ 2 คำตอบจะแตกต่างกันทุกครั้ง
    # Create a function to get a Gemini response
    def get_gemini_response(prompts, model, temp):
    
        # Generate a response
        response = client.chat.completions.create(
    
            # Set the prompts
            messages=prompts,
    
            # Set the model
            model=model,
    
            # Set the temperature
            temperature=temp
        )
    
        # Return the response
        return response.choices[0].message.content
    

    .

    ➕ (2) Function ใส่ Input ใน Prompt

    ในขั้นที่ 2 เราจะสร้าง function เพื่อประกอบ input เข้ากับ prompt เพื่อพร้อมที่จะนำไปใช้ใน function ในขั้นที่ 1

    ในตัวอย่างเราจะสร้าง function แบบนี้:

    # Create a function to concatenate prompt + JD + resume
    def concat_input(jd_text, rs_text):
    
        # Set the system prompt
        system_prompt = """
        # 1. Your Role
        You are an expert technical recruiter and resume analyst.
        """
    
        # Set the user prompt
        user_prompt = f"""
        # 2. Your Task
        Your task is to meticulously evaluate a candidate's resume against a specific job description (JD) and provide a detailed pre-screening report.
    
        Your analysis must be structured with the following sections and include specific, data-driven insights.
    
        ## 1. Strengths
        - Identify and elaborate on top three key strengths.
        - For each strength, briefly provide specific evidence from the resume (e.g., "The candidate's experience with Python and Django, as shown in their role at Acme Corp, directly addresses the JD's requirement for...") and explain how it directly fulfills a requirement in the JD.
    
        ## 2. Weaknesses
        - Identify top three areas where the candidate's experience or skills may not fully align with the JD's requirements.
        - For each point, briefly explain the potential concern and why it might be a risk for the role (e.g., "The JD requires experience with AWS, but the resume only mentions exposure to Azure. This could indicate a gap in cloud infrastructure expertise.").
    
        ## 3. Candidate Summary
        - Draft a concise summary of the candidate's professional background.
        - Emphasise their JD-relevant core responsibilities, key achievements, and career progression as evidenced in the resume.
    
        ## 4. Overall Fit Score
        - Provide a numerical score from 1 to 100, representing the overall alignment of the candidate's profile with the JD.
        - A higher score indicates a stronger match: 80-100 = best match; 60-80 = strong match; 0-40 = weak match.
    
        ## 5. Hiring Recommendation
        - Conclude with a clear, binary hiring recommendation: "🟢 Proceed to interview", "🟡 Add to waitlist", or "🔴 Do not proceed".
        - Justify this recommendation with a brief, objective explanation based on the analysis above.
    
        ---
    
        # 3. Your Output
        - Use a professional and objective tone.
        - Base your analysis solely on the provided resume and JD. Do not make assumptions.
        - Be concise and to the point; no more than 30 words per sentence; the hiring manager needs to quickly grasp the key findings.
        - Format your final report using markdown headings and bullet points for readability.
    
        Output template:
        '''
        # [candidate's name (Title Case)] ([fit score]/100)
    
        [recommendation]: [justification]
    
        ## Profile Summary:
        [summary]
    
        ## Strengths:
        - [strength 1]
        - [strength 2]
        - [strength 3]
    
        ## Weaknesses:
        - [weakness 1]
        - [weakness 2]
        - [weakness 3]
        '''
    
        ---
    
        # 4. Your Input
        **1. JD:**
        {jd_text}
    
        **2. Resume:**
        {rs_text}
    
        ---
    
        Generate the report.
        """
    
        # Collect prompts
        prompts = [
            {
                "role": "system",
                "content": textwrap.dedent(system_prompt)
            },
            {
                "role": "user",
                "content": textwrap.dedent(user_prompt)
            }
        ]
    
        # Return the prompts
        return prompts
    

    Note: เราใช้ textwrap.dedent() เพื่อลบย่อหน้าที่เกิดจาก indent ใน function ออกจาก prompt เพื่อป้องกันความผิดพลาดในการประมวลผลของ AI และประหยัด input token

    .

    🤔 (3) วิเคราะห์ Resumes

    ในขั้นที่ 3 ซึ่งเป็นขั้นที่สำคัญที่สุด เราจะวิเคราะห์ resumes โดย:

    • ใช้ functions จากขั้นที่ 1 และ 2 เพื่อสร้าง prompt และส่ง prompt ให้กับ Gemini
    • ใช้ for loop เพื่อส่ง resumes ให้กับ Gemini จนครบทุกใบ
    # Instantiate a response collector
    results = {}
    
    # Loop through the resumes
    for rs_name, rs_text in rs_texts.items():
    
        # Create the prompts
        prompts = concat_input(web_dev_jd, rs_text)
    
        # Get the Gemini response
        response = get_gemini_response(prompts=prompts, model="gemini-2.5-flash", temp=0.5)
    
        # Collect the response
        results[rs_name] = response
    

    เมื่อรัน code นี้แล้ว เราจะได้ผลลัพธ์เก็บไว้ใน results

    .

    👀 (4) Print ผลลัพธ์

    สุดท้าย เราจะ print ผลการวิเคราะห์ออกมา โดย:

    • ใช้ for loop ช่วย print ผลจนครบ
    • ใช้ Console กับ Markdown เพื่อทำให้ข้อความอ่านง่ายขึ้น:
    # Instantiate a console
    console = Console()
    
    # Instantiate a counter
    i = 1
    
    # Print the results
    for rs_name, analysis_result in results.items():
    
        # Print the resume name
        print(f"👇 {i}. {rs_name}:")
    
        # Print the response
        console.print(Markdown(analysis_result))
    
        # Add spacers and divider
        print("\\n")
        print("-----------------------------------------------------------")
        print("\\n")
    
        # Add a counter
        i += 1
    

    ตัวอย่างผลลัพธ์:

    ในตัวอย่าง จะเห็นได้ว่า George Evans เหมาะที่จะเป็น Senior Web Developer


    😺 Code & Input Examples

    • ดูตัวอย่าง code ได้ที่ Google Colab
    • ดูตัวอย่าง JD และ resumes ได้ที่ JD & Resumes

    📃 References

  • 4 ขั้นตอนในการใช้ google-genai library เพื่อทำงานกับ Gemini API — ตัวอย่างการสร้างสูตรอาหารที่ไม่เหมือนใคร

    4 ขั้นตอนในการใช้ google-genai library เพื่อทำงานกับ Gemini API — ตัวอย่างการสร้างสูตรอาหารที่ไม่เหมือนใคร

    ในบทความนี้ เราจะมาดู 4 ขั้นตอนในการใช้งาน google-genai ซึ่งเป็น official library สำหรับทำงานกับ Gemini API ผ่านตัวอย่างการสร้างสูตรอาหารใน Google Colab กัน:

    1. Import packages
    2. Create client
    3. Create function
    4. Generate response

    ถ้าพร้อมแล้ว ไปเริ่มกันเลย


    1. 📦 Import Packages
    2. 🧑‍💼 Create Client
    3. 📲 Create Function
    4. 📬 Generate Response
      1. 🤖 Set Model
      2. 🧑‍💻 Set User Prompt
      3. 🛠️ Set Configuration
      4. 📖 Generate Response
      5. 🖨️ Print Response
    5. 😺 Google Colab
    6. 📃 References

    📦 Import Packages

    เริ่มแรก เราจะ import 4 packages ที่จำเป็น ได้แก่:

    FromFunction/ClassFor
    googlegenaiทำงานกับ Gemini API
    google.genai.typesGenerateContentConfigตั้งค่า Gemini
    google.colabuserdataเรียก API key จากเมนู Secrets ใน Google Colab
    pydanticBaseModelกำหนดโครงสร้างของ response จาก Gemini
    # Import packages
    
    # google-genai library
    from google import genai
    from google.genai.types import GenerateContentConfig
    
    # Secret key
    from google.colab import userdata
    
    # pydantic
    from pydantic import BaseModel
    

    🧑‍💼 Create Client

    ในขั้นที่ 2 เราจะสร้าง client สำหรับทำงานกับ Gemini API

    เพื่อความปลอดภัย เราจะเก็บ API key ไว้ในเมนู Secrets ของ Google Colab

    เราสามารถเพิ่ม API key ด้วยการ import ผ่านปุ่ม “Gemini API keys” หรือผ่านการเพิ่ม API key เองด้วยปุ่ม “Add new secret”:

    หลังสร้าง API key ใน Secrets แล้ว เราสามารถเรียกใช้ API key ได้ด้วย userdata.get() ซึ่งต้องการ 1 argument คือ ชื่อ secret:

    # Get API key
    my_api = userdata.get("GOOGLE_API_KEY")
    

    จากนั้น เราจะสร้าง client ด้วย genai.Client() ซึ่งต้องการ 1 argument คือ API key:

    # Create client
    client = genai.Client(api_key=my_api)
    

    Note:

    • ในกรณีที่เราไม่ห่วงความปลอดภัยของ API key เราสามารถใส่ API key ใน genai.Client() ได้โดยตรง เช่น genai.Client(api_key="g04821...")
    • เราสามารถสร้าง API key ได้ฟรี โดยไปที่ Google AI Studio และกด “Create API key”

    📲 Create Function

    ในขั้นที่ 3 เราจะสร้าง function สำหรับเรียกใช้ Gemini ซึ่งต้องการ 3 arguments:

    1. model: Gemini model ที่เราจะเรียกใช้
    2. user_prompt: กำหนด user prompt
    3. config: กำหนดการตั้งค่าต่าง ๆ ของ model

    โดยทั้ง 3 arguments จะอยู่ใน client.models.generate_content():

    # Create a function to get Gemini response
    def get_response(model, user_prompt, config):
    
        # Get response
        response = client.models.generate_content(
    
            # Set model
            model=model,
    
            # Set user prompt
            contents=user_prompt,
    
            # Set config
            config=config
        )
    
        # Return response
        return response.text
    

    📬 Generate Response

    ในขั้นที่ 4 เราจะ get response จาก Gemini โดยใช้ function ที่เราสร้างในขั้นที่ 3

    เนื่องจาก function ต้องการ 3 arguments เราจะต้องกำหนด 3 สิ่งนี้ก่อนที่จะสร้าง response ได้:

    1. Model
    2. User prompt
    3. Configuration

    .

    🤖 Set Model

    ในตัวอย่างนี้ เราจะใช้ model เป็น Gemini 2.5 Flash ซึ่งเราสามารถกำหนดได้ดังนี้:

    # Set model
    gemini_model = "gemini-2.5-flash"
    

    Note: ดูชื่อ model อื่น ๆ ได้ที่ Gemini Models

    .

    🧑‍💻 Set User Prompt

    สำหรับ user prompt เราสามารถกำหนดเป็น string ได้แบบนี้:

    # Set user prompt
    gemini_user_prompt = """
    Create a healthy Thai-inspired burger for one person.
    
    Protein: chicken or tofu
    Bun: whole-wheat if possible (or lettuce wrap)
    
    Deliver (match field names exactly):
    - `menu` (string)
    - `ingredient` (list of items with name, description, amount, unit)
    - `steps` (30-word strings)
    - `calorie_kcal` (float, total for the dish)
    """
    

    .

    🛠️ Set Configuration

    สำหรับ configuration เราสามารถตั้งค่า model ได้หลายค่า

    ในตัวอย่างนี้ เราจะเลือกกำหนด 3 ค่า ได้แก่:

    1. System prompt
    2. Temperature
    3. Output type and structure

    ค่าที่ 1. System prompt คือ prompt ที่กำหนดพฤติกรรมของ Gemini ในการตอบสนองต่อ user prompt ของเรา

    เราสามารถกำหนด system prompt เป็น string ได้แบบนี้:

    # Set system prompt
    system_prompt = """
    You are a highly experienced home cook specialising in healthy Thai-style food.
    
    Constraints:
    - Single-serving
    - Favour grilling/pan-searing over deep-frying
    - Keep ingredients common in Thai kitchens
    - Keep steps <=7
    - Include an approximate total calories for the whole dish
    - Keep language simple
    - Return JSON only that matches the given schema exactly (no extra fields)
    """
    

    ค่าที่ 2. Temperature มีค่าระหว่าง 0 และ 2 โดย:

    • 0 จะทำให้ response ตายตัว (deterministic) มากขึ้น
    • 2 จะทำให้ response สร้างสรรค์ (creative) มากขึ้น

    Note: ค่า default ของ temperature อยู่ที่ 1 (Generate content with the Gemini API in Vertex AI)

    ในตัวอย่าง เราจะกำหนด temperature เป็น 2 เพื่อให้ response มีความสร้างสรรค์สูงสุด:

    # Set temperature
    temp = 2
    

    ค่าที่ 3. สำหรับ output type และ structure เราจะกำหนดดังนี้:

    กำหนด type เป็น "application/json" เพื่อให้ response อยู่ในรูป JSON object:

    # Set output type
    output_type = "application/json"
    

    Note: ดู type อื่น ๆ ได้ที่ Structured output

    กำหนดโครงสร้างของ JSON object ด้วย class และ BaseModel:

    # Set output structure
    class Ingredient(BaseModel):
        name: str
        description: str
        amount: float
        unit: str
    
    class OutputStructure(BaseModel):
        menu: str
        ingredient: list[Ingredient]
        steps: list[str]
        calorie_kcal: float
    

    Note: ดูวิธีใช้ BaseModel ได้ที่ JSON Schema

    หลังกำหนด system prompt, temperature, และ output type กับ structure แล้ว ให้เรารวมค่าทั้งหมดไว้ใน GenerateContentConfig() แบบนี้:

    # Set configuration
    gemini_config = GenerateContentConfig(
    
        # Set system prompt
        system_instruction=system_prompt,
    
        # Set temperature
        temperature=temp,
    
        # Set response type
        response_mime_type=output_type,
    
        # Set response structure
        response_schema=OutputStructure
    )
    

    Note: ดูค่าอื่น ๆ ที่เรากำหนดใน GenerateContentConfig() ได้ที่ Content generation parameters

    .

    📖 Generate Response

    หลังจากกำหนด arguments แล้ว เราจะเรียกใช้ function เพื่อ get response แบบนี้:

    # Generate a recipe
    recipe = get_response(
    
        # Set model
        model=gemini_model,
    
        # Set user prompt
        user_prompt=gemini_user_prompt,
    
        # Set configuration
        config=gemini_config
    )
    

    .

    สุดท้าย เราจะดู response ด้วย print():

    # Print response
    print(recipe)
    

    ผลลัพธ์:

    {
      "menu": "Thai Chicken Burger",
      "ingredient": [
        {
          "name": "Ground Chicken",
          "description": "Lean ground chicken",
          "amount": 150.0,
          "unit": "g"
        },
        {
          "name": "Whole-wheat Burger Bun",
          "description": "Standard size",
          "amount": 1.0,
          "unit": "unit"
        },
        {
          "name": "Lime Juice",
          "description": "Freshly squeezed",
          "amount": 1.0,
          "unit": "tablespoon"
        },
        {
          "name": "Fish Sauce",
          "description": "Thai fish sauce",
          "amount": 1.0,
          "unit": "tablespoon"
        },
        {
          "name": "Fresh Ginger",
          "description": "Grated",
          "amount": 1.0,
          "unit": "teaspoon"
        },
        {
          "name": "Garlic",
          "description": "Minced",
          "amount": 1.0,
          "unit": "clove"
        },
        {
          "name": "Cilantro",
          "description": "Fresh, chopped",
          "amount": 2.0,
          "unit": "tablespoons"
        },
        {
          "name": "Green Onion",
          "description": "Chopped",
          "amount": 1.0,
          "unit": "tablespoon"
        },
        {
          "name": "Red Chilli",
          "description": "Finely minced (optional)",
          "amount": 0.5,
          "unit": "teaspoon"
        },
        {
          "name": "Lettuce Leaf",
          "description": "Fresh, crisp",
          "amount": 1.0,
          "unit": "large"
        },
        {
          "name": "Cucumber",
          "description": "Sliced thinly",
          "amount": 3.0,
          "unit": "slices"
        },
        {
          "name": "Cooking Oil",
          "description": "Any neutral oil",
          "amount": 1.0,
          "unit": "teaspoon"
        }
      ],
      "steps": [
        "Combine ground chicken with fish sauce, lime juice, grated ginger, minced garlic, chopped cilantro, and green onion in a bowl. Mix thoroughly.",
        "Form the seasoned chicken mixture into a single, uniform burger patty. If using chilli, incorporate it now.",
        "Heat cooking oil in a non-stick pan over medium heat. Cook the chicken patty for 5-7 minutes per side, or until it is thoroughly cooked through.",
        "While the patty cooks, lightly toast the whole-wheat burger bun in a dry pan or toaster until golden brown.",
        "Assemble your burger: Place the cooked chicken patty on the bottom half of the toasted bun. Top with fresh lettuce and cucumber slices.",
        "Complete the burger with the top bun. Serve immediately and enjoy your healthy Thai-inspired meal."
      ],
      "calorie_kcal": 450.0
    }
    

    เท่านี้ก็จบ flow การทำงานกับ Gemini API ด้วย google-genai library แล้ว


    😺 Google Colab

    ดูตัวอย่าง code ทั้งหมดได้ที่ Google Colab


    📃 References

  • สรุปแนวทางการทำงานกับ AI: Mindset และเทคนิคการเขียน Prompt เพื่อการทำงานร่วมกับ AI อย่างมีประสิทธิภาพ

    สรุปแนวทางการทำงานกับ AI: Mindset และเทคนิคการเขียน Prompt เพื่อการทำงานร่วมกับ AI อย่างมีประสิทธิภาพ

    ในช่วงต้นปีที่ผ่านมา ผมได้มีโอกาสแชร์วิธีการทำงานกับ AI ให้กับคนในบริษัท โดยเนื้อหาส่วนใหญ่ไปที่การใช้ prompt เป็นหลัก และเป็นการตกตะกอนความรู้ AI ที่สะสมจากแหล่งต่าง ๆ

    เช่น:

    รวมไปถึงการใช้งาน AI ในการทำงานด้วยตัวเอง .

    ในบทความนี้ ผมจะชวนไปดูแนวทางการทำงานกับ AI ซึ่งเป็นเนื้อหาต่อยอดจากสิ่งที่ผมได้แชร์ไปเมื่อต้นปี

    โดยบทความจะแบ่งเป็น 5 ส่วน:

    1. What is AI?
    2. Mindset ในการทำงานกับ AI
    3. Prompting frameworks: โครงการเขียน prompt ง่าย ๆ
    4. Prompting techniques: เทคนิคการช่วย AI คิดให้ตอบโจทย์
    5. Tips: เคล็ดลับเพิ่มเติม

    ถ้าพร้อมแล้วไปเริ่มกันเลย


    1. 1️⃣ What Is AI?
    2. 2️⃣ Mindset ในการทำงานกับ AI
      1. 👌 ข้อที่ 1. AI Is Okay
      2. 🙆 ข้อที่ 2. AI as a Colleague
      3. ➿ ข้อ 3. Human in the Loop
      4. 🗝️ สรุป Mindset การทำงานกับ AI
    3. 3️⃣ Prompting Frameworks
      1. 🍚 RICE: Input Structure
      2. 🧂 SALT: Output Structure
      3. 🗝️ สรุป Prompting Frameworks
    4. 4️⃣ Prompting Techniques
      1. 🥃 n-Shot
      2. 💭 COT
      3. 🗝️ สรุป Prompting Techniques
    5. 5️⃣ Tips
      1. #️⃣ Annotation
      2. 😡 EmotionPrompt
      3. 🗑️ GIGO
      4. 🗝️ สรุป Tips ในการทำงานกับ AI

    1️⃣ What Is AI?

    AI หรือ artificial intelligence หมายถึง โปรแกรมคอมพิวเตอร์ที่สามารถทำงานได้เหมือนมนุษย์ เช่น:

    • คิดวิเคราะห์
    • ใช้เหตุผล
    • โต้ตอบด้วยภาษาธรรมชาติ
    • สร้างงานศิลป์

    เมื่อพูดถึง AI อีกคำที่มักจะได้ยิน คือ machine learning

    แม้จะมีความหมายคล้ายกัน แต่ machine learning เป็น subset และเป็นมันสมองของ AI

    โดยนิยามของ machine learning คือ การเขียนโปรแกรมที่ทำให้คอมพิวเตอร์เรียนรู้จากข้อมูลได้ด้วยตัวเอง โดยไม่ต้องมีมนุษย์คอยกำกับ (Arthur Samuel)


    2️⃣ Mindset ในการทำงานกับ AI

    ในการจะเริ่มทำอะไร เราควรเริ่มจากตัวเราก่อน โดย mindset ที่ควรมีในการทำงานกับ AI มีอยู่ 3 ข้อ

    .

    👌 ข้อที่ 1. AI Is Okay

    ก่อนอื่น เราควรจะเปิดใจยอมรับ AI

    AI เป็นสิ่งใหม่ที่หลายคนอาจยังไม่มีความเข้าใจอย่างลึกซึ้ง แต่ยังไง AI ก็เป็นเพียงเครื่องมืออย่างหนี่งในการทำงาน

    เมื่อเราเปิดใจยอมรับ และทำความเข้าใจจุดแข็งและข้อจำกัดของ AI เราก็จะสามารถใช้งาน AI ได้อย่างมีประสิทธิภาพ และตอบโจทย์การทำงานของเรา

    Note: ผมหยิบคำว่า “AI is okay” มาจากผู้บริหารในบริษัทอีกที 🙏

    .

    🙆 ข้อที่ 2. AI as a Colleague

    ข้อนี้อาจจะฟังดูขัดกับข้อแรกที่มองว่า AI เป็นเครื่องมือ

    AI เป็นเทคโนโลยีปฏิวัติโลก เช่นเดียวกับไฟ เครื่องจักรไอน้ำ และอินเทอร์เน็ต

    แต่ AI มีความแตกต่างคือ เป็นเครื่องมือที่มีความ “ฉลาด” ใกล้เคียงกับมนุษย์

    และด้วยความฉลาดนี้ ทำให้เราสามารถมองว่า AI เป็นมากกว่าเครื่องมือ หรือเป็นเพื่อนร่วมงานของเราได้

    การมอง AI แบบนี้ ไม่ได้มีผลต่อแค่ความคิด แต่ส่งผลในทางปฏิบัติด้วย

    เช่น ถ้าเราคิดไม่ออกว่าจะสั่งงาน AI ยังไง ให้ลองนึกว่า ถ้า AI เป็นคน เรากำลังจะพูดยังไง

    เราอาจจะพูดว่า:

    ช่วยทำรายงานให้หน่อย

    เช่นเดียวกับคน ถ้าเราไม่มีข้อมูล การเขียนรายงานจะเริ่มไม่ได้ ซึ่งเราก็อาจจะเห็น AI ตอบกลับเหมือนกับเพื่อนร่วมงานของเรา:

    อยากให้ช่วยเขียนรายงานเรื่องอะไร? ต้องเขียนเกี่ยวกับอะไรบ้าง? ขอข้อมูลหน่อย

    แล้วเราก็จะต้องส่งข้อมูลเพิ่มให้ก่อน AI จะทำงานได้

    จากตัวอย่าง เราจะเห็นว่า การทำงานกับ AI มีความเหมือนกันกับการทำงานกับคน ดังนั้น การมองว่า AI เป็นเพื่อนร่วมงานจะช่วยเป็นแนวทางในการทำงานกับ AI ให้เราได้

    .

    ➿ ข้อ 3. Human in the Loop

    สุดท้ายและเป็นข้อที่สำคัญ คือ เราควรทำงาน “ร่วม” กับ AI

    อย่างที่เราเห็นว่า AI เป็นเหมือนเพื่อนร่วมงาน และเช่นเดียวกับเพื่อนร่วมงานที่ทำงานผิดพลาดได้ AI ก็เช่นกัน

    ถ้าเราทำงานกับเพื่อน แล้วนำงานของเพื่อนไปใช้ แล้วเกิดข้อผิดพลาด เราอาจจะชี้นิ้วไปที่เพื่อนได้ แต่เราในฐานะเจ้าของงาน ก็ต้องรับผิดชอบในผลที่เกิดขึ้นด้วย

    ดูตัวอย่างจากกรณีของทนายความในออสเตรเลีย ที่นำเอกสารจาก AI ไปใช้ในชั้นศาล และถูกเรียกตรวจสอบวินัย เพราะศาลพบว่าข้อมูลในเอกสารไม่เป็นความจริง

    แม้ว่าทนายความจะยืนยันว่า ทำไปเพราะรู้เท่าไม่ถึงการณ์เกี่ยวกับการทำงานของ AI แต่ต้องรับผิดชอบผลกระทบที่ตามมาอยู่ดี

    ดังนั้น เพื่อแสดงออกถึงความรับผิดชอบในงาน และป้องกันผลกระทบจากความผิดพลาดของ AI เราควรทำงานร่วมกับ AI โดยคอยตรวจสอบและกำกับงานของ AI ก่อนนำไปใช้งานต่อ

    .

    🗝️ สรุป Mindset การทำงานกับ AI

    1. AI is okay: เปิดใจยอมรับ AI และทำความเข้าใจ AI ในฐานะเครื่องมือตัวหนึ่ง
    2. AI as a colleague: มองและทำงานกับ AI เหมือนเป็นเพื่อนร่วมงานคนหนึ่ง
    3. Human in the loop: ทำงานร่วมกับ AI โดยคอยตรวจสอบและกำกับการทำงานของ AI ก่อนนำงานไปใช้ต่อ

    3️⃣ Prompting Frameworks

    เราดู mindset ที่ควรมีในการทำงานกับ AI กันมาแล้ว ใน section นี้ เรามาดู prompting framework หรือแนวทางในการจัดโครงสร้าง prompt กัน

    เพื่อให้เข้าใจตรงกัน prompt หมายถึง คำสั่งที่เราให้กับ AI เพื่อให้ AI ทำงานบางอย่างให้กับเรา (W3Schools)

    Prompt มีหลากหลายรูปแบบ เช่น ข้อความ รูปภาพ วิดีโอ แต่แบบที่เราใช้กันบ่อยที่สุด คือ ข้อความ

    ทั้งนี้ frameworks ในการขึ้นโครง prompt มีมากมาย อย่างที่เห็นได้ในเว็บไซต์ของ Juuzt AI ที่ระบุไว้มากถึง 57 frameworks

    แต่ละ frameworks มีข้อดีและข้อเสียแตกต่างกันไป รวมทั้งมีการใช้งานที่ไม่เหมือนกัน เราควรศึกษาและเลือก framework ที่เหมาะกับเป้าหมายของงานของเรา

    สำหรับบทความนี้ ผมจะแนะนำ 2 frameworks ที่สามารถใช้กับหลากหลายหน้างาน:

    1. RICE
    2. SALT

    เหตุผลหนึ่งที่ผมเลือกนำเสนอ RICE และ SALT ก็เพราะ:

    1. RICE ใช้กำกับ input
    2. SALT ใช้กำกับ output

    ทำให้เมื่อใช้ทั้ง 2 frameworks ร่วมกัน เราก็จะได้ prompt ที่ครอบคลุมทั้งต้นทางและปลายทาง

    .

    🍚 RICE: Input Structure

    RICE เป็น framework ที่ระบุว่า เราควรกำหนด input ให้กับ 4 อย่าง:

    1. Role: บทบาทของ AI ในการทำงาน เพื่อให้ AI นึกข้อมูลที่เกี่ยวข้องมาใช้งาน
    2. Instruction: คำชี้แจงในการทำงาน เพื่อให้ AI รู้ว่าต้องทำอะไร
    3. Context: บริบทของงาน เพื่อให้เป็นข้อมูลเพิ่มเติมในการทำงาน
    4. Example: ตัวอย่างงาน เพื่อเป็นแนวทางในการทำงานให้ตรงกับภาพที่เราคาดหวัง

    เรามาดูตัวอย่างการใช้ RICE กัน โดยเปรียบเทียบกับการ prompt อย่างง่าย ๆ

    เช่น เราอยากให้ AI ช่วยวางแผนเที่ยวปีใหม่ให้กับเรา:

    ถ้าไม่ใช้ RICE:

    Help me plan for a New Year holiday trip.

    ผลลัพธ์จาก ChatGPT:

    จะเห็นว่า ChatGPT ต้องการข้อมูลเพิ่มเติม และเรายังไม่ได้คำตอบที่ต้องการ

    ถ้าใช้ RICE:

    [ROLE] You are a travel planner helping me organise a New Year holiday trip. [INSTRUCTION] Suggest a affordable 3-day itinerary for a relaxing vacation.

    [CONTEXT] I enjoy nature and fresh air, and I like to avoid crowded tourist spots. [EXAMPLE] Examples of places I like are Chiang Mai and Nan.

    ผลลัพธ์ จาก ChatGPT:

    จะเห็นว่า เมื่อใช้ RICE เราจะได้ผลลัพธ์ที่ละเอียด อ่านง่าย ตอบโจทย์ และลงมือทำได้ทันที

    Note: ในการเขียน prompt เราสามารถจัดลำดับ RICE ได้เอง (เช่น example มาก่อน instruction) แต่ขอให้อ่านแล้วฟังดูสมเหตุสมผลกัน

    .

    🧂 SALT: Output Structure

    SALT ช่วยเรากำหนดลักษณะ 4 อย่างของ output:

    1. Style: รูปแบบคำตอบที่ต้องการ เช่น เขียนเป็น paragraph หรือ bullet point
    2. Audience: ผู้รับสาร เพื่อให้ AI ปรับการใช้คำและประโยคให้เหมาะสม
    3. Length: ความยาวของคำตอบ
    4. Tone: การใช้ภาษา เช่น เป็นทางการ หรือเป็นกันเอง

    เรามาดูตัวอย่างกัน เช่น เราอยากเข้าใจคำว่า API (application programming interface):

    ไม่ใช้ SALT:

    Explain API

    ผลลัพธ์จาก ChatGPT:

    จะเห็นว่า ผลลัพธ์มีเนื้อหาที่อ่านง่าย แต่อาจต้องใช้เวลาในการทำความเข้าใจ

    เราสามารถใช้ SALT เพื่อช่วยได้:

    Explain API in a [STYLE] bullet-point format for [AUDIENCE] a 10-year-old, using an analogy. Length [LENGTH] around 100-150 words. Use [TONE] friendly tone.

    ผลลัพธ์จาก ChatGPT:

    จะเห็นว่า เราจะได้ผลลัพธ์ในแบบที่เรากำหนด ซึ่งช่วยให้อ่านและทำความเข้าใจได้ง่ายขึ้นกว่าก่อนหน้านี้

    .

    🗝️ สรุป Prompting Frameworks

    เราทำความรู้จัก 2 prompting frameworks ที่ใช้ทำงานทั่วไปได้:

    1. RICE: กำหนด input ด้วย role, instruction, context, example
    2. SALT: กำหนด output ด้วย style, audience, length, tone

    4️⃣ Prompting Techniques

    Prompting techniques เป็นกลยุทธ์ในการช่วย AI กำหนดขั้นตอนการคิดและการทำงาน และสามารถใช้ควบคู่กับ prompting framework เพื่อทำให้งานออกมามีคุณภาพภาพมากขึ้นได้

    ในบทความนี้ เราจะมาทำความรู้จักกับ 2 techniques พื้นฐานกัน ได้แก่:

    1. n-shot technique
    2. Chain-of-thought (COT) technique

    .

    🥃 n-Shot

    Shot ในการเขียน prompt หมายถึง ตัวอย่าง

    n-shot เป็นการเขียน prompt โดยเปลี่ยนจำนวนตัวอย่าง:

    N-ShotNumber of Shots
    Zero-shot0
    One-shot1
    Few-shot≥2

    เรามาลองดูผลของจำนวนตัวอย่างต่อผลลัพธ์กัน:

    n-ShotPromptChatGPT
    Zero-shotList 3 animals– Elephant
    – Penguin
    – Kangaroo
    One-shotList 3 animals such as dog– Cat
    – Wolf
    – Fox
    Few-shotList 3 animals such as dog, cat, hamster– Rabbit
    – Guinea pig
    – Ferret

    จะเห็นได้ว่า คำตอบของ ChatGPT จะเปลี่ยนไปเรื่อย ๆ โดยยิ่ง shot มากขึ้น ผลลัพธ์ก็จะยิ่งเหมือนกับ shot มากขึ้น:

    • Zero-shot: เป็นสัตว์ป่าทั้งหมด
    • One-shot: มีทั้งสัตว์ป่าและสัตว์เลี้ยง
    • Few-shot: สัตว์เลี้ยงทั้งหมด

    ดังนั้น เราสามารถใช้ n-shot ในการกำหนดผลลัพธ์ได้ โดย:

    • ต้องการผลลัพธ์ที่สร้างสรรค์หรือแปลกใหม่: ใช้ shot น้อย
    • ต้องการผลลัพธ์ที่ตรงกับสิ่งที่เรามีอยู่แล้ว: ใช้ shot เยอะ

    .

    💭 COT

    COT เป็น technique ที่บอกขั้นตอนในการคิดของ AI เพื่อให้มั่นใจว่า AI จะทำงานออกมาถูกต้อง

    ยกตัวอย่างจากงานต้นฉบับของ Wei et al. (2022):

    Standard vs CoT prompt from Wei et al. (2022) (CC BY 4.0)

    จากรูป จะเห็นว่า AI ในด้านซ้ายตอบผิด เพราะมีเพียงตัวอย่างโจทย์และคำตอบให้

    ในทางตรงกันข้าม prompt ในด้านขวามือ ซึ่งใช้ COT technique คือ ให้ตัวโจทย์ อธิบายการคิดเลข และเฉลยคำตอบ ช่วยให้ ChatGPT ตอบคำถามได้ถูกต้อง

    COT เหมาะกับงานที่มีความซับซ้อน (มีกระบวนการทำงานหลายขั้นตอน) ส่วนในงานง่าย ๆ (เช่น ถามว่าเมืองหลวงของไทยคืออะไร) เราสามารถใช้ prompt ทั่วไปได้

    .

    🗝️ สรุป Prompting Techniques

    ใน section นี้ เราทำความรู้จัก 2 prompting techniques ในการกำกับกระบวนการทำงานของ AI:

    1. n-shot technique: กำกับผ่านตัวอย่าง
    2. COT technique: กำกับผ่านขั้นตอนการคิด

    Note: ดู techniques อื่น ๆ เพิ่มเติมได้ที่ Prompting Techniques


    5️⃣ Tips

    สำหรับส่งท้ายบทความนี้ เรามาดู 3 เคล็ดลับเพิ่มเติมในการทำงานกับ AI กัน:

    1. Annotation
    2. EmotionPrompt
    3. Garbage in, garbage out (GIGO)

    .

    #️⃣ Annotation

    Prompt ของเราเป็นเหมือนเอกสารที่ AI อ่านก่อนไปทำงานให้เรา

    ถ้าเอกสารของเราอ่านไม่รู้เรื่อง AI ก็อาจจะทำงานผิดพลาดได้

    เพื่อช่วยให้ AI เข้าใจ เราสามารถใช้ annotation หรือเครื่องหมายต่าง ๆ กำกับ prompt ของเราได้

    ถ้านึกภาพไม่ออก ให้มองว่า annotation เป็นเหมือนการจัดหน้าเอกสารของเรา ซึ่งเราสามารถทำได้ดังนี้:

    NameUsageExample
    Markdownระบุหัวข้อ# Header 1
    ## Header 2
    ### Header 3
    Quotation marksเน้นข้อความ“n-shot technique”
    Delimiterแบ่งตอนSection 1

    Section 2
    XML tagติดแท็กข้อความ<file>example.docx</file>

    มาดูตัวอย่างการใช้งานกัน เช่น เราต้องการให้ ChatGPT เขียนกลอนให้

    เราอาจเขียน prompt ได้แบบนี้:

    You are a poet. Write a poem called The Last Night. See example poems that I like in the file: poems.docx

    เราสามารถใช้ annotation ได้แบบนี้ เพื่อให้ AI อ่าน prompt ได้ง่ายขึ้น:

    # Role & Task You are a poet.

    Write a poem called “The Last Night”.


    # Example Poems See example poems that I like in the file:

    <example_file>poems.docx</example_file>

    • ใช้ # เพื่อกำหนดหัวข้อ
    • ใช้ "" เพื่อเน้นชื่อเฉพาะของบทกลอน
    • ใช้ --- เพื่อแบ่ง prompt เป็น 2 sections (ตามหัวข้อ)
    • ใช้ <></> เพื่อระบุว่า poems.doc เป็นไฟล์ตัวอย่าง

    .

    😡 EmotionPrompt

    เพราะ AI เรียนรู้การทำงานจากมนุษย์ เราสามารถใส่คำแสดงอารมณ์เข้าไปใน prompt เพื่อส่งสารบางอย่างให้กับ AI ได้

    ถ้าเปรียบเทียบกับคน คือ แทนที่จะบอกว่า:

    ช่วยทำรายงานให้หน่อย

    เป็น

    รีบทำรายงานตอนนี้ให้หน่อย ด่วนที่สุด

    ตัวอย่างเช่น:

    ใส่ความเร่งด่วน:

    This is extremely urgent! Summarise this article as quickly as possible, focusing only on the key points.

    ใส่ความตื่นเต้น:

    Write an exciting social media post that builds anticipation for our upcoming event! Make readers feel thrilled and eager to attend.

    ใส่ความสำคัญ:

    Write an important and professional email explaining the new company policy. Emphasise its significance and ensure employees understand its impact on their roles.

    อ่านเพิ่มเติมเกี่ยวกับ EmotionPrompt ได้ที่ Large Language Models Understand and Can be Enhanced by Emotional Stimuli

    .

    🗑️ GIGO

    สุดท้าย จำไว้ว่า AI เป็นสิ่งที่ทำงานกับข้อมูล ดังนั้น เพื่อให้ผลลัพธ์ออกมาดี เราควรให้ข้อมูลที่ถูกต้องและมีคุณภาพกับ AI

    ถ้าเราให้ข้อมูลที่ไม่ดีแล้ว AI ก็จะทำงานผิดพลาด หรือให้ผลลัพธ์ที่ใช้ไม่ได้ออกมา (ขยะ)

    เหมือนคำที่ว่า garbage in, garbage out

    .

    🗝️ สรุป Tips ในการทำงานกับ AI

    ใน section สุดท้าย เราได้เรียนรู้ 3 เคล็ดลับเพิ่มเติมในการทำงานกับ AI:

    1. Annotation: จัด prompt ให้อ่านง่ายด้วยเครื่องหมายต่าง ๆ
    2. EmotionPrompt: ใส่อารมณ์ลงใน prompt
    3. GIGO: AI ทำงานด้วยข้อมูล คุณภาพของผลลัพธ์ขึ้นอยู่กับข้อมูลที่เราให้กับ AI